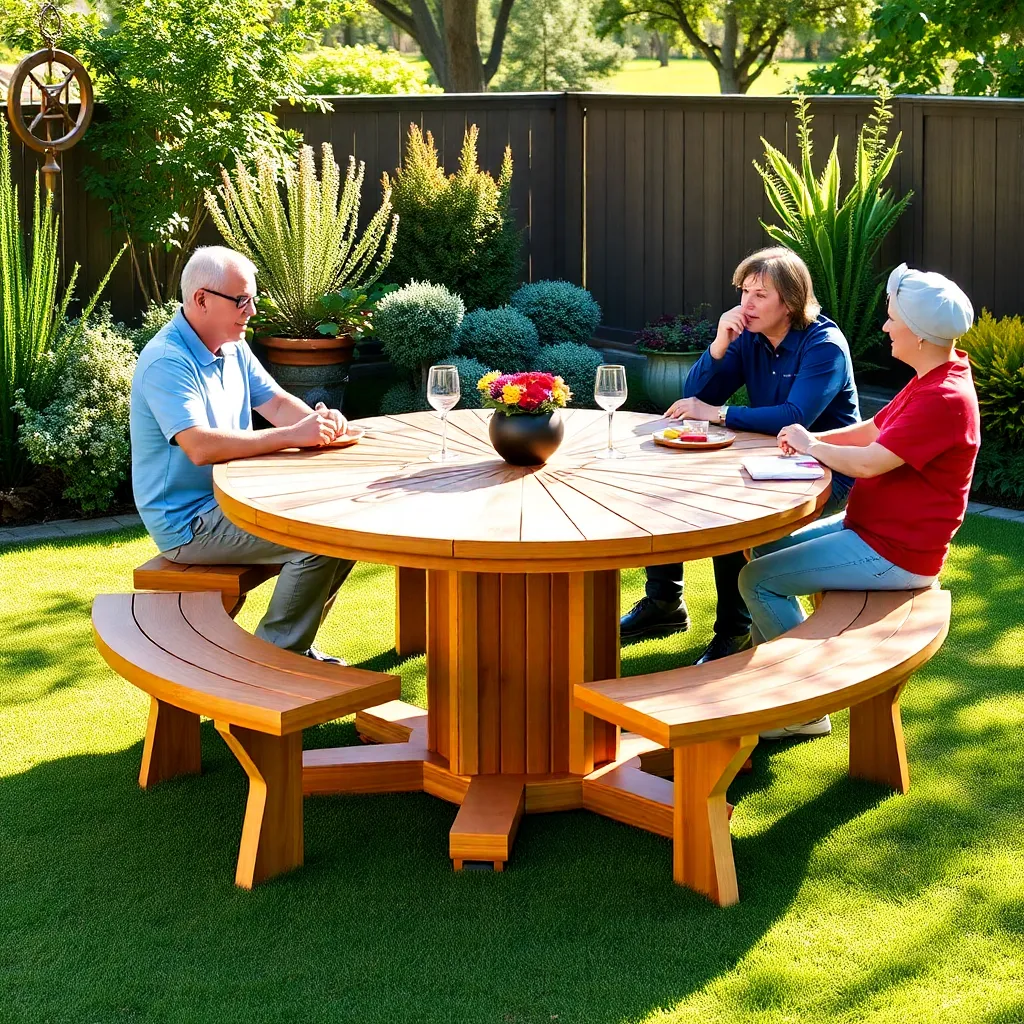
A round picnic table solves the problem every rectangular table has: nobody gets stuck at the awkward end seat, everyone faces the center, and conversation flows naturally around the table rather than down two parallel lines. A 48-inch round table seats four to five adults comfortably and fits in spaces where a 6-foot rectangular table would overwhelm the area — a small deck, a garden corner, a patio tucked against a fence.
These round picnic table plans build a 48-inch diameter tabletop from 2×6 cedar boards arranged in a starburst pattern, mounted on a central pedestal base with four angled legs. The round top is cut to shape after the boards are glued and screwed together — no steam bending, no lamination, just a circular cut with a jigsaw. Built in a day, it lasts 20 years.
Want 16,000+ step-by-step woodworking plans?
Ted’s Woodworking has plans for every skill level — from simple shelves to full bedroom sets. Each plan includes a cut list, material list, and detailed diagrams. Browse Ted’s plans →
Step 1: Plan the Build and Understand the Starburst Top
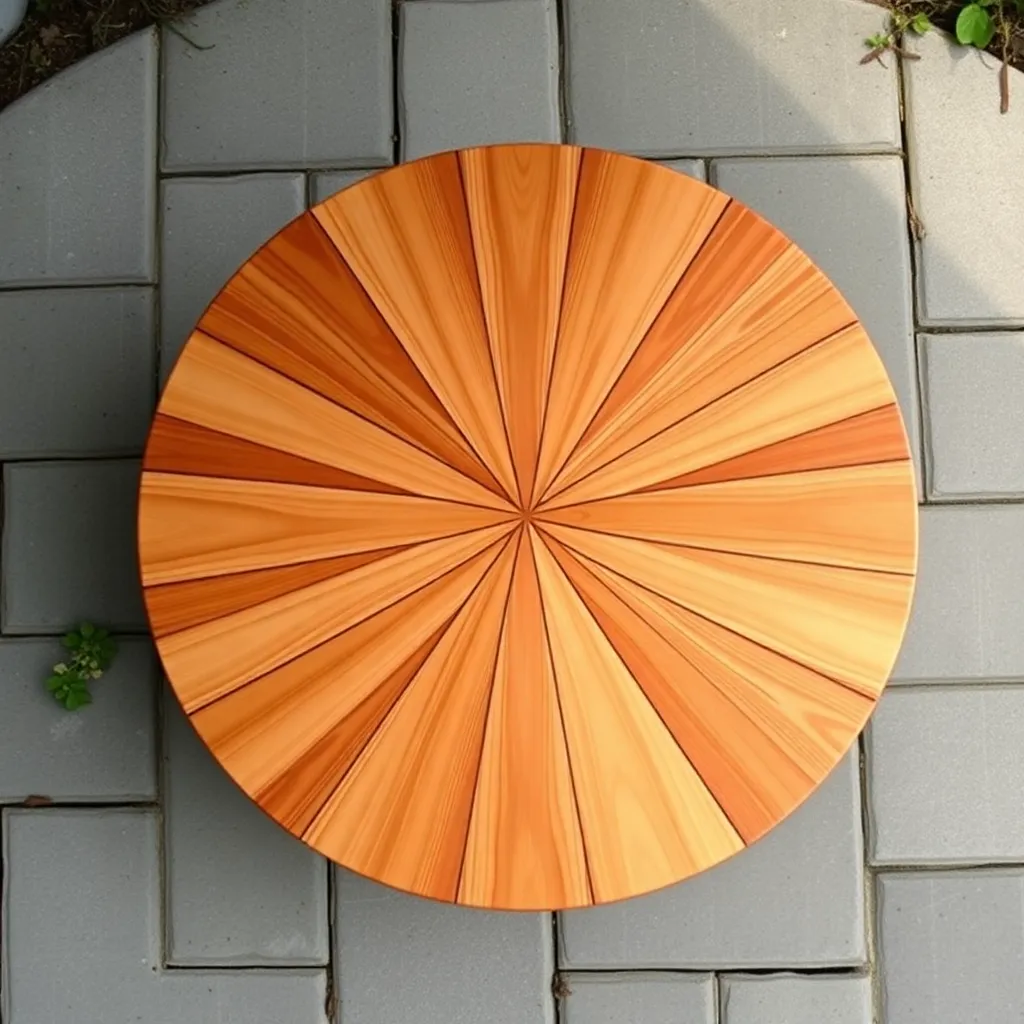
The starburst top is the defining feature of this design and the step that makes most builders nervous. The nervousness is unwarranted — it’s straightforward once you understand what you’re doing.
How the starburst top works: Six or seven 2×6 boards are arranged radiating from a center point, like spokes in a wheel but with the boards positioned flat and side by side rather than edge-on. The boards are glued and screwed together on a flat surface, forming a solid rectangular panel roughly 50 × 50 inches. A compass is then used to scribe a 48-inch diameter circle on the panel surface, and a jigsaw cuts the circle. The result is a round top with a visible starburst grain pattern radiating from the center.
Why not cut boards to pie shapes first? Cutting wedge shapes and fitting them together sounds intuitive but produces narrow, fragile tips at the center and difficult glue joints. The flat-boards-then-cut method is structurally stronger, dimensionally more accurate, and easier to execute.
Visualizing the final table: The round top sits on a central support column (the pedestal) made from a 4×4 post. Four 2×4 legs angle outward from the pedestal base at 20 degrees, creating a wide stable footing without blocking legroom around the table. Bench seating on a round pedestal table is typically a wraparound bench ring rather than the attached-bench style of a rectangular table — this plan focuses on the table itself; bench seating instructions are included as an optional addition.
Step 2: Materials and Cut List
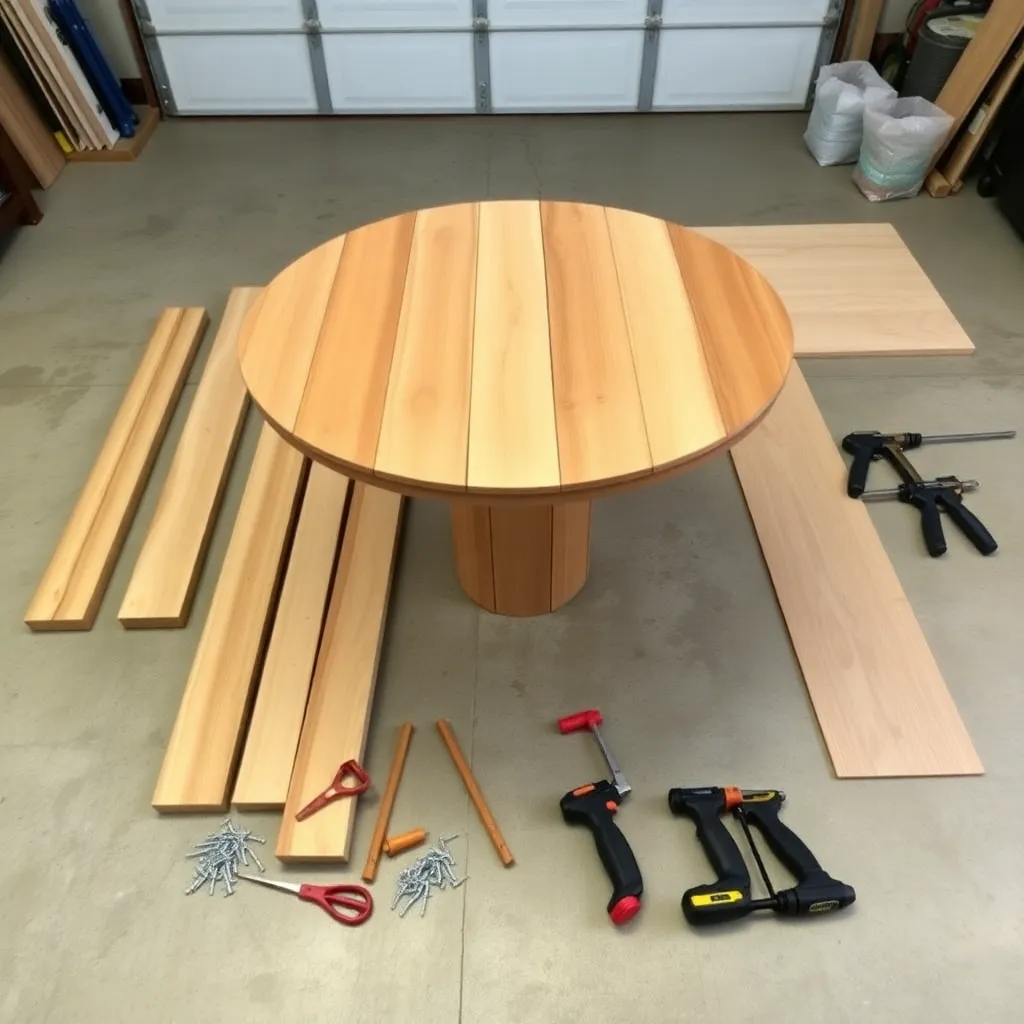
Cedar is the right choice for a round picnic table — it’s lighter than pressure-treated pine, which matters when you’re handling a 50-pound circular tabletop, and it machines cleanly for the circular cut without splintering.
| Part | Qty | Length | Board Size | Notes |
|---|---|---|---|---|
| Starburst top boards | 7 | 52″ | 2×6 cedar | Cut to circle after assembly |
| Pedestal post | 1 | 28″ | 4×4 cedar | Central column |
| Pedestal legs | 4 | 28″ | 2×4 cedar | Both ends at 20° parallel cuts |
| Pedestal top plate | 1 | 14″×14″ | ¾” ext. plywood | Connects pedestal to tabletop |
| Pedestal foot plate | 1 | 18″×18″ | ¾” ext. plywood | Base spreader |
| Tabletop cleats | 2 | 44″ | 2×4 cedar | Underside bracing, keep top flat |
| Lag screws | 8 | ¼” × 3″ | — | Leg-to-post connections |
| Exterior screws | 1 box | 2″ and 2½” | — | Stainless or coated |
| Wood glue | 1 | Exterior PVA | — | For top board face joints |
| Pipe clamps or bar clamps | 4+ | — | — | For gluing top assembly |
Total estimated cost: $140–195 depending on cedar grade and region.
Tools needed: Circular saw, jigsaw, drill/driver, router with roundover bit (optional), tape measure, compass (trammel point or string-and-pencil), clamps, random-orbit sander.
Step 3: Glue and Assemble the Starburst Top
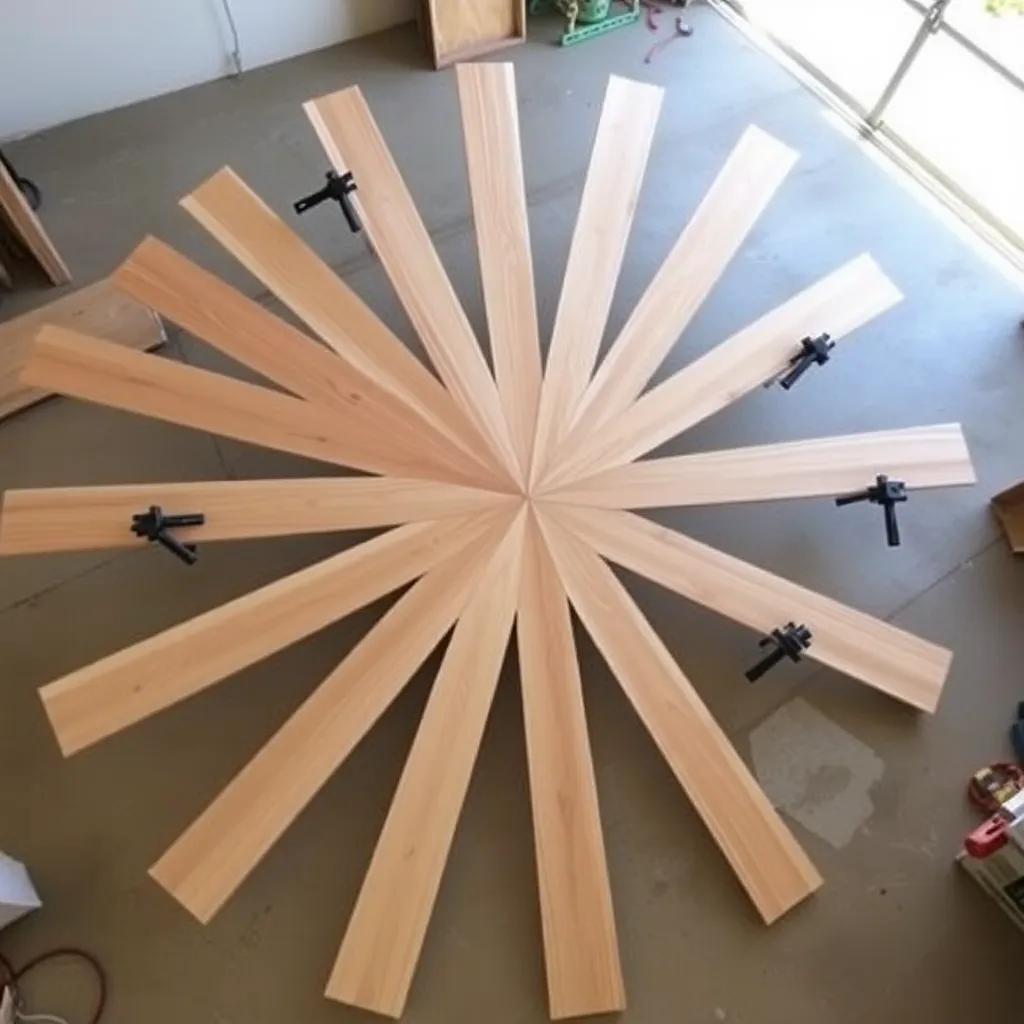
This is the most time-sensitive step — glue has an open time of about 10 minutes, so have everything staged before you start spreading glue.
Stage your boards. Lay the seven 52-inch 2×6 boards face-up on a flat surface (garage floor works well) in a roughly parallel arrangement, edges touching. Before gluing, number them 1–7 on the ends so you can reassemble them in the right order after a dry run.
Dry-fit first. Arrange the boards with slight fanning — the center board runs straight, and the three boards on each side fan out slightly so the outer boards are angled 10–15 degrees from parallel. This fanning creates the starburst effect in the finished top. Confirm the arrangement covers an area at least 50 × 50 inches, which gives you 1 inch of material beyond the 48-inch circle on all sides.
Apply glue and clamp. Apply a thin, even bead of exterior PVA glue to one face edge of each board and press the boards together in your pre-planned arrangement. Work quickly — edge-to-edge, tapping the joint closed as you go. Apply pipe clamps or long bar clamps across the width of the panel (perpendicular to the boards) every 12 inches. Tighten until glue squeezes out of every joint along the length — this confirms full contact. Wipe excess glue with a damp cloth before it skins over.
Reinforce with screws from below. While the glue is still wet, flip the panel (with help — it’s heavy and flexible until cured) and drive 2″ exterior screws up through adjacent boards at 45-degree angles — two screws per joint, staggered every 10 inches. These pocket-style screws supplement the glue and prevent the joints from opening as the wood moves seasonally. Flip back face-up, re-clamp, and let cure for 4 hours minimum (overnight is better).
Surface-flatten the panel. After the glue cures, remove clamps. The panel face may have slight ridges at the board joints — run a belt sander (60-grit) across the ridges until the surface is flat. Follow with a random-orbit sander at 80-grit across the full face, then 120-grit for the finished surface.
Step 4: Cut the Circle
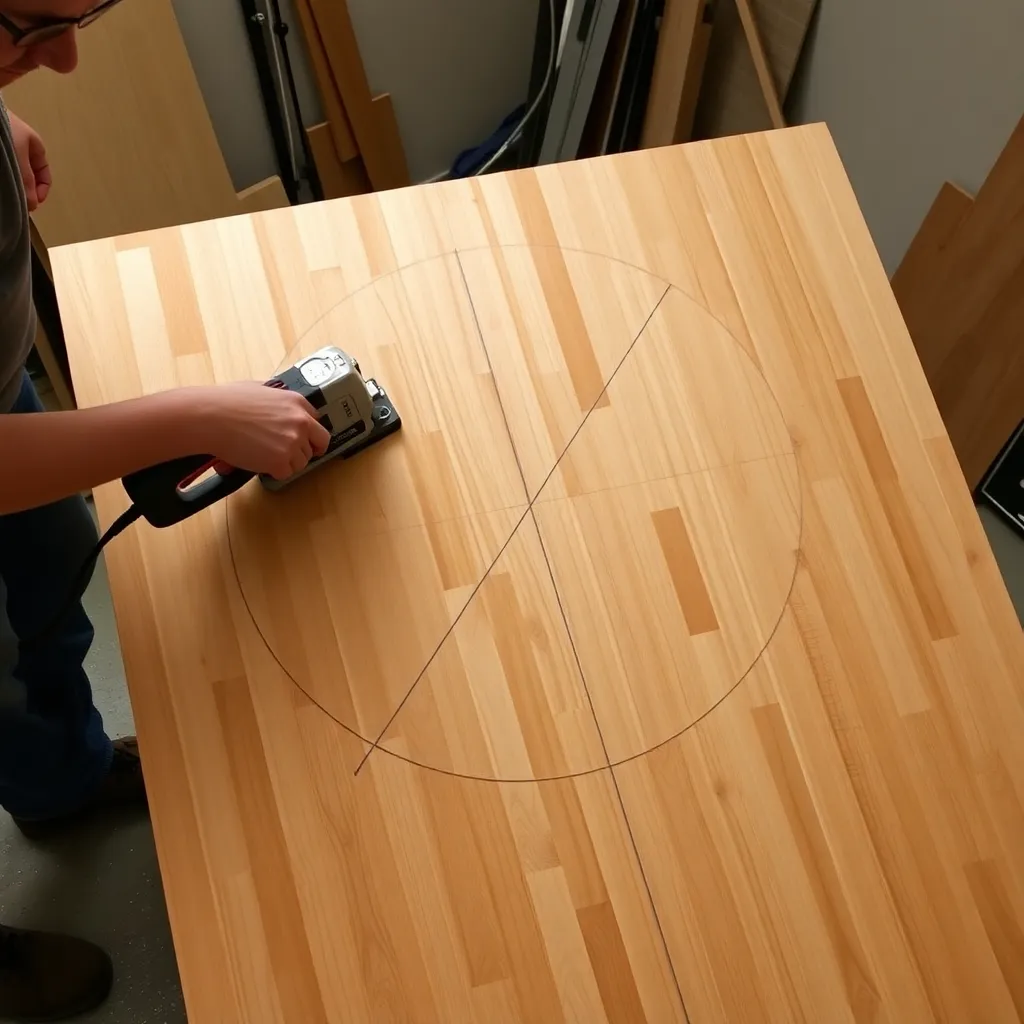
With the panel flat and sanded, scribing and cutting the 48-inch circle is the most satisfying step in the build.
Find and mark the center. Measure diagonally from corner to corner of the panel with a tape measure — the center is where both diagonals cross. Mark it clearly with a pencil.
Scribe the circle. The simplest compass for a 48-inch circle: tie a string to a pencil, measure 24 inches of string (the radius), and pin the other end to the center point with a finish nail. Hold the string taut and trace a full circle. Alternatively, a trammel point compass (available at most home centers for under $15) gives a cleaner, more accurate line.
Cut with a jigsaw. Cut just outside the pencil line — leave the line visible. Use a jigsaw with a fresh fine-tooth blade (10–12 TPI), moving slowly and following the curve consistently. Don’t rush: the jigsaw blade wants to wander on long curves. If your jigsaw has an orbit setting, turn it off for this cut — straight cutting mode gives a cleaner edge.
Clean up the edge. A belt sander or random-orbit sander held at 90 degrees to the edge cleans the jigsaw cut to the pencil line. Then switch to 120-grit to smooth the edge fully. Optionally, run a router with a ¼-inch roundover bit around the top and bottom edges — it removes the sharp corner and gives the top a finished furniture-quality profile.
Step 5: Build the Pedestal Base
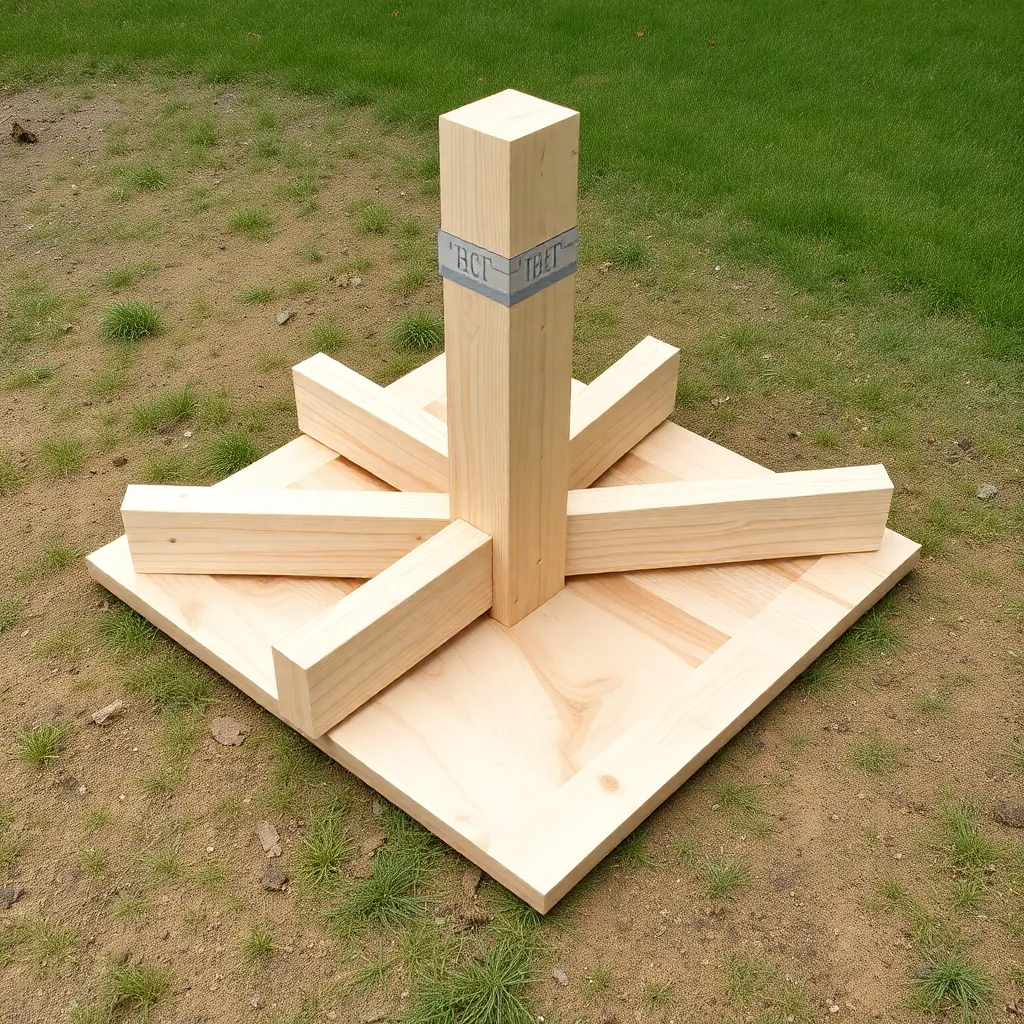
The pedestal base is a central 4×4 post with four 2×4 legs angling outward from a plywood foot plate, topped with a plywood plate that connects to the tabletop.
Build the foot plate assembly. Cut an 18×18-inch square from ¾” exterior plywood. At the center of the foot plate, mark the four leg positions radiating outward at 90 degrees to each other (like compass points — north, south, east, west). Each leg attaches to the foot plate at a 20-degree outward angle. Cut the bottom end of each 2×4 leg at 20 degrees (flat cut, so the leg sits flush on the foot plate). Fasten each leg to the foot plate with two ¼” × 3″ lag screws from below through the plywood into the leg end grain — pre-drill to prevent splitting.
Attach the center post. The 28-inch 4×4 pedestal post stands vertically at the center of the foot plate, directly over the intersection of the four legs. Fasten it through the foot plate from below with four 2½” screws, and add a metal post base anchor (available at any home center) for additional rigidity. The four legs and the center post together form the complete pedestal base.
Build the top plate. Cut a 14×14-inch square from ¾” exterior plywood. This plate connects the pedestal post to the underside of the tabletop. Center it on the top of the 4×4 post and fasten with four 2½” screws from above through the plate into the post top.
Attach the tabletop cleats. Two 44-inch 2×4 cedar cleats run across the underside of the tabletop, perpendicular to each other, crossing at the center. These cleats serve two functions: they keep the glued-up top panel flat over time, and they provide a wide fastening surface for connecting the tabletop to the pedestal top plate. Fasten the cleats to the underside of the top with 2″ screws every 8 inches.
Step 6: Join the Top to the Pedestal and Finish
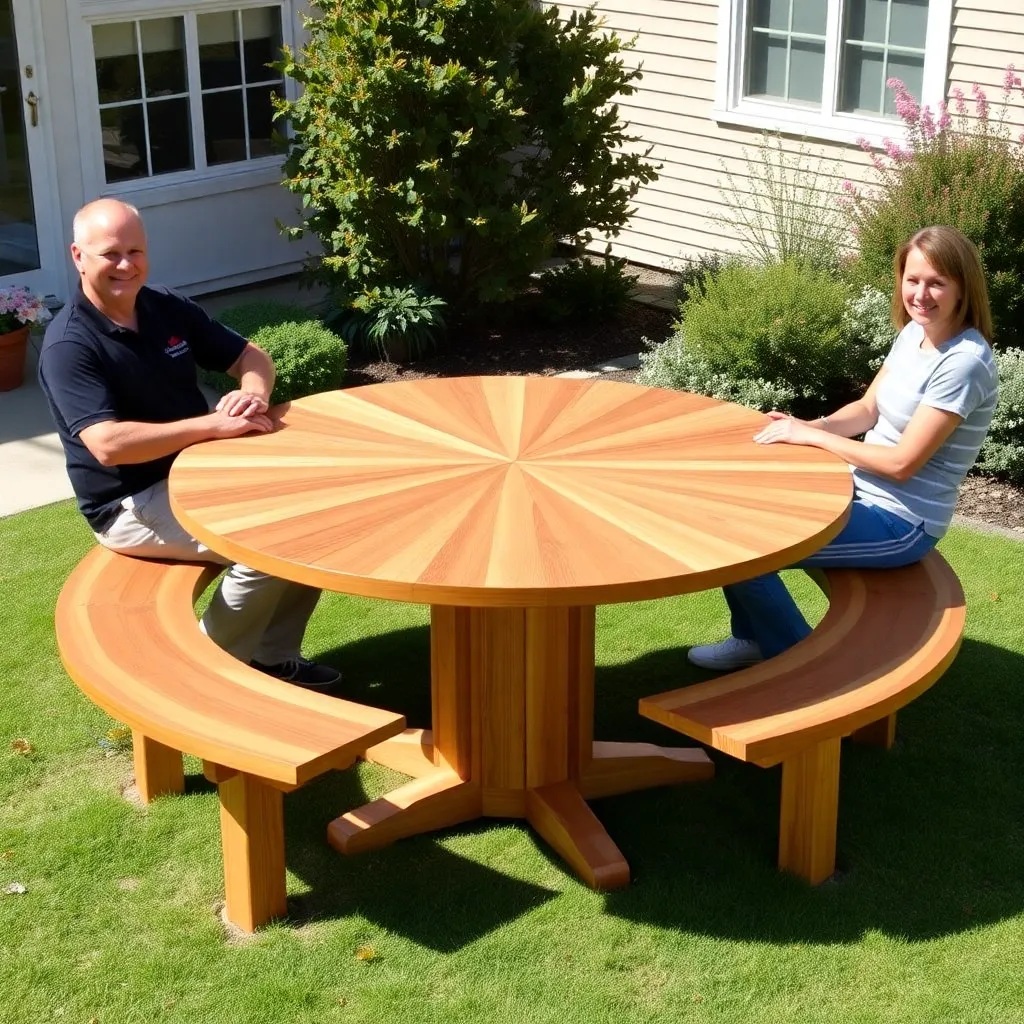
Connect top to pedestal. Flip the tabletop face-down on a padded surface (moving blankets or cardboard). Set the pedestal assembly upside down on the tabletop underside, centering the top plate over the cleat intersection. Fasten through the top plate into the crossing cleats with six 2½” screws. The connection is now: tabletop → cleats → top plate → pedestal post → legs → foot plate.
Check stability. Stand the table upright and apply pressure to the edge at multiple points around the circumference. The pedestal base should handle moderate lateral pressure without tipping — the 18-inch foot plate and angled legs provide stability. For permanent outdoor installation or windy locations, anchor the foot plate to a deck with two lag screws or drive two 12-inch landscape stakes through holes drilled in the foot plate corners into the ground.
Finish the cedar. Apply a UV-blocking semi-transparent exterior oil stain to all surfaces: the tabletop face, the pedestal post, and the leg surfaces. Pay particular attention to the circular sawn edge of the tabletop — end grain is exposed all the way around the circumference and absorbs water far faster than the face surfaces. Two coats on the edge, one coat everywhere else. Reapply every 2–3 years.
For more outdoor table designs and plans, visit our picnic table plans hub.
Want 16,000+ step-by-step woodworking plans?
Ted’s Woodworking has plans for every skill level — from simple shelves to full bedroom sets. Each plan includes a cut list, material list, and detailed diagrams. Browse Ted’s plans →
Round Picnic Table Plans FAQ
How many people does a 48-inch round picnic table seat?
A 48-inch round table comfortably seats four adults, and five is achievable with slightly tighter spacing. The rule of thumb for round table seating is 24 inches of circumference per person — a 48-inch (4-foot) diameter table has about 150 inches of circumference, which works out to six theoretical positions but four or five in practice with chairs or bench seating. For six people, build a 60-inch diameter version: extend the starburst boards to 64 inches and cut a 60-inch circle.
Is a round picnic table harder to build than a rectangular one?
The pedestal base and jigsaw circle cut add about 1–2 hours compared to a rectangular table, but neither step is technically difficult. The glue-up of the starburst top requires staging and working quickly, which first-time woodworkers sometimes find stressful — a dry run (assembling without glue to confirm your clamp positions) eliminates most of the anxiety. Overall difficulty is intermediate rather than beginner, primarily due to the circular cut and the angled pedestal legs.
What is the best wood for a round outdoor picnic table?
Cedar is the top choice for a round pedestal table for two reasons: weight and workability. A 48-inch glued-up cedar tabletop weighs 45–55 pounds — manageable. The same top in pressure-treated pine weighs 65–75 pounds, which makes the glue-up, sanding, and flipping significantly harder to do solo. Cedar also cuts more cleanly with a jigsaw, producing a smoother circle edge with less tearout. Both species last comparably outdoors.
Can I add bench seating to a round pedestal table?
Yes, but attached benches like those on a rectangular picnic table don’t work well on a pedestal design — they’d block the leg clearance and make the table unstable. The right solution is a freestanding bench ring: a circular bench that sits around the table as a separate piece. Build a hexagonal or octagonal bench frame at 18-inch seat height from 2×4 cedar, sized so the inner opening is 52–54 inches (leaving a 2–3 inch gap around the 48-inch table). Alternatively, standard outdoor chairs work perfectly with a pedestal round table.
How do I prevent the glued-up tabletop from warping?
Three practices prevent warping: (1) use properly dried lumber — check that boards are straight and flat when you buy them, not bowed or twisted; (2) install the two perpendicular 2×4 cleats on the underside, which act as flatness insurance; (3) apply finish to all surfaces including the underside of the tabletop — a top that’s finished on one side and bare on the other will cup toward the unfinished side as humidity changes. Finishing both faces keeps moisture absorption equal.
How do I cut a perfect circle without a router jig?
The string-and-pencil compass method described in these plans produces an accurate enough circle for a picnic table — the human eye is quite forgiving of a slightly imperfect circle in outdoor furniture. For a more precise circle, make a simple router jig: a scrap of ¼” plywood with a hole at one end (for the router bit) and a pivot pin hole at 24 inches from the bit hole. Pin the jig to the tabletop center point, ride the router around the circumference, and the circle is precise to within 1/16″. This requires a plunge router and a straight or spiral upcut bit.

“DIY woodworking enthusiast who started with zero experience and a YouTube tutorial.
I build simple, practical projects for my home and share free plans
so other beginners can skip the guesswork.If I can build it, you can too.”