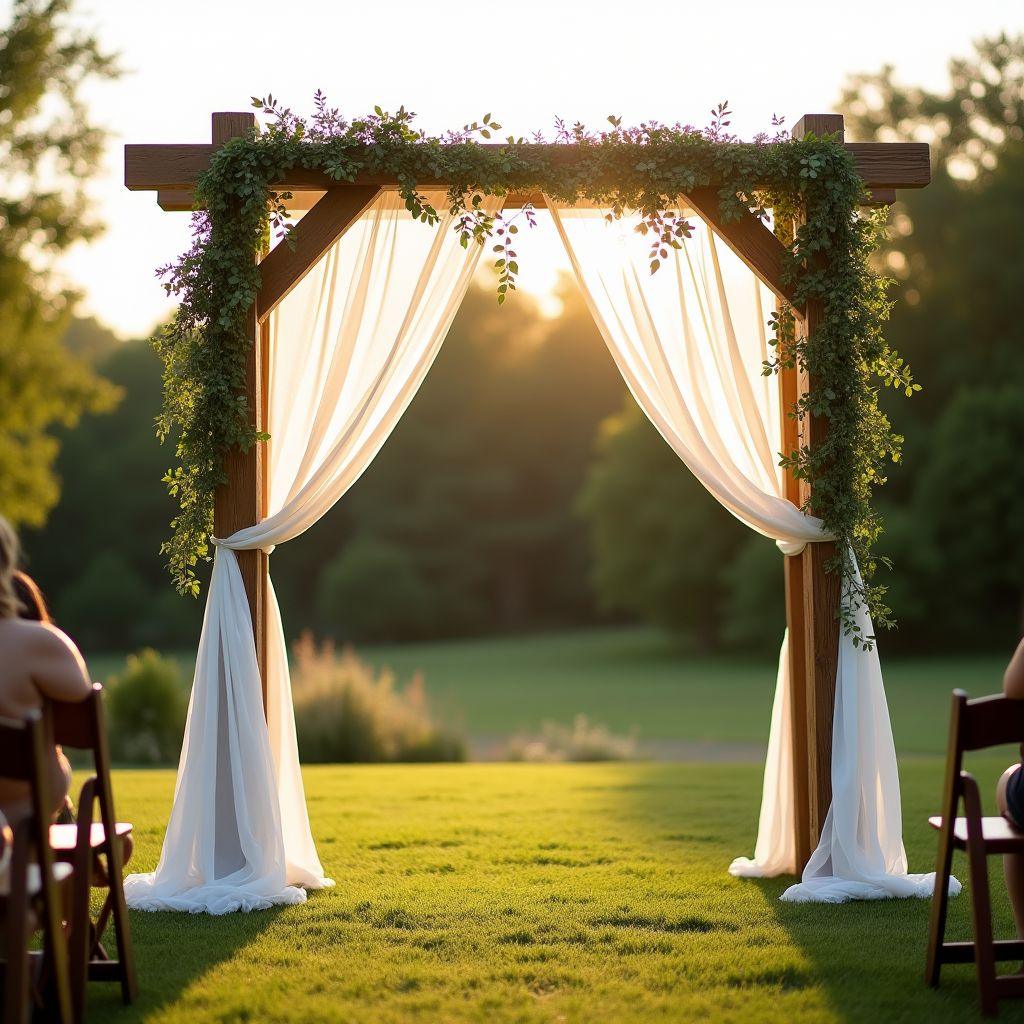
You spend a weekend building a beautiful arch, then reality hits. It will not fit in the car. It might tip over in a light breeze. And there is nowhere to hang the flowers. Most guides show you a build and stop there, leaving out the three things that actually decide whether your arch works on the day.
This is the complete plan. A beginner can build a sturdy 7.5 ft by 5 ft square arch out of wedding arch wood for about $70 to $100 in a single weekend, using nothing more than a circular saw and a drill. No table saw required.
You are building for your own wedding or a friend’s, and you want it done right. So this guide covers everything: a style-picker, a size guide, an exact cut list with 2026 lumber costs, a bolt-together design that breaks down to fit an SUV, stability options for grass and hard floors, and floral attachment prep.
Steps 1 through 3 are pure decisions. You pick the style, lock the size, and choose the wood and budget before you buy a single board, so nothing gets wasted. Steps 4 onward are the build. When you reach the cut list, double-check your quantities with our board-foot calculator.
Step 1: Pick Your Arch Style
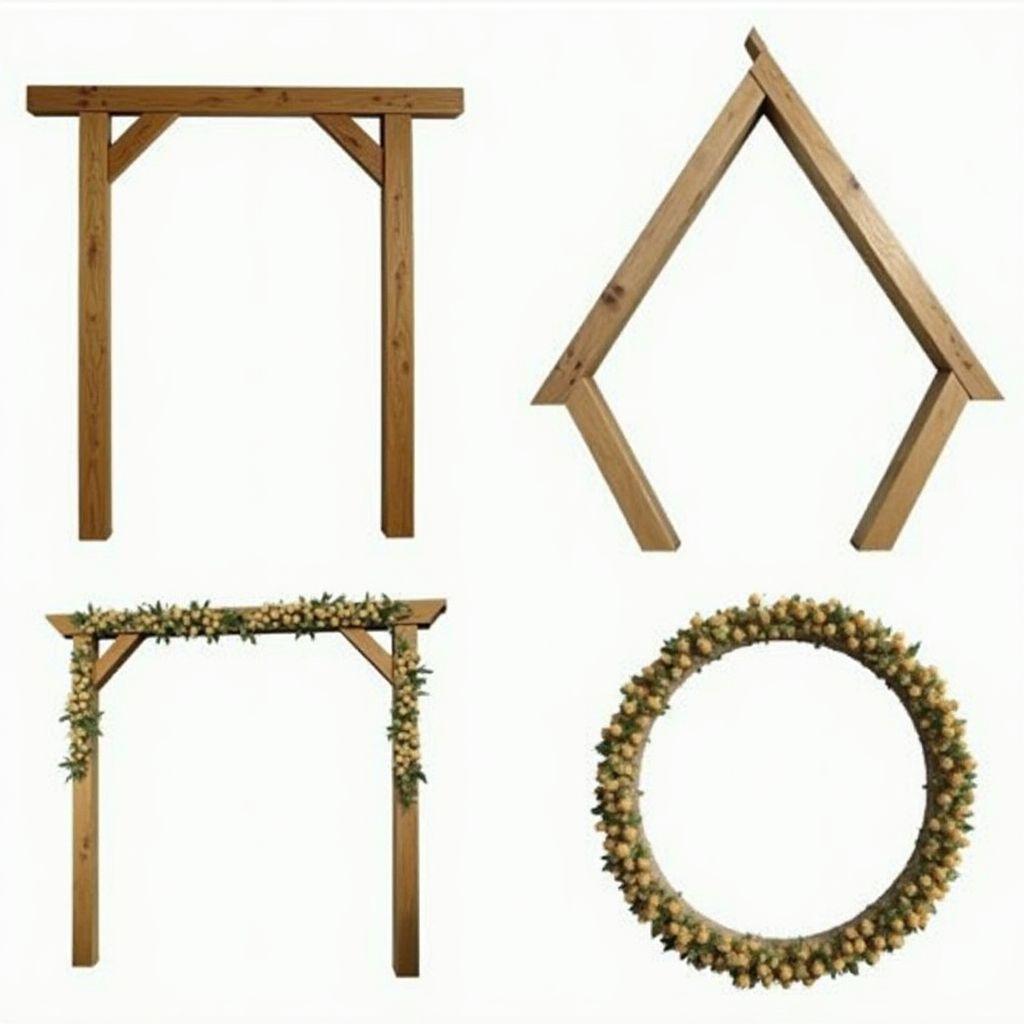
The shape you choose drives skill level, tools, and cost far more than most beginners expect. Get this decision right first and the rest of the build follows easily.
Here is how the four common styles compare.
| Style | Skill Level | Tools Needed | Approx Material Cost (2026) | Build Time | Best For |
|---|---|---|---|---|---|
| Square / A-frame | Beginner | Drill, circular saw, speed square | $60-$120 SPF, $150-$250 cedar | 4-6 hrs | Any wedding style, easiest to transport |
| Triangular | Beginner to intermediate | Adds a miter saw for the 60-degree peak | $80-$180 | 5-8 hrs | Dramatic treeline or mountain backdrops |
| Hexagon | Intermediate | Miter saw for precise 30-degree angles | $150-$300 | 8-12 hrs | Modern and boho, pairs with pampas and macrame |
| Circular | Advanced | Table saw to rip strips, or a purchased metal hoop | $200-$500+ wood, $30-$250 hoop | 12-20+ hrs | Romantic garden look |
For a first-timer, the square or A-frame wins on every axis that matters. It is the cheapest, the fastest, the most stable once you add diagonal braces, and the easiest to break down for the drive to the venue. It also takes draping and greenery beautifully, which is why the rest of this guide builds exactly this style.
The other styles are all viable once you own a miter saw or a table saw. The triangular arch is a small step up and looks striking against nature. The hexagon and circular styles reward more experience.
Best for: anyone who wants a reliable arch under $100 that they can build in a weekend. Skip the square only if you specifically want a geometric hexagon or a bent-wood hoop as the visual centerpiece.
Step 2: Size It Right for Photos and Comfort
Build your arch 7.5 ft tall (90 in) by 5 ft wide (60 in) by roughly 4 ft deep (48 in). This is the balanced sweet spot for a ceremony arch, and here is the reasoning behind each number.
Height. Seven to eight feet is the standard range. At 7.5 ft you clear a 6’4″ person and still leave 12 to 18 in of overhead room for greenery hanging from the crossbeam, so the top does not get cropped in portrait-orientation photos. If the arch doubles as a guest entry gate, keep 7 ft as your absolute minimum, since guests do not center themselves carefully when they walk through.
Width. Five feet frames a couple and officiant standing side by side. It feels intimate without being cramped. Step up to 6 ft if three people will stand under the arch or you want a more spacious look.
Depth. About 4 ft between the two side frames gives the arch freestanding stability and room for the diagonal braces that keep it from racking.
Before you finalize anything, have someone stand where the couple will stand and shoot from 20 to 30 ft back. The arch should frame them with 6 to 12 in of clearance on each side.
Indoor venues add one more constraint. Measure the venue ceiling height first, because an arch built 2 in too tall is a classic disaster that no amount of styling can fix. For reference, real builder arches have landed at 88 in by 90 in and 96 in by 54 in, which shows the usable range.
Direct recommendation: build 90 in by 60 in unless your venue ceiling or a three-person ceremony pushes you otherwise.
Step 3: Choose Your Wood and Budget It in 2026
Here is the bottom line first. An all-in beginner square arch runs about $70 to $100 in SPF or whitewood pine, and about $200 to $210 in cedar. That total covers lumber, hardware, and stain.
Three species cover almost every wedding arch build.
SPF / whitewood pine is the cheapest and most available. A 2x4x8 runs about $3.38 to $3.64, and a pressure-treated 4x4x8 runs about $10.28. It takes paint beautifully, but it must be sealed or painted for outdoor use, and pressure-treated pine’s green tint has to be hidden. Best for budget builds, painted arches, and first-timers.
Cedar is naturally rot-resistant, repels moisture and insects, and is lightweight with a lovely grain. It is the most expensive at roughly $25 to $40 for a 4x4x8. In humid climates untreated pine rots fast, while cedar needs only periodic sealing. Best for outdoor weddings and any arch you plan to reuse or sell.
Poplar is the lightest option and paints to a flawless white, but it is indoor-only because it rots quickly outdoors. Best for indoor painted arches.
Here is the 2026 cost breakdown for the recommended SPF build.
| Item | Quantity | Cost |
|---|---|---|
| 4x4x10 posts | 4 @ ~$13 | $52 |
| 2x4x8 boards | 4 @ ~$3.50 | $14 |
| Hardware (bolts, screws, washers) | 1 set | $12-$18 |
| Exterior stain | 1 quart | ~$15 |
| Total (SPF) | ~$93-$99 |
To upgrade to cedar, figure four 4x4x10 cedar posts at about $35 each ($140) plus four 2x4x8 cedar boards at about $9 each ($36), which brings the total with hardware and stain to roughly $205 to $210.
These are early-2026 national averages. Framing lumber is running about $872 per thousand board feet, and prices vary 10 to 20 percent by region. To verify your own quantities before you shop, run the numbers through our board-foot calculator.
One reality check on where the money goes: florals routinely cost 5 to 10 times the price of the frame, so keep the build itself cheap.
The verdict: SPF pine for budget, painted, or indoor arches. Cedar if it lives outdoors or gets reused.
Step 4: Gather Tools and Cut the Lumber
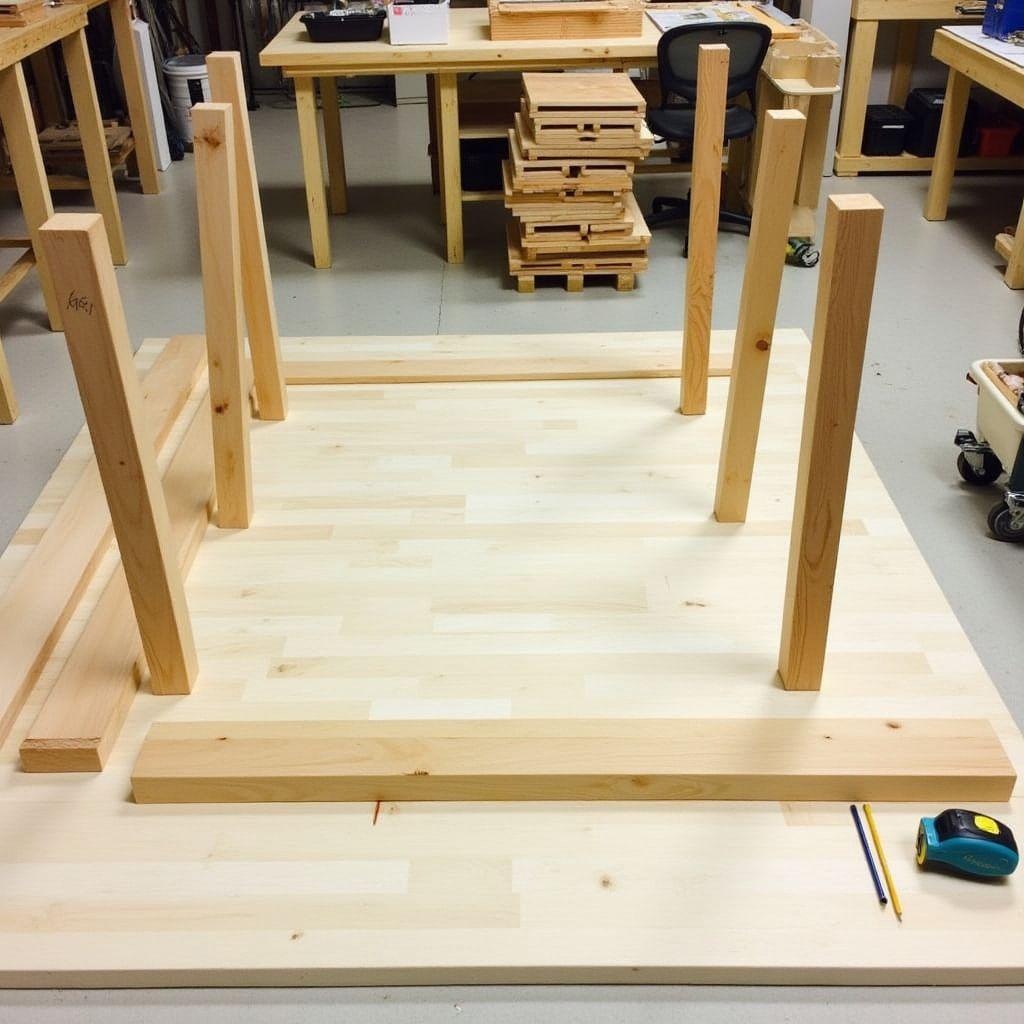
You can build this entire arch with a beginner tool set. No table saw.
Tools you need: circular saw, cordless drill/driver, a 3/32-in pilot bit, a 3/8-in spade or twist bit, a socket wrench with a 9/16-in socket, tape measure, speed square, pencil, two to four bar clamps, and safety glasses plus hearing protection.
Optional but helpful: a miter box or miter saw for cleaner 45-degree brace cuts, an orbital sander, and a foam roller for stain.
Here is the complete cut list for the 90 in by 60 in by 48 in square arch.
| Piece | Qty | Lumber | Cut Length | Source Board | Notes |
|---|---|---|---|---|---|
| Vertical posts | 4 | 4×4 | 90 in (7.5 ft) | 4x4x10 | Two posts per side, sides identical, save the 30-in offcut |
| Top crossbeam | 1 | 2×4 or 2×6 | 60 in (5 ft) | 2x4x8 or 2x6x8 | 2×6 looks heftier and holds more floral weight |
| Upper horizontal rails | 2 | 2×4 | 41 in | 2x4x8 | Connects the two posts on each side at the top |
| Lower horizontal rails (optional) | 2 | 2×4 | 41 in | 2x4x8 | Set 12-18 in from the ground, doubles as a decoration ledge |
| Diagonal corner braces | 4 | 2×4 | 28 in point-to-point | 2x4x8 (2 boards yield 4) | 45-degree miter on both ends |
Why 41 in for the rails? Your two 4×4 posts sit 48 in apart, center to center. Each 4×4 is 3.5 in thick, so the gap between their inside faces is 48 minus 3.5 minus 3.5, which equals 41 in. Trust that number and your side frames will square up cleanly.
Cut the diagonal braces in a miter box for clean 45s, and mark your cross cuts with the speed square so they stay square. Always predrill within 2 in of any edge or end grain, using a bit about 1/64 in smaller than the screw shank, to keep the 4×4 from splitting. One timing trap: wet pressure-treated lumber must dry 2 to 4 weeks before it will take stain evenly, so buy it early.
Direct recommendation: buy 10-ft posts, not 8-ft. You get a clean 90-in cut with a usable offcut instead of coming up short.
Step 5: Design It to Bolt Apart for the Drive to the Venue
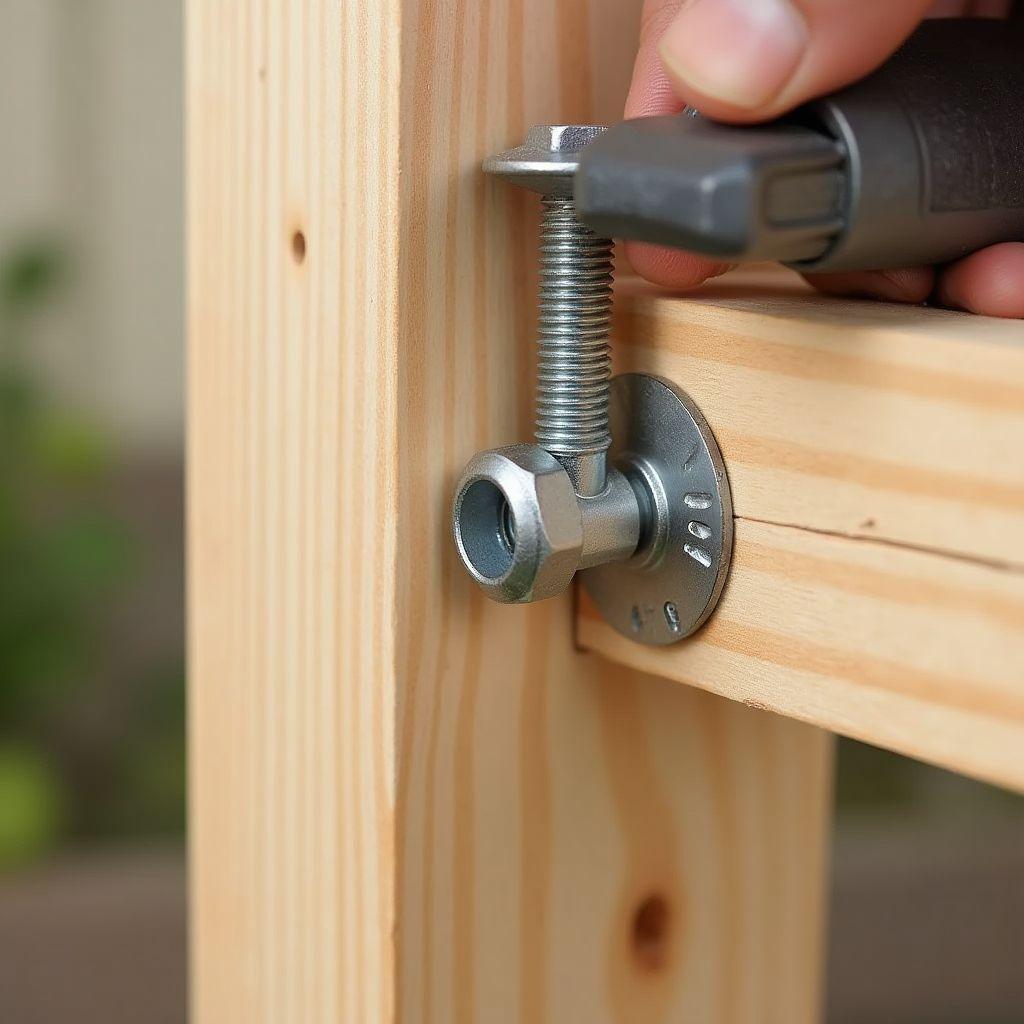
This is the single biggest gap in nearly every other guide. A fully screwed-together arch travels assembled or in huge sections, and the screws strip on the second teardown. After one or two uses, the arch is effectively permanent.
The fix is a bolt-together design. Use 3/8-in carriage bolts, which have a smooth domed head and a square neck that bites into the wood so the bolt does not spin while you tighten the nut. Pair each with a 3/8-in flat washer on the nut side and a 3/8-in hex nut. Use 3-1/2 in bolts for the 4×4-to-2×4 joints, and run a minimum of 2 bolts per joint for shear resistance.
Hardware for this build: eight 3/8 x 3-1/2 in carriage bolts, eight washers, eight nuts, plus a box of 3-in #10 star-drive screws for the crossbeam-to-post tops and 2-1/2-in #8 screws for the secondary joints.
Here is why bolts beat screws for anything that travels.
| Factor | Bolt-together | Screwed |
|---|---|---|
| Disassembly cycles | 10+ with no damage | Strips on the second teardown |
| Transport | Breaks into car-sized pieces | Must travel assembled or in huge sections |
| Racking resistance | Stronger in shear | Weaker pullout strength |
| On-site tools | Socket wrench only, no power | Needs a drill |
| Initial assembly | Slightly slower | Faster once |
The disassembly workflow is simple. Build and dry-fit the entire arch at home, then mark every connection point with pencil or paint before you take it apart. Break it into 6 to 8 flat pieces: two side frames, the crossbeam, and the braces. Two people reassemble the whole thing on site in 20 to 30 minutes.
One tip from portable-arch designers: recess the bolt hole slightly so the socket head sits flush. If you store the arch disassembled, re-snug every bolt before each event, fingertight plus a quarter turn.
For transport, 6 pieces fit a pickup bed or an SUV cargo area. Keep every piece under 6 ft and they will fit inside a minivan with the seats folded.
Best for: any arch that travels, which is almost all of them. Skip it only for a one-time build that gets assembled permanently at the venue.
Step 6: Assemble the Side Frames and Crossbeam
Build in this order and the arch stands straight and rigid. This sequence matches the bolt-together design from Step 5.
-
Build the first side frame. On a flat surface, lay out two 4×4 posts 41 in apart at their inside faces. Clamp the upper horizontal rail flush with the post tops, and the lower rail 12 in from the bottom. Predrill 1/8-in pilot holes and drive 3-in screws. Then build the second side frame exactly the same way. The two frames must be identical.
-
Add the diagonal braces. At each upper inside corner of a side frame, position a 28-in brace at 45 degrees. Predrill the 3/8-in bolt hole through both the brace and the post, insert the carriage bolt, add the washer and nut, and tighten with the socket wrench. Snug it fingertight plus a quarter turn, not so tight that the wood splits.
-
Join with the crossbeam. Stand both side frames upright 5 ft apart, outside face to outside face. Have a helper hold them while you lay the crossbeam across the post tops, centered, with up to 1/2 in of overhang on each side being fine. Predrill 1/8-in pilots and drive two 3-in screws through the crossbeam into each post top.
-
Square check. Measure both diagonals of the full arch opening. They should match within 1/4 in. Adjust the base spread before you make the final tightening pass.
That square check is the step that separates a straight arch from one that leans visibly in every ceremony photo. Do not skip it.
A few safety notes. Keep the clamps on while you drill. Always predrill near edges. Use the speed square to confirm your 90-degree corners before driving screws. And bring a second person for the standing step, because it is far safer with two.
The verdict: if the diagonals match and every joint is snug, the structure is done and ready for stability and finishing.
Step 7: Keep It From Tipping on Grass or Hard Floors
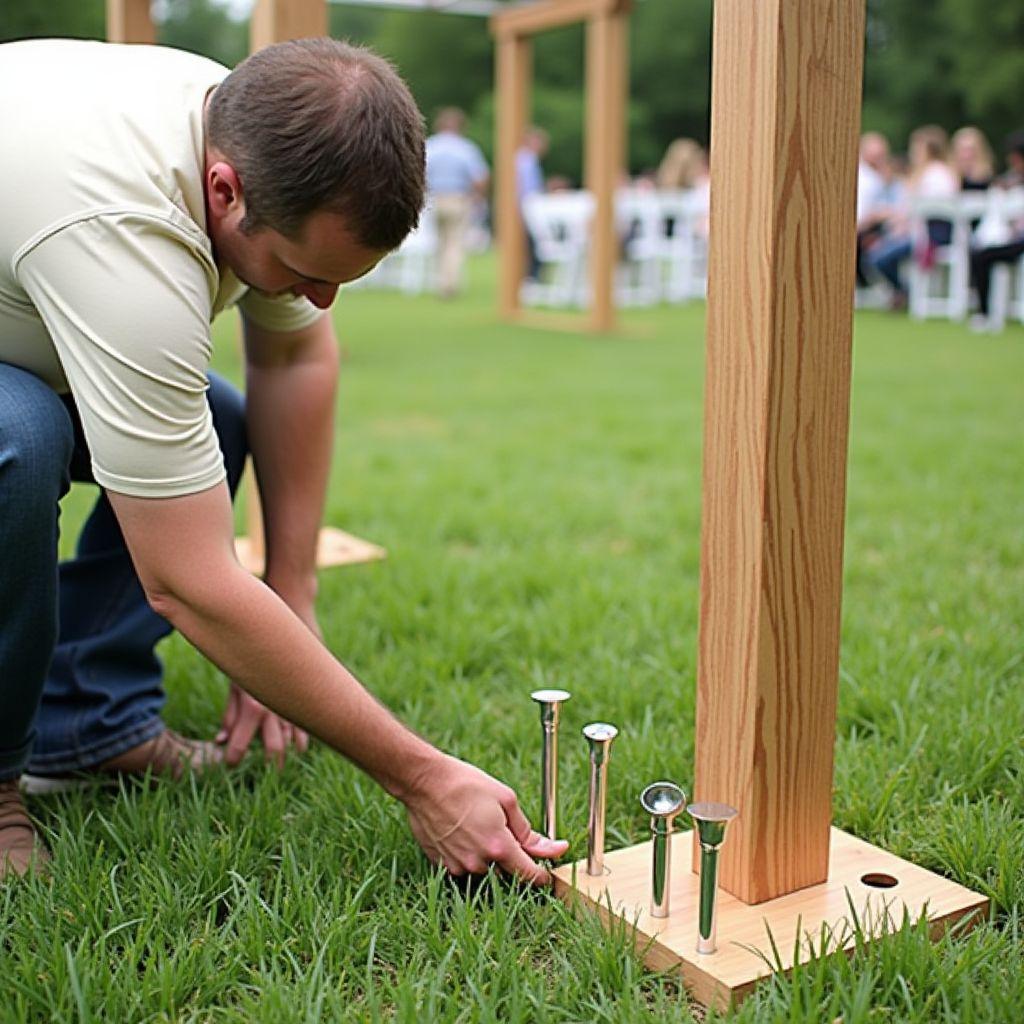
Wind is the number one way wedding arches fail, and almost no guide covers it. A light breeze can topple a 7-ft arch loaded with fabric draping. Plan for a 15 to 20 mph wind load, and aim for a minimum of 40 lb of weight per base leg on hard surfaces. The expert rule is simple: always more weight than feels necessary.
Your method depends on the surface.
Grass or soil:
– Drive steel tent stakes 10 to 12 in long at a 45-degree angle at the base of each post, then lash them to the post with 550 paracord or screw them on.
– For a firmer hold, drive 1/2-in rebar 18 to 24 in long about 12 in into the soil and slide the post over it.
– For a semi-permanent hold, drive 4×4 metal post spikes with a sledgehammer. These are harder to remove afterward.
Hard floors, patio, or concrete:
– Bucket cement bases: fill a decorative bucket with quick-set concrete and cast a PVC pipe in the center, then slide the post in. Use 2 per leg in wind and hide them with florals.
– Sandbags: 20 to 40 lb wrapped in burlap, 2 per post leg.
– Large flower pots, 12 to 16 in, filled with soil, stone, and sand around a post tube, then top-dressed with flowers.
– A weighted umbrella stand, 50+ lb, clamped to the post for lighter arches.
Wind add-ons. Run nearly invisible guy lines, either 3/32-in wire or 50-lb test fishing line, tied at 45 degrees to ground stakes. For high-wind oceanside or hilltop venues, add a 1-in ratchet strap from the arch top to a stake.
One styling note: plan how you will hide the sandbags or buckets with fabric or greenery before the day, so they do not look ugly in photos.
Direct recommendation: stakes for grass, weighted bucket bases for hard floors, and always add more weight than feels necessary.
Step 8: Pre-Install Floral and Draping Attachment Points
Every arch gets decorated, and the trick is preparing for it before you finish the wood. Install your eye hooks and cup hooks before staining. It is far easier to screw them into raw wood, and the finish then seals neatly around them.
Space 5/16-in by 2-in screw-in eye hooks every 12 in along each post. That spacing gives you maximum flexibility on the day.
Here is the day-of attachment toolkit.
– Zip ties (clear or green) and 22 to 24 gauge floral wire are the workhorses. Wrap greenery around the posts with floral wire every 6 in.
– Floral foam blocks attached with zip ties hold fresh flowers at the crossbeam and corners.
– Fabric drapes get secured with zip ties around the post at the top, then draped loosely downward. The eye hooks give the fabric anchor points so it does not slide.
Tie this back to your sanding. Smooth the posts with 80 then 120 grit so rough lumber does not snag fabric when a breeze catches it, which is a common ceremony annoyance. And remember that the lower horizontal rail from the cut list doubles as a ledge to rest a garland or a floral swag.
The florals are the visual star, and they cost far more than the frame. Making them easy to hang and keep in place is well worth the 20 minutes of pre-installing hooks.
Best for: any arch you will decorate heavily. Skip it only for a bare, minimalist wood look.
Step 9: Sand, Stain, and Seal for the Big Day
Choose your finish by the look you want.
Natural wood look: apply an exterior stain (a warm tone like Minwax Early American is a proven pick) followed by a clear exterior sealer or polyurethane for outdoor protection. Cedar needs only periodic sealing.
White or black arch: paint SPF pine or poplar, which both take paint beautifully. White chalk paint gives a crisp, matte finish. Painting is also the fix for hiding pressure-treated pine’s green tint, which photographs badly.
One quart of stain or paint covers about 75 sq ft, which is enough for the whole arch.
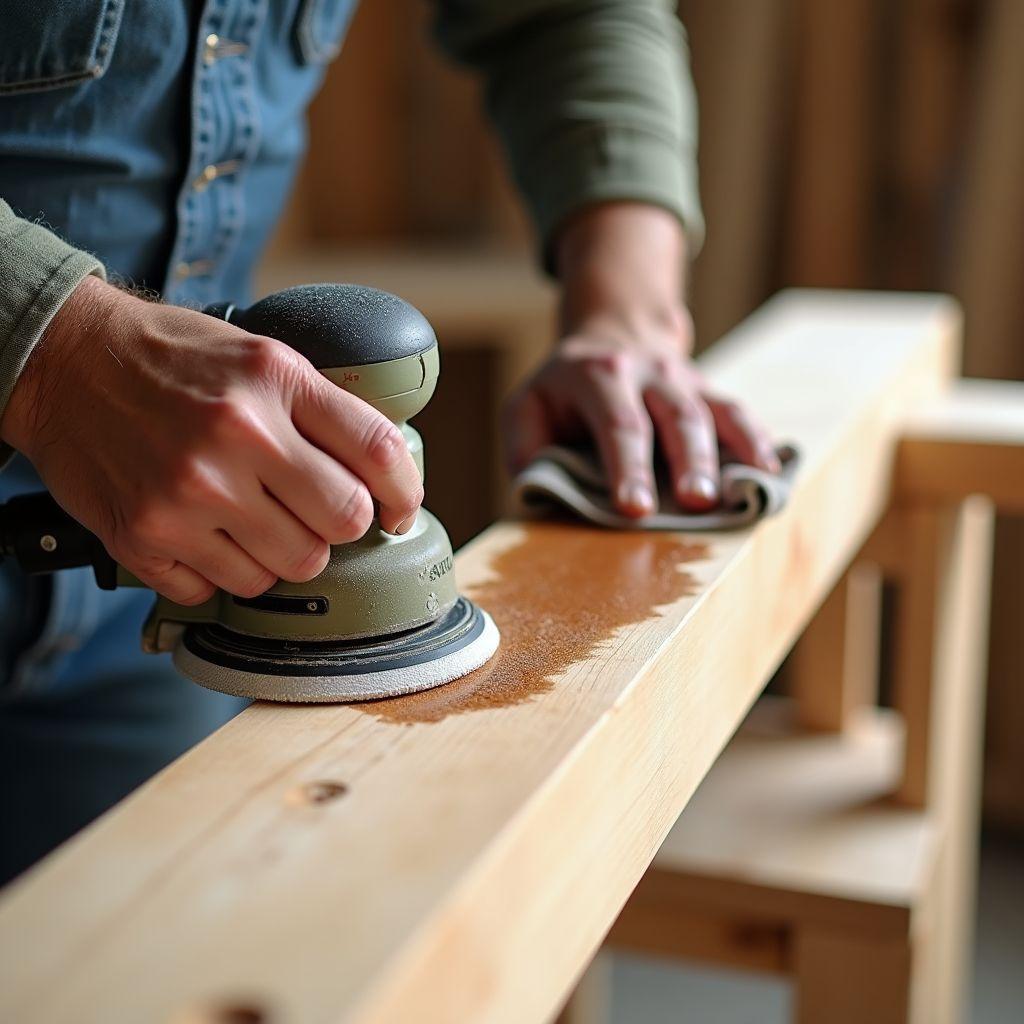
Here is the process. Sand everything at 80 grit, then 120 grit, then 220 grit for a smooth surface. Pay special attention to the top and bottom cut end grain, which drinks stain unevenly if you leave it rough. For outdoor use, apply 2 coats with 24-hour dry time between them.
Watch the pressure-treated timing trap again. Wet PT lumber needs 2 to 4 weeks to dry before it will take stain, so finish well ahead of the wedding. Install your eye hooks from Step 8 before this step. Once the finish is dry, wrap the pieces in furniture pads or moving blankets so the finish does not scuff on the drive.
If you would rather skip the guesswork, download the full plan library here for thousands of ready-made woodworking plans with exact cut lists and finishing steps.
The verdict: stain and seal cedar or SPF for a natural look, paint SPF or poplar for a crisp white or black, and always finish at least a week before the event.
Step 10: Avoid These Common Wedding Arch Mistakes
Run this checklist during your home dry-fit, not at the venue.
- Underestimating wind. The number one failure. Add more stake or sandbag weight than feels necessary.
- Not predrilling near edges. Wood splits. Always predrill within 2 in of an edge or end grain.
- Wrong screws. Drywall and coarse-thread screws fail in shear. Use 3-in #10 star-drive construction screws.
- Screwing an arch you will disassemble. Screws strip on teardown. Use carriage bolts for anything that travels.
- Building too narrow. Under 5 ft looks cramped in photos. Build 60 in wide minimum.
- No square check. The arch leans in photos. Match both diagonals within 1/4 in during assembly.
- No floral hardware. Flowers slide down bare posts. Pre-install eye hooks before staining.
- Leaving PT lumber green. It looks bad in photos. Stain or paint it.
- Ugly exposed bases. Sandbags and buckets look bad undressed. Plan to hide them with fabric or greenery.
- Too tall for an indoor venue. Measure the ceiling first. An arch 2 in too tall does not fit.
- Rough, unsanded posts. They snag fabric in a breeze. Sand to at least 120 grit.
- Arch too tall for the car. Use the bolt-together design and keep every piece under 6 ft.
Direct recommendation: walk this list at home during your dry-fit, while you still have time and tools to fix anything.
Wood Wedding Arch FAQ
Is it cheaper to rent or build a wedding arch?
Building is cheaper upfront: $70 to $120 for a DIY arch in SPF, versus $100 to $250 for a bare rental frame plus $50 to $150 in delivery. Factor in 6 to 8 hours of your time and any tool costs. Renting makes sense for destination weddings, time-crunched couples, or when the venue includes an arch. DIY wins when you want control over size and style and can resell or gift the arch afterward.
How tall and wide should a wood wedding arch be?
Build 7.5 ft tall (90 in) by 5 ft wide (60 in). That height clears a 6’4″ person with room for overhead greenery and photographs without the top being cropped, and 5 ft frames a couple and officiant comfortably. Go 6 ft wide for three people, and never build below 7 ft for a guest entry arch.
What wood is best for a wedding arch?
Cedar for outdoor use, since it is naturally rot-resistant and low maintenance. SPF or whitewood pine for budget or painted arches. Poplar for indoor painted arches only. Pressure-treated pine is durable outdoors but must be painted or stained to hide its green tint.
How do I make a wedding arch that comes apart for transport?
Use a bolt-together design with 3/8-in carriage bolts instead of screws. The arch breaks into 6 to 8 flat pieces that fit an SUV or truck bed. Mark every connection point before disassembling, and two people can reassemble it in 20 to 30 minutes with a socket wrench.
How do I keep a wedding arch from falling over?
On grass, drive 10 to 12 in steel stakes at 45 degrees at each post base and lash them on. On hard floors, use weighted bucket-cement bases or 40 lb of sandbags per leg. For wind, add nearly invisible fishing-line guy lines from the top to ground stakes.
You now have everything you need to build a wood wedding arch that travels, stands up to a breeze, and holds its flowers, all for under $100. Build it at home, dry-fit it, run the mistakes checklist, and you will be ready for the big day.
If you want thousands of done-for-you woodworking plans with exact cut lists, download the full plan library here. And when you are ready for your next weekend project, our floating shelves guide and DIY mud kitchen plan are great beginner-friendly builds.

“DIY woodworking enthusiast who started with zero experience and a YouTube tutorial.
I build simple, practical projects for my home and share free plans
so other beginners can skip the guesswork.If I can build it, you can too.”