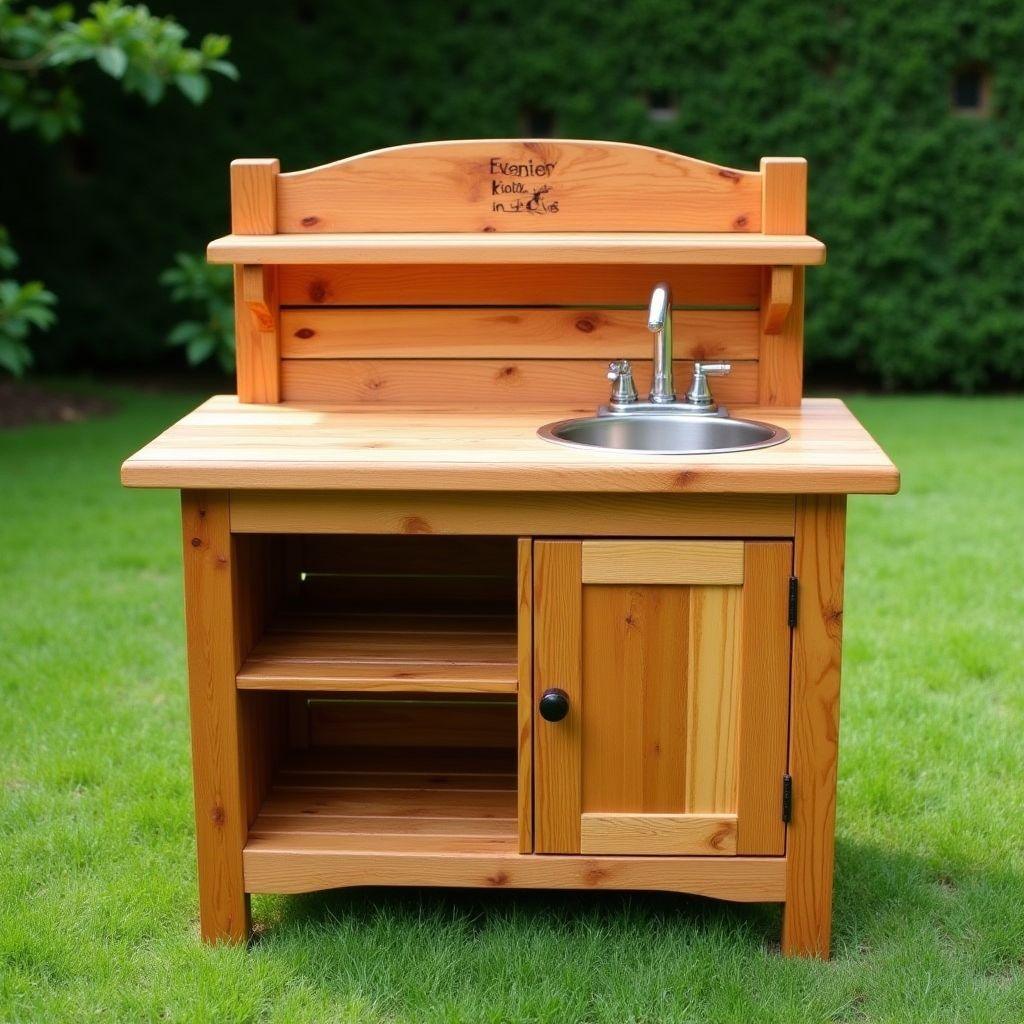
You saved six Pinterest photos of the perfect mud kitchen, and you still can’t answer the only question that matters: what do you actually cut, and what do you actually buy? Every “free plan” you clicked turned out to be a 500-word post wrapped around a pretty photo. No cut list. No dimensions. No honest price tag. Part of our kitchen and pantry projects guide.
This guide is the plan those photos left out.
Here you get a real weekend build sized for kids ages 2 to 8, with exact cuts down to the inch, a 2026 cost breakdown, and safety-first wood guidance that most posts skip entirely. A budget cedar build runs under $100. A loaded version with extras tops out around $200. Either way, you’ll know the number before you leave the driveway.
The dimensions here are grounded in real ranges. Beginner builds start at 48″ wide. Counter height lands between 22″ and 30″ depending on your child’s age. You’ll size yours precisely in Step 1 instead of guessing.
Wood choice is where safety lives, and it’s where the internet gets vague. You’ll get straight answers on cedar, pressure-treated lumber, and pine, including which fasteners each one demands.
Here are the seven steps ahead:
- Plan your size and kid-height dimensions
- Choose the right wood
- Gather tools and the full cut list
- Build the frame and legs
- Add the countertop and sink basin
- Install shelves, backsplash, and play features
- Finish and weatherproof for years outdoors
By the end you’ll have a working plan and a shopping list, not another photo to pin.
Step 1: Plan Your Size and Kid-Height Dimensions
Looking for more kitchen ideas?
This guide is part of our complete kitchen and pantry projects series — compare all options by skill level, cost, and build time.
Want 16,000+ woodworking plans?
Ted’s Woodworking has step-by-step plans for every skill level. Browse Ted’s plans.

Decide your footprint and counter height before you cut a single board. Get this wrong and your child either hunches over or reaches up on tiptoes, and the kitchen gets ignored.
The rule of thumb is simple: measure your child’s standing elbow height, then subtract 2 to 4 inches. That number is your counter height. It puts the work surface where small hands can actually stir, pour, and scoop without strain.
If you’d rather size by age, use this chart:
- Age 2 to 3: 18 to 22″ counter height
- Age 4 to 5: 22 to 26″ counter height
- Age 6 to 8: 26 to 30″ counter height
The sweet spot for ages 3 to 7 is 24 to 26″. That range covers the widest span of childhood, which matters if you want more than one season out of this build. For younger toddlers, build to 24 to 26″ anyway and add a small step stool. A stool is cheaper than a second kitchen.
These numbers aren’t invented. Popular builds across the web land right in this band: 22″ for toddler-focused designs, 24″ for mid-range kits, and 30″ for taller farmhouse-style units. The range is real, and 24 to 26″ sits comfortably in the middle.
For the footprint, 48″ wide is the beginner sweet spot. It gives room for a sink plus prep space without turning into a lumber-hungry monster. Set your depth at 16″, which fits a standard basin and keeps the unit from tipping forward when a child leans in.
Plan for a backsplash and upper shelf too. The two back legs run a full 48″ tall, well above the counter, so you have posts to mount a splash guard and hanging storage later in Step 6. The front legs stop at your chosen counter height.
Write down three numbers before moving on: width (48″), depth (16″), and counter height (24 to 26″ for most kids). Those three measurements drive every cut that follows.
Milestone: you have exact width, depth, and counter height written down.
Step 2: Choose the Right Wood (Cedar vs Pressure-Treated vs Pine)
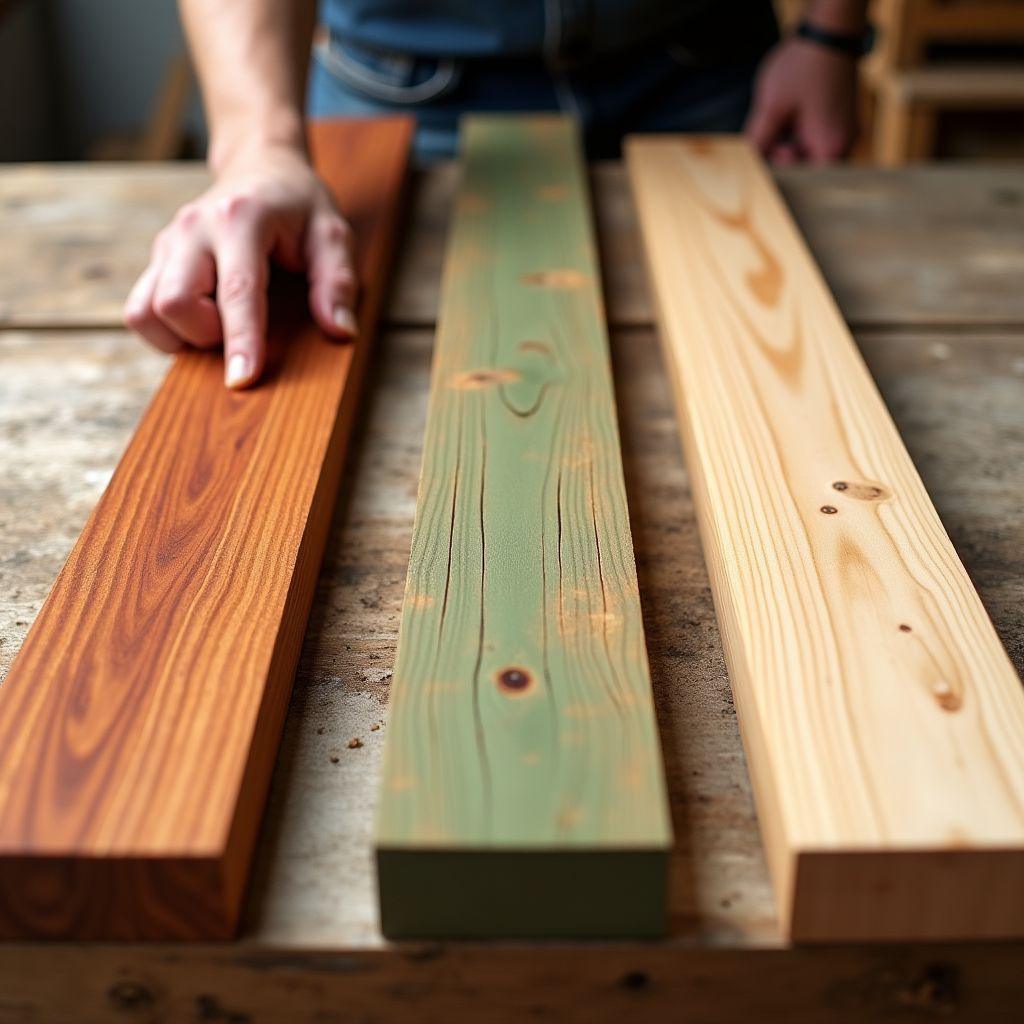
Pick a wood that’s safe for kids and survives the weather. This one decision affects safety, cost, lifespan, and even which screws you buy.
The pressure-treated wood your parents feared was banned back in 2003. The old CCA formula used arsenic, and the EPA pulled it from residential use on December 31, 2003. Today’s pressure-treated lumber uses ACQ or copper azole, a completely different chemistry that the EPA approves for residential playground equipment.
Cedar is the gold standard for a kids’ build. The USDA rates western red cedar as “resistant to very resistant” against decay. Its natural thujone oils fight rot and insects without a single added chemical, which is why the CPSC endorses it for play structures. Expect a 20 to 30 year lifespan. Cedar fence pickets run just $2 to $4 each, making it surprisingly affordable.
Modern pressure-treated is safe for child contact when sealed, and it costs 20 to 30% less than cedar for structural parts. One critical catch: the copper in PT lumber corrodes standard steel fasteners. You must use galvanized or stainless screws, or the connections rust and fail. This is the detail that sinks most first builds.
Untreated pine works if you seal it thoroughly, but it lives a shorter life outdoors and needs recoating more often. It’s the budget fallback, not the first choice.
The smart middle path is a hybrid: build the frame from pressure-treated 2x4s and clad the surfaces kids touch in cedar. You get PT’s strength and lower cost in the skeleton, plus cedar’s chemical-free safety where it counts.
| Wood | Lifespan | Cost | Child Safety | Fasteners Required |
|---|---|---|---|---|
| Cedar | 20 to 30 yr | $2 to $4/picket | Excellent, no chemicals | Galvanized or stainless |
| Pressure-treated (modern) | 20 to 40 yr | 20 to 30% cheaper | Safe when sealed | Galvanized or stainless (required) |
| Untreated pine | 5 to 10 yr | Cheapest | Safe, needs sealing | Standard or galvanized |
Milestone: you’ve chosen your wood species and know exactly which fasteners to buy.
Step 3: Gather Your Tools and Cut List
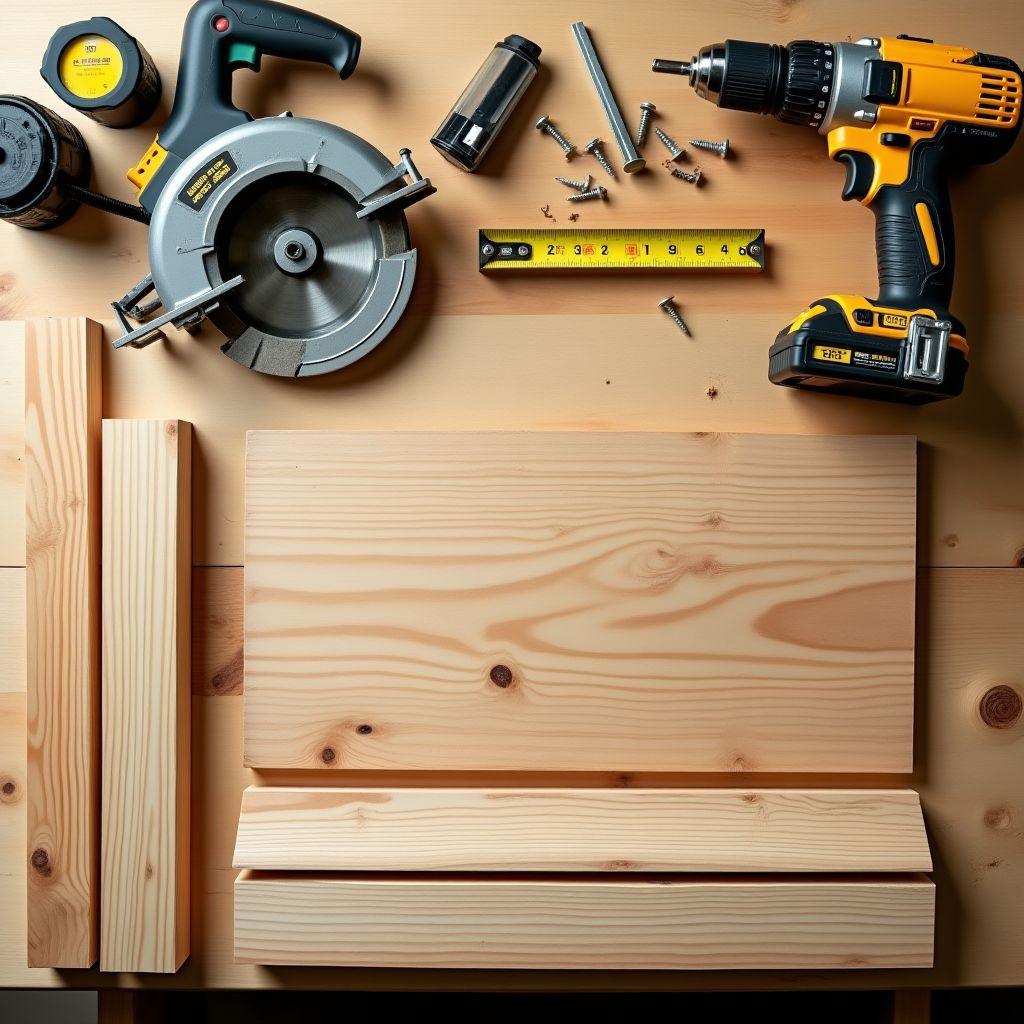
Walk into the hardware store with an exact shopping list. Print this section and you’re done planning.
You’ll need these tools:
- Drill/driver
- Circular saw or miter saw
- Jigsaw (for the sink cutout)
- Tape measure
- Speed square
- Orbital sander
- Clamps
- Galvanized deck screws
The cut list below builds a 48″ wide, 16″ deep, 24 to 26″ tall mud kitchen. Adjust the front leg length to match the counter height you chose in Step 1.
| Part | Qty | Dimensions | Material |
|---|---|---|---|
| Front legs | 4 | 24 to 26″ long | 2×4 cedar or PT |
| Back legs / backsplash posts | 2 | 48″ long | 2×4 cedar or PT |
| Front/back aprons (top) | 2 | 45″ long | 2×4 cedar or PT |
| Side aprons (top) | 2 | 13″ long | 2×4 cedar or PT |
| Counter slats | 5 to 6 | 48″ long | 1×6 cedar fence boards |
| Lower shelf slats | 4 to 5 | 45″ long | 1×6 cedar fence boards |
| Backsplash slats | 3 to 4 | 48″ long | 1×6 cedar fence boards |
| Lower shelf supports | 2 | 13″ long | 2×4 cedar or PT |
Here’s the 2026 cost breakdown for a cedar build. Prices reflect current fence picket and dimensional lumber rates.
| Item | Cost |
|---|---|
| Cedar 2x4s (7 boards at $5 to $8 each) | $35 to $56 |
| Cedar fence pickets (16 at $2 to $4 each) | $32 to $64 |
| Galvanized deck screws (2 boxes) | $12 to $18 |
| Sink basin (plastic tub) | $8 to $15 |
| Exterior stain or spar urethane | $15 to $30 |
| TOTAL | $102 to $183 |
That total lands in the mid-tier range. If you have scrap 2x4s and fence boards in the garage, your lumber cost drops toward $0 and you’re only buying screws, a basin, and finish. Load it up with an oven door, chalkboard, and water dispenser and you’ll approach $200.
Buy one or two extra fence pickets. They’re cheap, and cedar boards sometimes hide a crack or a bad knot you won’t spot until you’re cutting.
Milestone: all lumber cut to length and staged, ready to assemble.
Step 4: Build the Frame and Legs
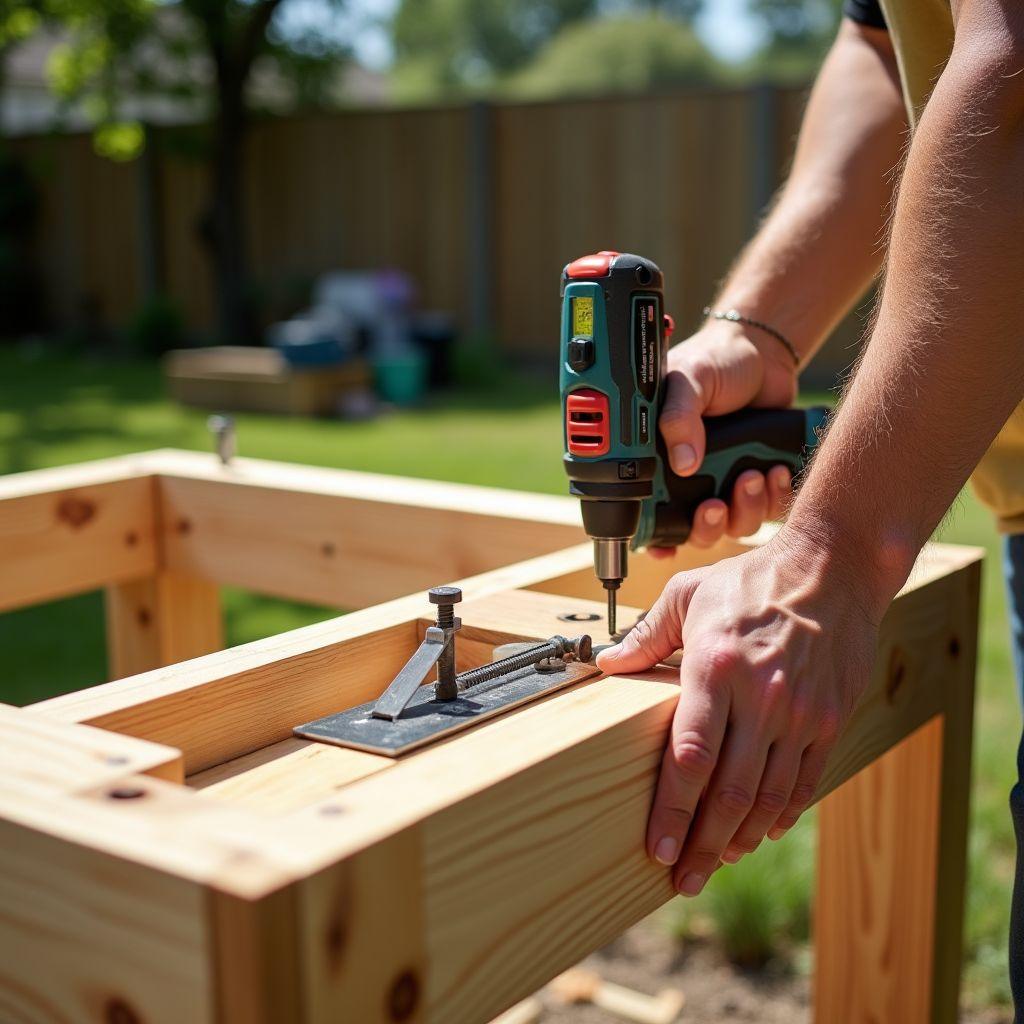
Assemble a square, rigid base structure. A wobbly mud kitchen gets abandoned by week two, so frame stability is the difference between a keeper and firewood.
Start by building the two side frames. Each side gets one front leg (at your counter height) and one back leg (the full 48″), joined by the two 13″ side aprons: one at the top, one lower down for the shelf. Build both sides identically.
- Lay out one side frame on a flat surface. Position the top side apron flush with the top of the front leg, then set the lower shelf support about 6″ up from the floor.
- Pre-drill every hole. Cedar splits easily near the ends, and pre-drilling saves you from cracking a leg on the last screw.
- Drive galvanized screws through the legs into the aprons. This is where your Step 2 wood choice pays off. If you used any pressure-treated lumber, galvanized fasteners are mandatory, not optional.
- Repeat for the second side frame.
Before you drive the final screws on either frame, check for square. Measure both diagonals of the frame corner to corner. The two measurements must match within 1/8″. If they don’t, tap the frame until they do, then lock it down. A square frame is the only structural test that actually matters.
Now connect the two sides. Stand them upright and run the 45″ front and back top aprons across, screwing into the top of each leg. The back legs rise well above the counter to carry the backsplash and upper shelf you’ll add in Step 6.
Add a cross-brace between the two back legs, roughly 6″ above the bottom. This one board kills side-to-side racking and turns a shaky rectangle into a solid stand.
Test it. Press down hard on each corner and try to rock it. A finished frame sits flat with zero wobble. If a corner lifts, recheck your diagonals and tighten the loose joint.
Milestone: a freestanding, square frame that passes the wobble test with no rocking when you press on a corner.
Step 5: Add the Countertop and Sink Basin
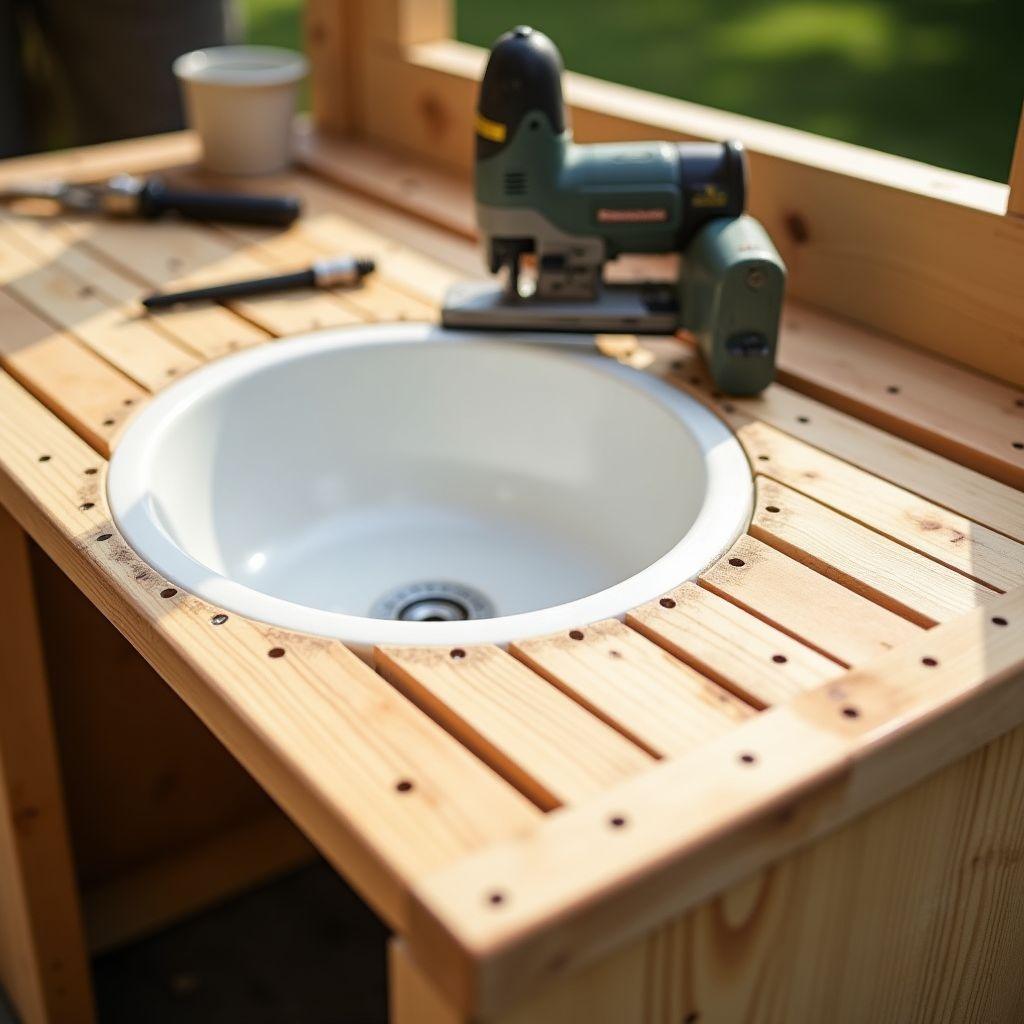
Fit the countertop boards and drop in a removable, kid-safe basin. This is the step that makes it look like a real kitchen.
Start with the counter slats. Lay your cedar 1×6 boards across the top frame, working from the back forward. Leave a small gap of about 1/8″ between each board. That gap lets rain drain through and gives the wood room to swell and shrink without buckling. Screw each slat down with galvanized screws.
For the sink cutout, position your basin where you want it and flip it upside down on the counter. Trace the inside of the rim with a pencil. Then cut 1/4″ inside that traced line with your jigsaw. Cutting inside the line leaves a lip for the basin to rest on so it sits flush instead of dropping through. Smooth the raw cut edge with 80-grit sandpaper.
That sleek stainless bowl you’re eyeing can hit skin-burning temperatures on a July afternoon. It’s the safety detail almost no competitor mentions. Metal absorbs and holds solar heat, and a bowl sitting in full sun can genuinely burn small hands. Match your basin to your kitchen’s location.
| Basin | Cost | Durability | Safety Note | Best For |
|---|---|---|---|---|
| Rubbermaid plastic tub | $8 to $15 | Medium (can crack if frozen or dropped) | Safe, removable | Beginners, budget |
| Stainless steel pan | $20 to $40 | Excellent (lasts decades) | Burns skin in direct sun | Shaded locations only |
| Metal mixing bowls | $3 to $8 | Good | Safe, dual-sink option | Tight budgets, two sinks |
| IKEA Trofast bins | $5 to $10 | Medium | Safe, limited sizing | IKEA-frame builds only |
Choose a removable, lift-out basin. It’s the single best decision for daily use. You pull it out to dump dirty water, rinse it clean, and set it back in seconds. A permanently mounted sink turns every cleanup into a chore, and it complicates the drainage you’ll solve in Step 6.
Milestone: countertop boards on and the basin seated, flush, and removable.
Step 6: Install Shelves, Backsplash, and Play Features
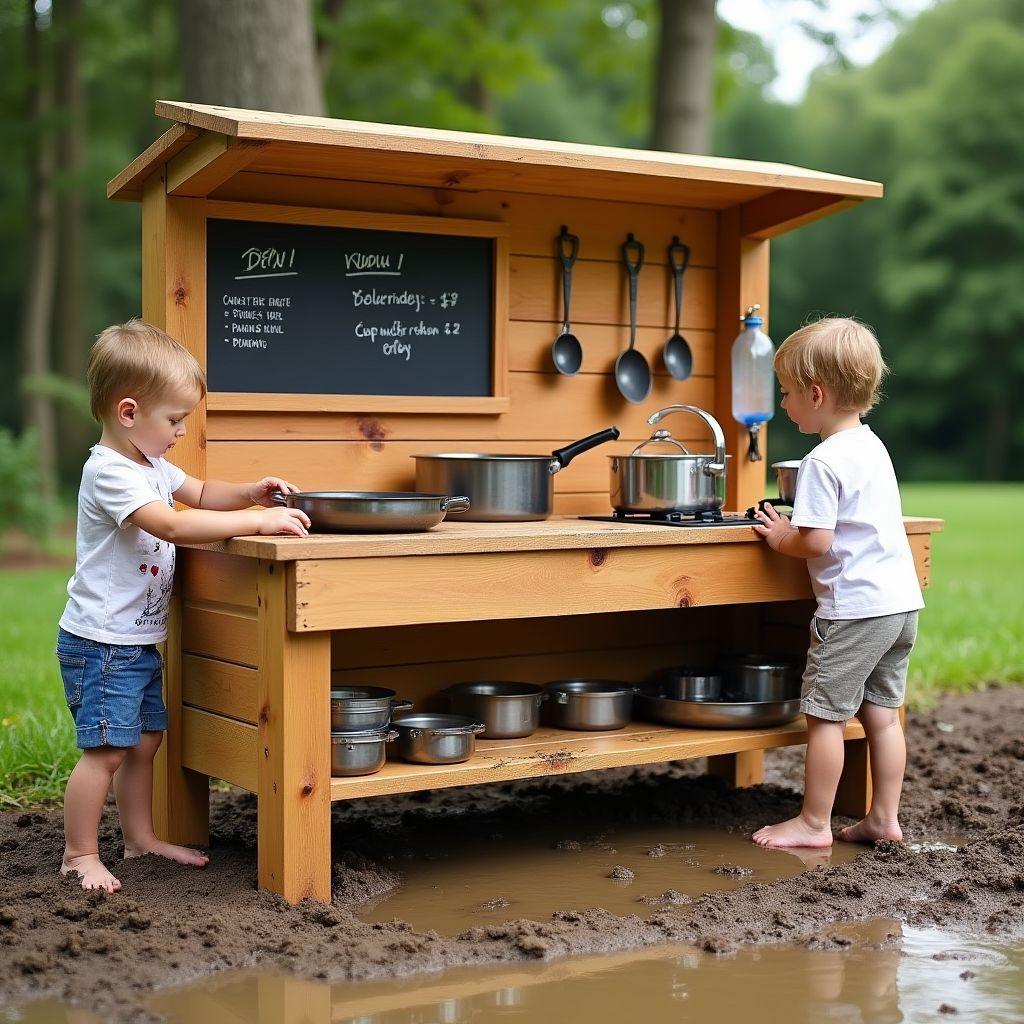
Add storage, a backsplash, play features, and solve drainage. There’s one $20 add-on that doubles how long kids play, and it’s not the sink. More on that below.
Build the backsplash first. Screw cedar 1×6 slats horizontally across the two tall 48″ back legs, starting 2″ above the counter. Leave a 1″ gap between slats for airflow and a lighter, more open look. Cap it with a 2×4 top rail across the top of the posts for a finished edge and extra rigidity.
Add the lower shelf next. You already installed the 13″ shelf supports on each side frame in Step 4. Lay cedar slats across them, using the same 1″ spacing as the backsplash so water and dirt fall through instead of pooling.
Drainage is the universal gap in every “free plan,” so here are four ways to handle it:
- Lift-out basin: remove the Rubbermaid tub and dump it. Easiest option and why Step 5 recommended a removable basin.
- Removable plug plus catch bucket: drill a drain hole, fit a rubber plug, and set a bucket underneath.
- Tilt-and-empty: if your basin has no drain hole, just lift and pour.
- Permanent drain hole with gravel pit: drill through and dig a small gravel-filled pit below for a set-and-forget setup.
Whatever you choose, empty the basin after every play session. Standing water breeds mosquitoes within days. And don’t park the kitchen under leaf-dropping trees, because falling debris clogs drains and fouls the water fast.
Now the fun part. Add the features that fit your space:
- Oven door: cut a 12″ x 12″ opening in the lower backsplash section and hinge a panel using outdoor bracket hardware.
- Chalkboard panel: brush chalkboard paint onto one backsplash section for menus and doodles.
- Hooks: drill in 3 to 4 cup hooks for hanging ladles, pots, and pans.
- Water without plumbing: this is the $20 add-on. Mount a camping jug with a spigot up on the backsplash, or set a clear drink dispenser within reach. Running water transforms play from pretend to real, and kids stay engaged far longer.
Milestone: shelves, backsplash, drainage, and your chosen features all installed.
Step 7: Finish and Weatherproof for Years Outdoors
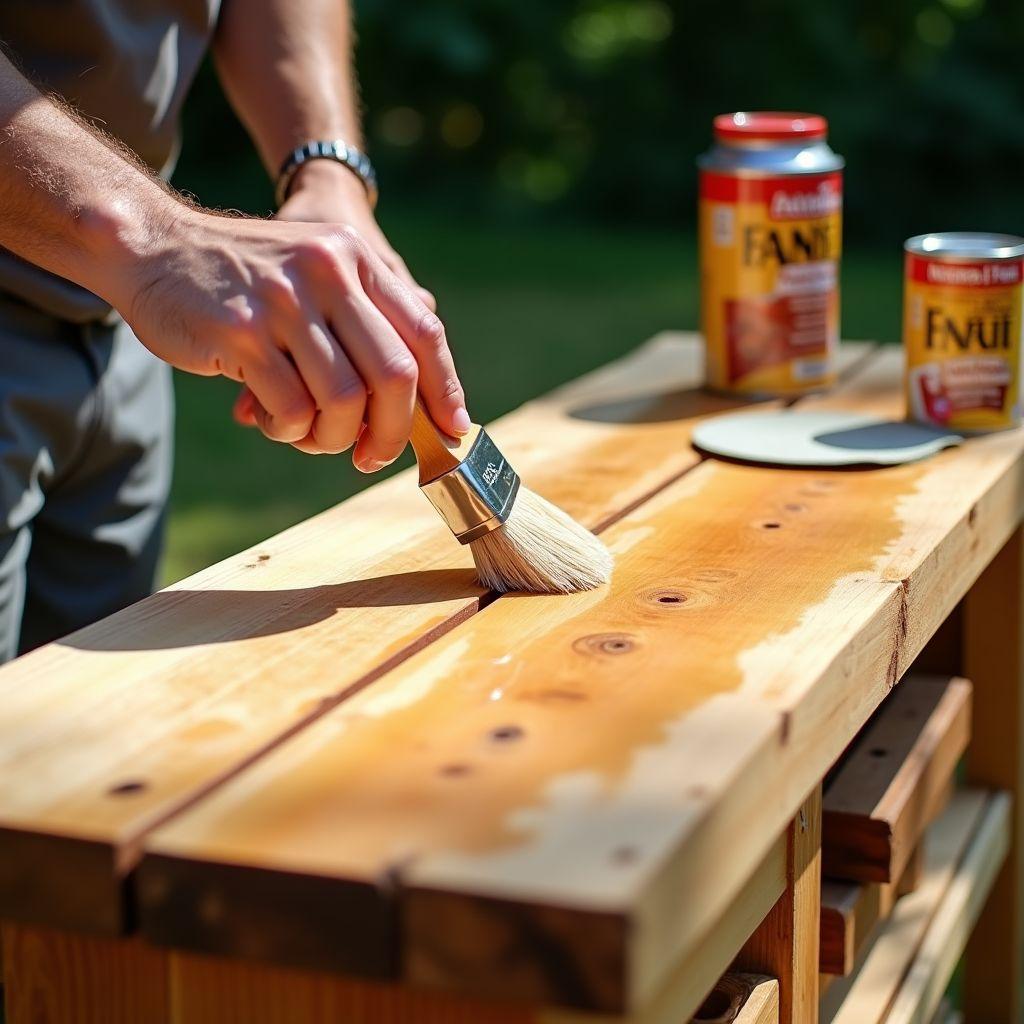
Seal the build so it survives seasons and stays kid-safe. Two coats today buys you five years outdoors.
Prep first. Sand every surface to 120 grit, then again to 220 grit for a splinter-free finish. Round over all corners and edges, since sharp cedar edges catch small skin. Vacuum off every trace of dust before you open a can, or it’ll get trapped in the finish.
| Finish | Lifespan | UV Protection | Kid-Safe Standard | Recoat Schedule |
|---|---|---|---|---|
| Spar urethane (Minwax Helmsman) | 3 to 5 yr | Excellent | Standard | Inspect annually |
| Penetrating oil (tung oil) | 1 to 2 yr | Moderate | Food-safe grade options | Every 6 to 12 mo on horizontals |
| DIN EN 71-3 certified lacquer | 3 to 5 yr | Good | European toy safety standard | Inspect annually |
| Pigmented exterior stain | 2 to 4 yr | Best (pigment blocks UV) | Standard | Every 2 to 3 yr |
For most builds, spar urethane wins on pure durability and UV resistance. If you want the highest kid-contact assurance, choose a DIN EN 71-3 certified lacquer. That’s the European toy safety standard, and it’s rated safe for surfaces children touch and mouth.
Apply at least two coats. Seal all the end grain, because cut ends drink up moisture faster than any other surface and rot from the inside out. Let the finish cure fully for 48 to 72 hours before the first play session.
Recoat the horizontal surfaces first when maintenance time comes. The counter and lower shelf take the brunt of sun and rain, so they wear before the vertical parts. Cover or store the basin over winter, and keep the whole kitchen out from under leaf-dropping trees.
Want ready-made plans for this build and thousands more? TedsWoodworking has over 16,000 step-by-step woodworking plans with cut lists, diagrams, and material lists for every skill level. Tables, benches, sheds, outdoor furniture, kids projects, and more.
Milestone: a fully sealed, kid-safe mud kitchen ready for the backyard.
FAQ
How much does it cost to build a DIY mud kitchen?
A cedar build runs $102 to $183 in 2026, covering lumber, galvanized screws, a plastic basin, and finish. Using scrap wood drops your cost close to $0 for materials, leaving only screws and sealer. Adding extras like an oven door, chalkboard, and water dispenser pushes a loaded build toward $200.
What is the best wood for an outdoor kids mud kitchen?
Cedar is the best choice. The USDA rates it “resistant to very resistant” to decay, it lasts 20 to 30 years, and its natural oils repel rot and insects without chemicals. Modern pressure-treated lumber is also safe when sealed and costs less. A hybrid build, PT frame with cedar cladding, balances cost and safety.
How tall should a mud kitchen be for my child?
Measure your child’s standing elbow height and subtract 2 to 4 inches for the counter height. By age, that’s 18 to 22″ for ages 2 to 3, 22 to 26″ for ages 4 to 5, and 26 to 30″ for ages 6 to 8. Build to 24 to 26″ for ages 3 to 7 and add a step stool for younger kids.
What can I use for the mud kitchen sink?
A Rubbermaid plastic tub ($8 to $15) is the best beginner basin: cheap, safe, and removable for easy dumping. Metal mixing bowls ($3 to $8) work for a two-sink setup. Avoid stainless steel pans in sunny spots, since metal absorbs solar heat and can burn small hands on hot afternoons.
How do I add water to a mud kitchen without plumbing?
Mount a camping jug with a built-in spigot on the backsplash, elevated so it feeds by gravity. It costs about $20 and lets kids turn a real tap. A clear drink dispenser ($15 to $20) works the same way and doubles as a refill station. Both skip plumbing entirely.
How do I protect a mud kitchen from the weather?
Sand smooth, then apply at least two coats of spar urethane or pigmented exterior stain, sealing all end grain. Let it cure 48 to 72 hours before use. Recoat horizontal surfaces first since they weather fastest, empty the basin after each session, and keep it out from under leaf-dropping trees.
Can a mud kitchen stay outside year-round?
Yes, a cedar or sealed pressure-treated build handles year-round outdoor use. Cedar lasts 20 to 30 years thanks to its natural rot resistance. Keep it sealed with fresh finish, remove or store the plastic basin in winter to prevent cracking from freezing, and inspect the finish each spring, recoating horizontal surfaces as needed.
Related Articles

“DIY woodworking enthusiast who started with zero experience and a YouTube tutorial.
I build simple, practical projects for my home and share free plans
so other beginners can skip the guesswork.If I can build it, you can too.”