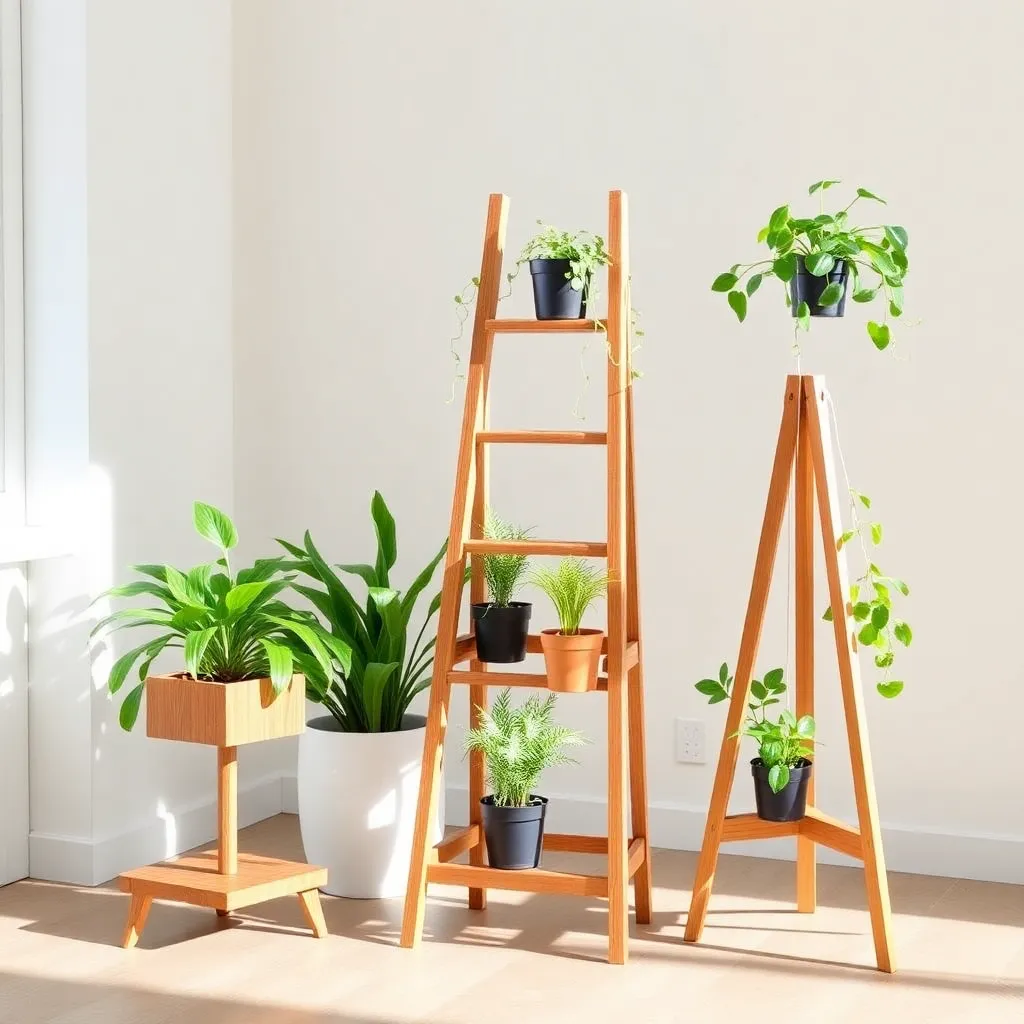
A plant stand does two things: lifts your plants to the right height and makes a visual statement. The problem with most store-bought versions is that they’re either too flimsy for a heavy pot or so industrial-looking they clash with everything. Building your own solves both problems — and none of these three designs requires more than basic tools or a Saturday afternoon.
These plant stand plans cover a simple single-tier stand for one large pot, a tiered A-frame for displaying multiple plants at different heights, and a mid-century modern tripod stand that works indoors or on a covered porch. Each includes a full cut list and step-by-step instructions.
Step 1: Choose Your Style and Wood
Want 16,000+ step-by-step woodworking plans?
Ted’s Woodworking has plans for every skill level — from simple shelves to full bedroom sets. Each plan includes a cut list, material list, and detailed diagrams. Browse Ted’s plans →

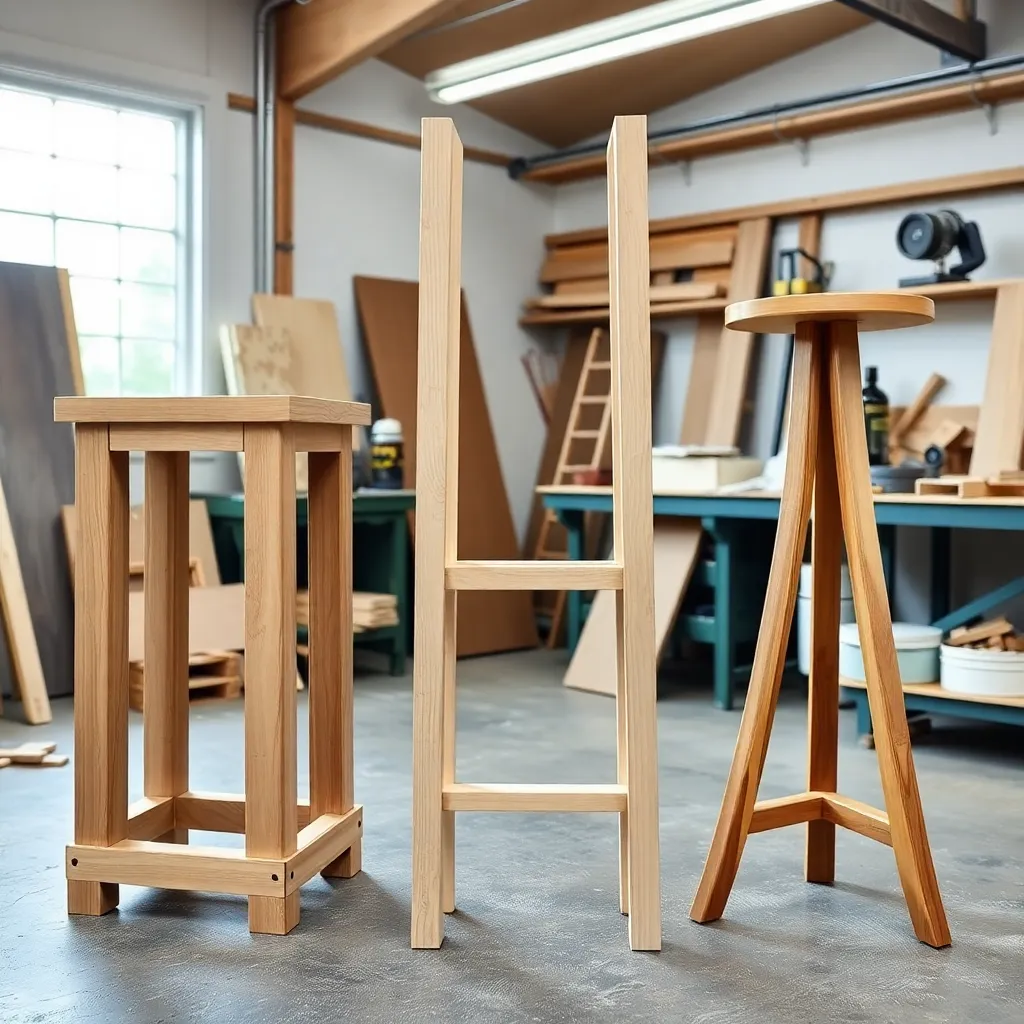
Single-tier square stand — Four legs, a square top platform, clean lines. Holds one pot up to 14″ diameter. Best for heavy ceramic pots or trailing plants you want elevated. Build time: 1.5 hours.
Three-tier A-frame stand — Two angled side frames connected by three shelves at different heights. Holds three to six small to medium pots. Works as a ladder-style display against a wall. Build time: 3 hours.
Tripod stand — Three angled legs joined at the top with a small platform or ring. Mid-century look, compact footprint. Best for single specimen plants indoors. Build time: 2 hours.
For wood, poplar is the best choice for indoor stands — takes paint and stain well, stable, inexpensive. For covered outdoor use, step up to cedar (naturally rot-resistant) or white oak (harder, weathers beautifully with oil finish). Avoid pine outdoors; it needs frequent recoating to hold up.
Step 2: Cut Lists and Materials
Single-Tier Square Stand (holds up to 14″ pot)
| Part | Qty | Size | Board |
|---|---|---|---|
| Legs | 4 | 18″ × 1½” × 1½” | 2×2 poplar or cedar |
| Top rails | 2 | 12″ × 1½” × ¾” | 1×2 poplar or cedar |
| Top stiles | 2 | 12″ × 1½” × ¾” | 1×2 poplar or cedar |
| Platform slats | 3 | 12″ × 1½” × ¾” | 1×2 poplar or cedar |
| Bottom stretchers | 4 | 12″ × 1½” × ¾” | 1×2 poplar or cedar |
Hardware: 1¼” pocket screws or #8 × 1¼” wood screws, wood glue, sandpaper (120 and 220 grit).
Three-Tier A-Frame Stand (holds 6 pots up to 6″ diameter)
| Part | Qty | Size | Board |
|---|---|---|---|
| Side rails | 4 | 48″ × 1½” × ¾” | 1×2 poplar or cedar |
| Top shelf | 1 | 14″ × 5½” × ¾” | 1×6 poplar or cedar |
| Middle shelf | 1 | 18″ × 5½” × ¾” | 1×6 poplar or cedar |
| Bottom shelf | 1 | 22″ × 5½” × ¾” | 1×6 poplar or cedar |
| Shelf cleats | 6 | 5½” × 1½” × ¾” | 1×2 poplar or cedar |
| Cross brace | 1 | 20″ × 1½” × ¾” | 1×2 poplar or cedar |
Hardware: 1¼” pocket screws, wood glue, 2″ corner brackets (optional for shelves).
Tripod Stand (holds 1 pot up to 10″ diameter)
| Part | Qty | Size | Board |
|---|---|---|---|
| Legs | 3 | 30″ × 1½” × 1½” | 2×2 poplar or oak |
| Top platform | 1 | 8″ × 8″ × ¾” | ¾” plywood or 1×8 |
| Top mounting plate | 1 | 4″ × 4″ × ¾” | scrap ¾” plywood |
Hardware: 2½” bolts with nuts and washers (3), wood glue, sandpaper. Optional: dowel jig for cleaner leg joints.
Step 3: Build the Single-Tier Square Stand
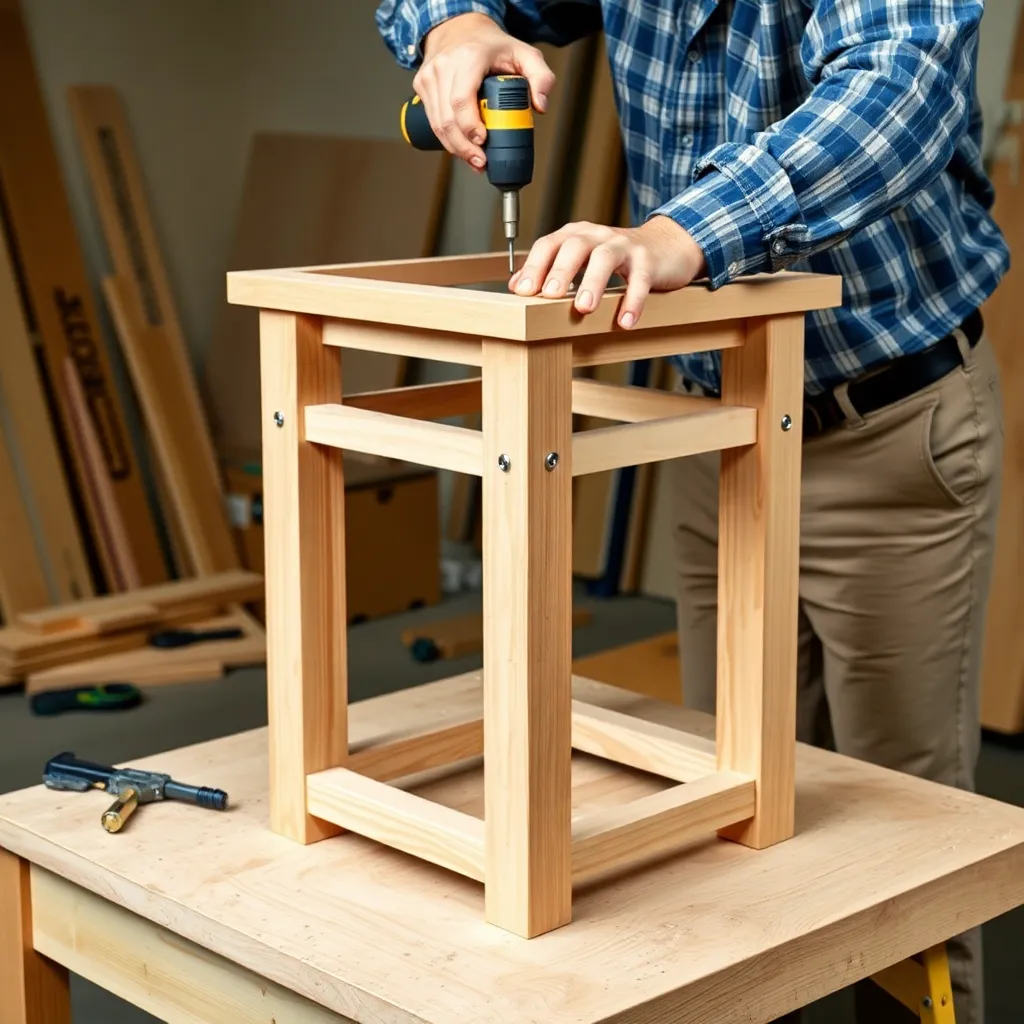
This is the easiest of the three and the best starting point if you’re new to woodworking.
Mark the leg taper (optional but recommended). A straight 2×2 leg looks chunky. Tapering the bottom 12″ from 1½” to ¾” on two faces gives the stand a lighter, furniture-like look. Use a tapering jig on a table saw or cut freehand with a circular saw and clean up with a hand plane. Skip this step if you prefer straight legs — they work fine structurally.
Attach the bottom stretchers first. Lay two legs flat on your bench, parallel, 12″ apart (outside to outside). Glue and screw a stretcher flush with the bottom of the legs on the inside face. Repeat for the other pair. Let dry, then join the two pairs with the remaining two stretchers, forming a square base.
Build the top frame. Glue and screw the top rails and stiles into a 12″ × 12″ square frame. Attach this frame to the top of the legs, flush with the top ends. Check for square on both the base and the top before the glue sets.
Install the platform slats. Lay three 1×2 slats across the top frame with even spacing — about ¼” gaps. Glue and screw each slat into the frame from below.
Step 4: Build the Three-Tier A-Frame Stand
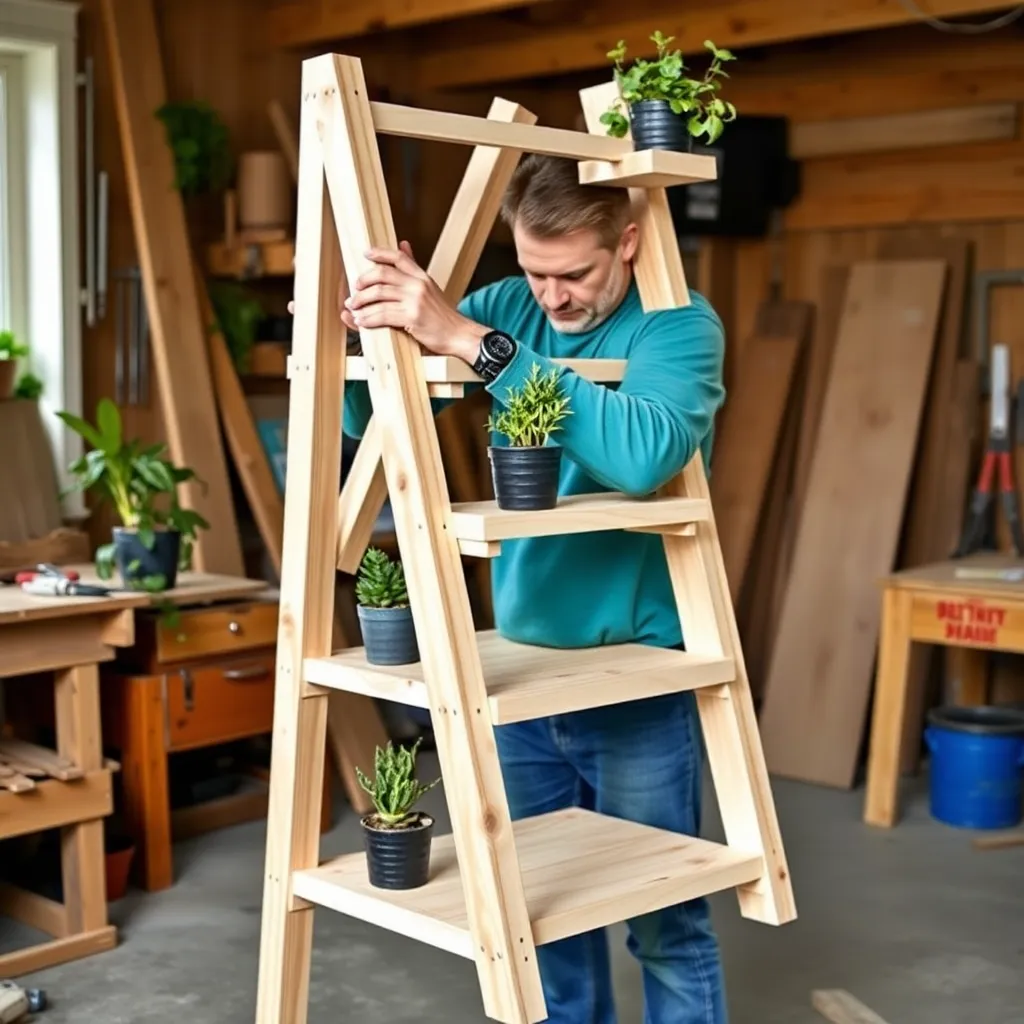
The A-frame’s signature look comes from the angled side rails. The angle is 10 degrees — shallow enough that standard cuts work, dramatic enough to read visually.
Cut the side rails. Each of the four side rails gets a 10-degree bevel cut at top and bottom so the stand sits flat and the top rails meet evenly. Set your miter saw to 10 degrees and cut all four at once.
Assemble the side frames. Join two side rails at the top with a 1½” overlap and two screws — this is the apex of the A. The rails spread apart toward the bottom. At each shelf height (bottom: 6″ from floor, middle: 22″, top: 36″), attach a shelf cleat perpendicular to the rail on the inside face. Each cleat gives the shelf something to rest on without visible hardware on the face.
Cut and fit the shelves. The shelves are wider at the bottom (22″) and narrower at the top (14″) to match the spreading A-frame geometry. Test-fit each shelf on its cleats before gluing — they should sit flat and level. Secure with two screws from below through each cleat.
Add the cross brace. A single 1×2 cross brace connecting the two side frames at mid-height keeps the stand from racking side to side. Attach it on the back side where it won’t be visible from the front.
Step 5: Build the Tripod Stand
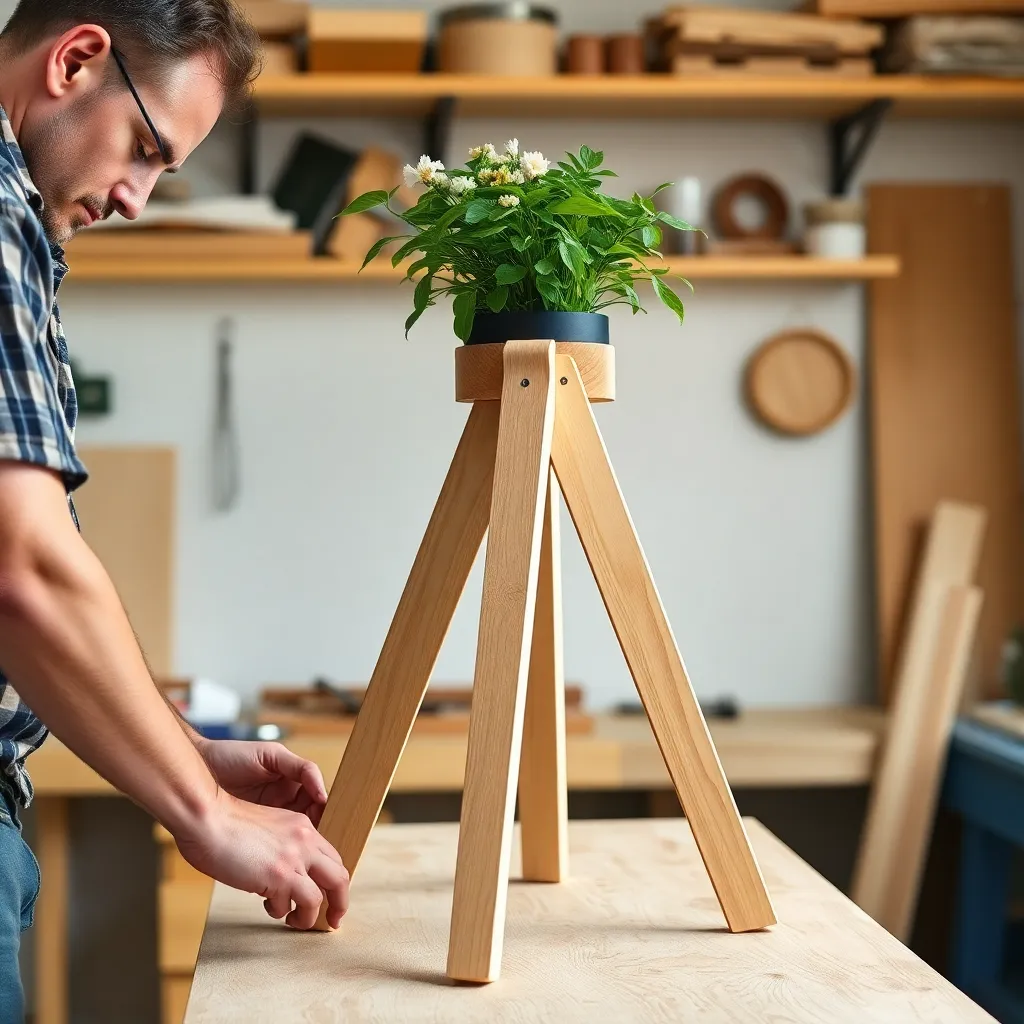
The tripod is the most visually striking of the three and the most forgiving to build — small variations in leg angle read as “handmade character” rather than errors.
Cut the leg angles. Each leg needs an angled cut at the top so all three legs meet at a single point. The target splay angle is 15 degrees per leg. Set your miter saw to 15 degrees and cut the top of each leg. The bottom of each leg gets a matching cut so it sits flat on the floor despite the splay.
Join the legs at the top. The simplest method: cut a 4″ × 4″ mounting plate from ¾” plywood, drill three equally spaced holes at 120 degrees apart (use a protractor or mark at 12, 4, and 8 o’clock positions), then bolt each leg to the plate from below. Tighten the bolts firmly — this joint carries all the load.
Attach the top platform. Cut an 8″ × 8″ square or circle from ¾” plywood or a solid 1×8. Center it over the mounting plate and glue and screw it down from below. An 8″ platform holds pots up to 10″ diameter comfortably with a slight overhang.
Test stability before loading. Set the stand on a flat floor and check that all three feet touch. If one rocks, shim with a thin wood wedge glued to the short foot, or plane the bottom of the offending leg until it sits flat.
Step 6: Sand and Finish
Start with 120-grit to remove mill marks and smooth any torn grain, then move to 220-grit for a final pass. Pay attention to the legs — these get the most visual attention and show sanding scratches under stain.
Indoor stands: Any interior finish works. For a natural wood look, one coat of Danish oil followed by a coat of paste wax gives a hand-rubbed furniture finish. For color, a water-based interior paint in eggshell sheen is durable and easy to touch up.
Covered outdoor stands: Use an exterior penetrating oil (teak oil, outdoor wood conditioner) applied to all surfaces. Reapply annually. Avoid film-forming finishes like varnish outdoors — they peel under UV and moisture cycling.
Painting tip for a clean look: Spray paint gives a smoother result than brush painting on plant stands because the legs have so many corners and edges. Two thin coats of a quality spray primer and two coats of spray paint in your chosen color beats a thick brush coat every time.
For more outdoor planter and display projects, see our planter box plans hub.
Want 16,000+ step-by-step woodworking plans?
Ted’s Woodworking has plans for every skill level — from simple shelves to full bedroom sets. Each plan includes a cut list, material list, and detailed diagrams. Browse Ted’s plans →
Plant Stand Plans FAQ
What wood is best for a plant stand?
For indoor stands, poplar is the best value — stable, smooth, takes paint well, and inexpensive. For natural wood look indoors, oak or walnut are upgrades worth considering. For outdoor use, western red cedar or white oak handle moisture without rot; avoid untreated pine outdoors.
How tall should a plant stand be?
It depends on the plant and where you’re displaying it. Floor-level stands typically range from 12″ to 24″ for large statement plants. Tabletop plant stands run 6″ to 12″. For a grouping display, mixing heights at 12″, 24″, and 36″ creates the most visual interest.
How much weight can a DIY plant stand hold?
The single-tier square stand in these plans holds 40+ lbs — more than enough for a large 14″ pot with soil. The tripod stand is rated for 20-30 lbs depending on leg joint tightness. The A-frame holds approximately 10-15 lbs per shelf. If you’re placing heavy ceramic pots, stick with the square stand.
Do I need a pocket hole jig to build a plant stand?
No. Pocket screws make assembly faster and neater, but all three designs can be built with standard wood screws and pre-drilling. The joint strength difference is minimal for a plant stand’s load requirements.
Can I build a plant stand without a table saw?
Yes. The single-tier stand needs only straight cuts (a miter saw handles everything). The A-frame requires 10-degree bevel cuts, which a compound miter saw handles easily. The tripod requires 15-degree cuts, also within a compound miter saw’s range. Only the optional leg taper on the square stand benefits from a table saw — skip it for straight legs.
How do I keep a plant stand from scratching hardwood floors?
Glue felt pads to the bottom of each leg. For outdoor use on decking, rubber feet work better than felt. On uneven surfaces, adjustable rubber leveling feet (available at hardware stores) let you dial in stability without shimming.
How do I protect a plant stand from water damage?
Use saucers under every pot — they’re the single most effective protection. Finish all surfaces including the bottom of the legs and the underside of shelves. For indoor stands, a coat of polyurethane on the top platform or shelves adds a water-resistant layer where pots sit.

“DIY woodworking enthusiast who started with zero experience and a YouTube tutorial.
I build simple, practical projects for my home and share free plans
so other beginners can skip the guesswork.If I can build it, you can too.”