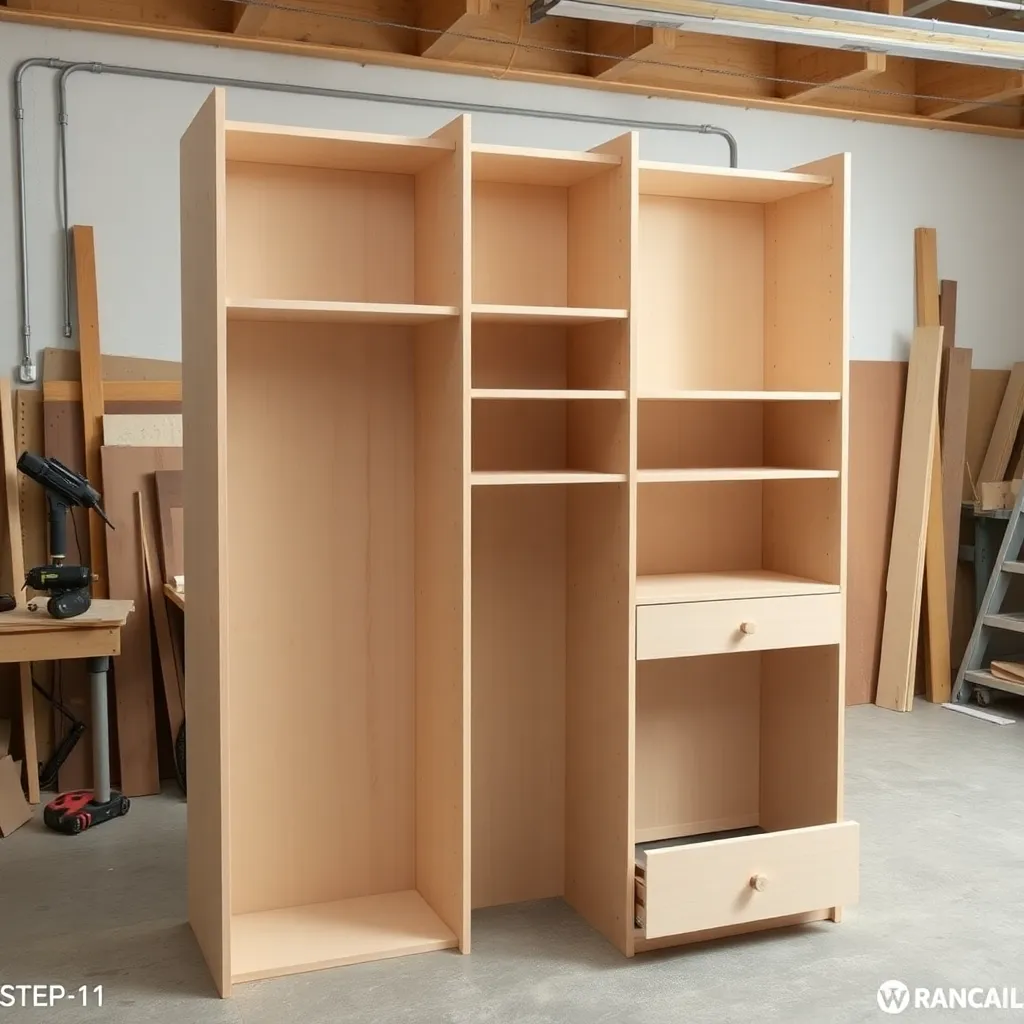
A DIY closet system built from plywood costs 60–80% less than a comparable professional installation and can be customized to the exact dimensions and contents of the closet. These six builds cover the core module types — a shelf tower, a hanging unit, a drawer tower, a shoe cubby, a double-hang unit, and a complete assembled system — that combine into any closet configuration.
Ted’s Woodworking has complete DIY closet system plans with module dimensions and assembly guides. Browse Ted’s plans →
Step 1: Build a Shelf Tower Module

Goal: A 12-inch wide × 72-inch tall freestanding shelf tower — the foundational closet module.
Build a box from ¾-inch plywood:
- 2 side panels: 72 × 16 inches
- 1 top panel: 10½ × 16 inches
- 1 bottom panel: 10½ × 16 inches
- 1 back panel: 12 × 72 × ¼ inch
- 5 adjustable shelves: 10½ × 15¼ inches (rest on shelf pins in ¼-inch peg holes)
Drill ¼-inch peg holes at 1-inch intervals along the inside face of both side panels (2 columns per side, 1 inch from front and back edge). Assemble with glue and pocket screws. Apply iron-on edge banding to all front edges. Paint or finish.
Milestone: A box that’s square (diagonal measurements equal), plumb when placed on the floor.
Step 2: Build a Double-Hang Unit

Goal: A 24-inch wide × 72-inch tall unit with two hanging rods — maximizes shirt and pants storage.
Build a box similar to the shelf tower but 24 inches wide:
- 2 side panels: 72 × 16 inches
- 1 top panel: 22½ × 16 inches
- 1 fixed shelf at 36 inches (for the rod height transition)
- 2 rods: 1⅜-inch closet rod at 84 inches and 42 inches from the floor
The fixed shelf at 36 inches divides the unit into two hanging zones. Mount rod cups on the inside face of each side panel at 84 and 42 inches. Insert the rods. The upper zone holds shirts (42-inch clearance); the lower zone holds shirts and pants (36-inch clearance below the upper rod to the 42-inch rod).
Milestone: Both rods level and parallel, with 42 inches of clearance in each hanging zone.
Step 3: Build a Drawer Tower

Goal: A 24-inch wide × 48-inch tall tower with four drawers — for folded items, accessories, and underwear.
Build the outer box (24 × 48 × 16 inches) from ¾-inch plywood. Install four sets of full-extension drawer slides (22-inch length) at consistent vertical spacing (10 inches between each slide pair). Build four drawer boxes from ¾-inch plywood (22 × 8 × 14 inches each) and four drawer faces (23 × 9 inches each). Drill and attach drawer pulls. The tower sits on a 3½-inch plywood toe kick base.
Milestone: Four drawers that open and close smoothly at full extension with no racking.
Step 4: Build a Shoe Cubby Unit

Goal: A 36-inch wide × 24-inch tall cubby unit with 12 individual shoe cubbies.
Build three rows of four cubbies:
- Outer box: 36 × 24 × 14 inches
- 3 horizontal dividers (creating 3 rows)
- 2 vertical dividers in each row (creating 4 cubbies per row = 12 total)
- Each cubby: 9 × 8 × 14 inches (holds one pair of shoes)
Build the outer box, then install the horizontal dividers with dadoes (1-inch dados, ¼ inch deep). Install the vertical dividers in each row the same way. No back panel needed (or use ¼-inch plywood for cleaner appearance). Apply edge banding to all front edges.
Milestone: 12 even cubbies, each at least 9 inches wide to accommodate most shoe widths.
Step 5: Build a Long-Hang Unit

Goal: A 24-inch wide × 72-inch tall unit with a single high rod — for dresses, coats, and long items.
The simplest unit: a box with a single rod at 68 inches. Build the outer box (24 × 72 × 16 inches). Add a single shelf at 78 inches above the floor (above the rod, for hat/accessory storage). Mount one rod at 68 inches. Below the rod (down to 24 inches from the floor): add a shoe shelf insert (three shelves on cleats at 8-inch spacing — fits 4 pairs of shoes in the floor area under the hanging clothes).
Milestone: Rod at 68 inches with at least 48 inches of clearance below for long garments.
Step 6: Build a Complete Assembled Closet System

Goal: A full closet system assembled from the five modules above — for a 6-foot wide reach-in closet.
Left section (24 inches): Double-hang unit (shirts and pants)
Center section (18 inches): Shelf tower (folded items)
Right section (24 inches): Long-hang unit (dresses/coats with shoe shelf below)
Install the modules:
- Set all units in position on the floor — no wall attachment yet
- Shim the units level (closet floors are often not perfectly level)
- Screw adjacent units together at the top (two screws through the side panel)
- Secure to wall studs through the back panel (two screws per unit, into studs)
- Add a continuous top shelf across all three units (cut one full-width shelf, rest on the unit tops)
Milestone: A system that doesn’t move or flex when pulling a loaded clothes rod sideways.
DIY Closet Systems FAQ
How much does a DIY closet system cost compared to a professional installation?
A DIY plywood closet system for a standard 6-foot reach-in closet costs approximately $150–$250 in materials (one sheet of ¾-inch plywood per module, hardware, edge banding, paint). A comparable professional installation (California Closets, Closet Factory, etc.) costs $1,500–$3,000 for the same closet. A modular kit system (IKEA PAX, ClosetMaid) costs $400–$800 installed. The DIY approach saves 80–90% of the professional cost, with the tradeoff being 1–2 days of shop and installation time. The quality of a well-built plywood system equals or exceeds any kit system.
What size should each closet module be?
Standard module widths: 12 inches (narrow tower, one row of shoes), 18 inches (medium tower), 24 inches (standard hanging unit), 36 inches (wide shelf tower or double hang). Standard depths: 16 inches for bedroom closets (clothes hang at 12-inch depth; 16 gives clearance from the door). Standard heights: 72 inches for most modules, 84 inches for tall hanging units, 24–36 inches for base-level shoe cubbies. Modules should be sized in increments that add up to the closet width — a 6-foot closet might use a 24 + 18 + 24-inch combination.
Do I need a back panel on each module?
Yes, for structural reasons. The back panel keeps the module square and prevents racking — a box without a back panel can lean sideways under load. Use ¼-inch plywood for the back panel. Staple and glue it to the back edge of the side, top, and bottom panels. Alternatively, use a 1-inch × 3-inch cleat on the top back edge and screw the module to the wall through the cleat — this provides the same anti-racking function as a back panel.
How do I finish the plywood edges on closet modules?
Iron-on edge banding is the standard method: cut a strip slightly wider than the panel edge, position it on the edge, press with a household iron (medium heat, no steam), let cool 30 seconds, and trim flush with a laminate trimmer or utility knife. Iron-on banding with a PVC or ABS substrate is more durable than wood veneer banding. Sand the edges lightly after trimming to remove any high spots. Apply primer before painting — unfinished edge banding absorbs paint unevenly and shows the banding edge. For a premium finish: use solid wood nosing (¾ × ¾-inch strips glued to the edge with wood glue) instead of banding.

“DIY woodworking enthusiast who started with zero experience and a YouTube tutorial.
I build simple, practical projects for my home and share free plans
so other beginners can skip the guesswork.If I can build it, you can too.”