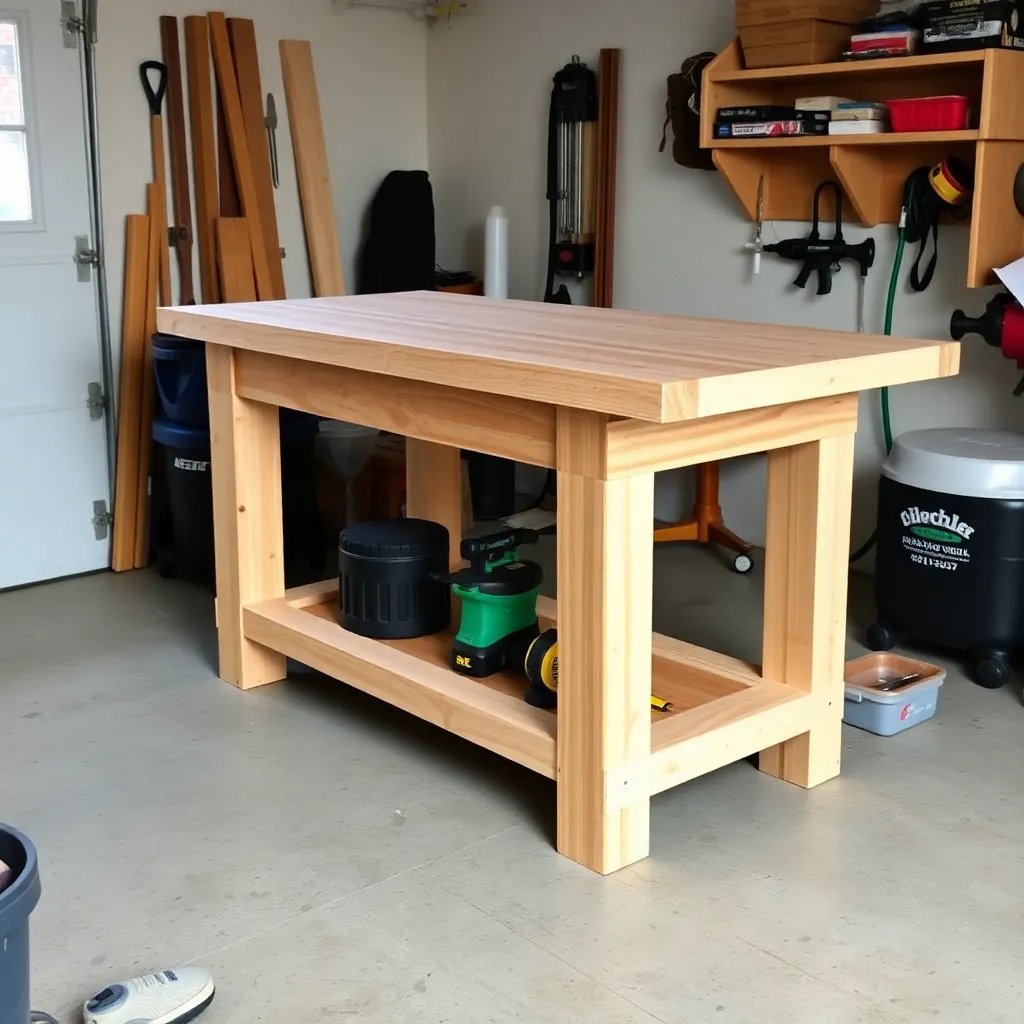
A simple DIY workbench — four legs, a lower shelf, a flat top — is the first major project for a new woodworking shop, and one of the best uses of a beginner’s first weekend of building. This plan uses construction lumber and plywood, costs under $150 in materials, and produces a rock-solid bench that will serve a full shop for years. The build uses only basic tools (circular saw, drill, and clamps) and requires no complex joinery.
Ted’s Woodworking has complete workbench plans from simple starter benches to traditional joiner’s benches. Browse Ted’s plans →
This guide is part of our complete Workbench Plans: Shop Benches, Sawhorses & Tool Storage — covering workbench designs, sawhorses, tool storage, and more.
Step 1: Gather Materials and Tools
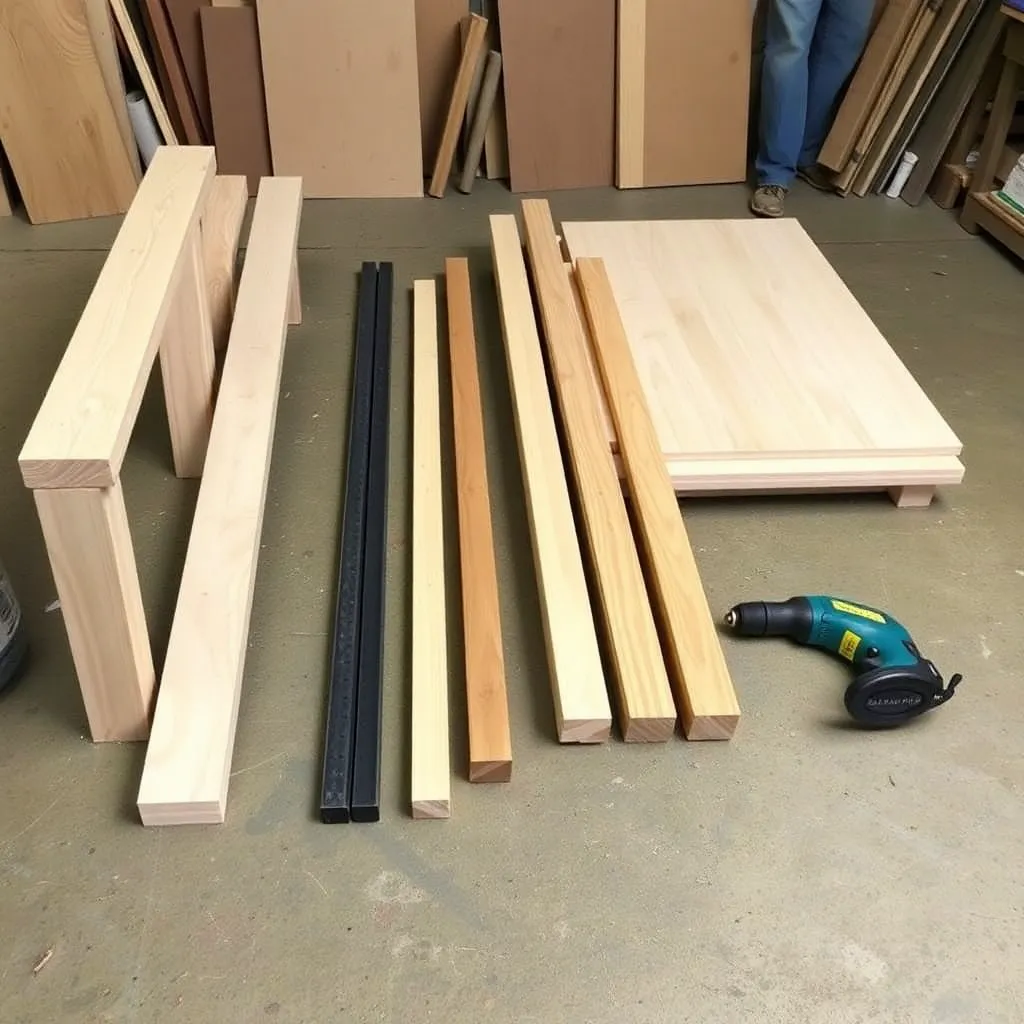
Goal: Assemble all materials before starting — this bench goes together in one session.
Cut list (for a 6-foot × 24-inch bench at 34-inch height):
- 4 legs: 4×4, 31.5 inches each (for 34-inch finished height with 2.5-inch top thickness)
- 4 long rails: 2×4, 66 inches each (2 at top height, 2 at shelf height — 6 inches from floor)
- 4 short rails: 2×4, 21 inches each (2 at top height, 2 at shelf height)
- Top: 2 sheets of ¾” plywood, 24×72 inches (laminated for 1.5″ total thickness)
- Lower shelf: 1 piece of ¾” plywood, 18×66 inches
Hardware:
- 3-inch construction screws (1 lb box)
- 2-inch construction screws (small box)
- Wood glue
- 4 corner brackets (optional, for leg-to-rail reinforcement)
Tools needed: circular saw or miter saw, drill/driver, square, tape measure, clamps (4 minimum), level.
Milestone: Lay out all cut parts on the floor before starting. Verify quantities match the cut list.
Step 2: Cut All Parts to Length
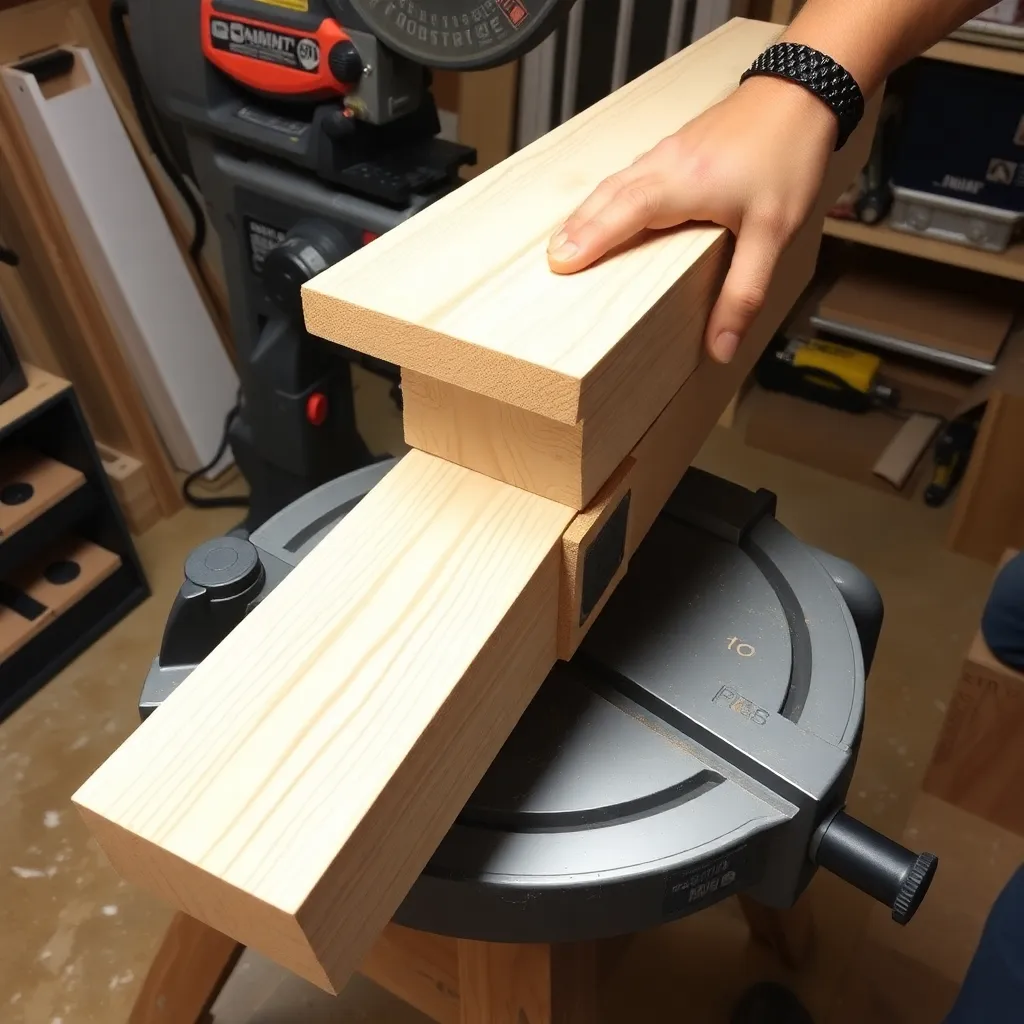
Goal: Cut all parts accurately before assembly — measure twice, cut once.
Legs: set a stop block on the miter saw at 31.5 inches and cut all four legs from 4×4 stock. They must be identical in length — the bench will rock if they’re not.
Rails: cut the four long rails to 66 inches and the four short rails to 21 inches. These dimensions assume you want a 72-inch finished bench length: the top overhangs 3 inches on each end beyond the leg frame. If you want flush ends, cut long rails to 72 inches.
Top panels: cut two pieces of ¾” plywood to 24×72 inches. For the cleanest result: clamp a straightedge guide to the plywood and use a circular saw with a 60-tooth fine-finish blade.
Shelf: cut one piece to 18×66 inches (slightly narrower than the bench top to clear the shelf rails).
Label all parts with a pencil mark immediately after cutting — all 2×4 pieces look identical once cut.
Milestone: Dry-stack all parts in order of assembly. Verify all four legs are exactly the same length by standing them upright next to each other.
Step 3: Build the Two End Frames
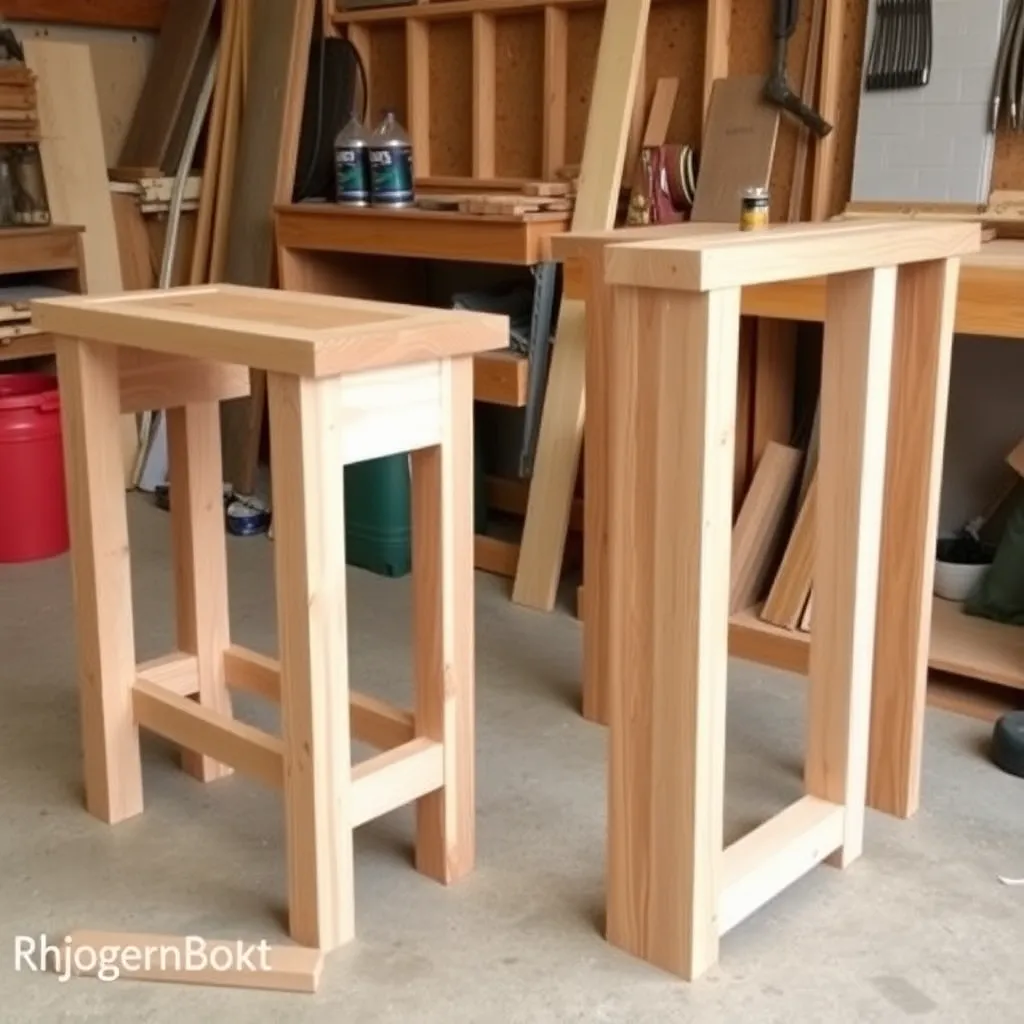
Goal: Assemble the two H-shaped end frames that form the bench base.
Each end frame consists of two legs with two rails between them — one at the top height and one at the shelf height (6 inches from the floor).
Assembly:
- Lay two legs parallel on a flat surface, 21 inches apart (inside measurement)
- Place the short top rail between the legs, flush with the top ends of the legs
- Drill two pilot holes through the rail into the end of each leg — 3/8-inch clearance hole through the rail, 3/16-inch pilot hole into the leg
- Drive 3-inch screws — two per joint
- Add the short shelf rail at 6 inches from the bottom of the legs, using the same method
- Check the frame for square: the diagonal measurements should be equal within 1/16″
- Apply wood glue to all joints before driving the screws for maximum strength
- Repeat for the second end frame
Milestone: Both completed end frames should stand upright without assistance and be square within 1/16″ on each diagonal.
Step 4: Connect the End Frames with Long Rails
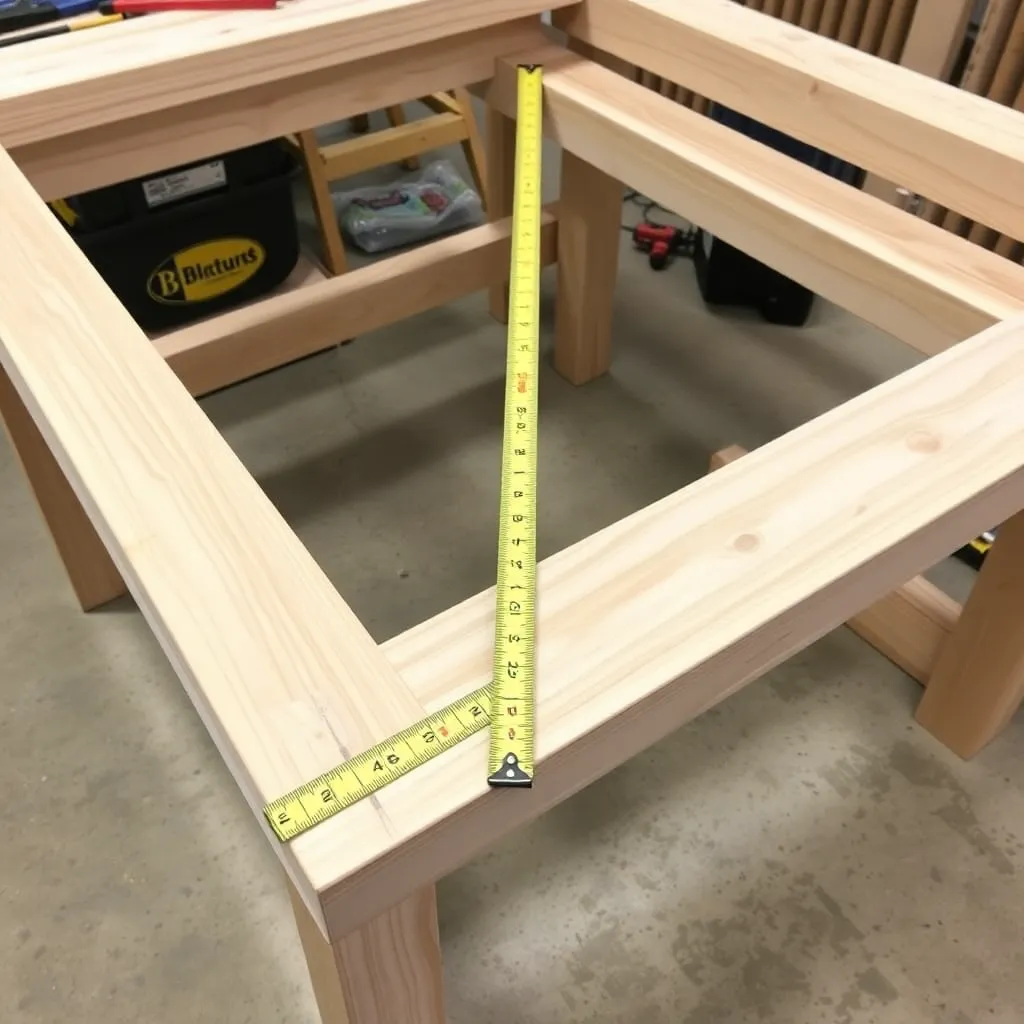
Goal: Connect the two end frames to form the complete bench base.
- Stand both end frames upright, 66 inches apart (end to end)
- Position the long top rails between the end frames, flush with the top edges of the short rails
- Have a helper hold the frames in position while you drive the first screws — or clamp the frames to a wall stud to hold them upright
- Drill and screw the long rails to the legs: two 3-inch screws per joint, with glue
- Repeat for the long shelf rails at the bottom
Check for square: measure diagonally across the completed base from corner to corner — both diagonals should be equal within 1/8″. If not, rack the frame slightly (push one corner diagonally) to bring it square before the glue sets.
Level check: with the base standing on a flat floor, check that all four feet contact the floor. If one leg is short, shim it with a playing card until the bench top is flat, then trim the leg to match.
Milestone: The completed base stands without rocking, is square within 1/8″, and all four legs contact the floor.
Step 5: Build and Attach the Top
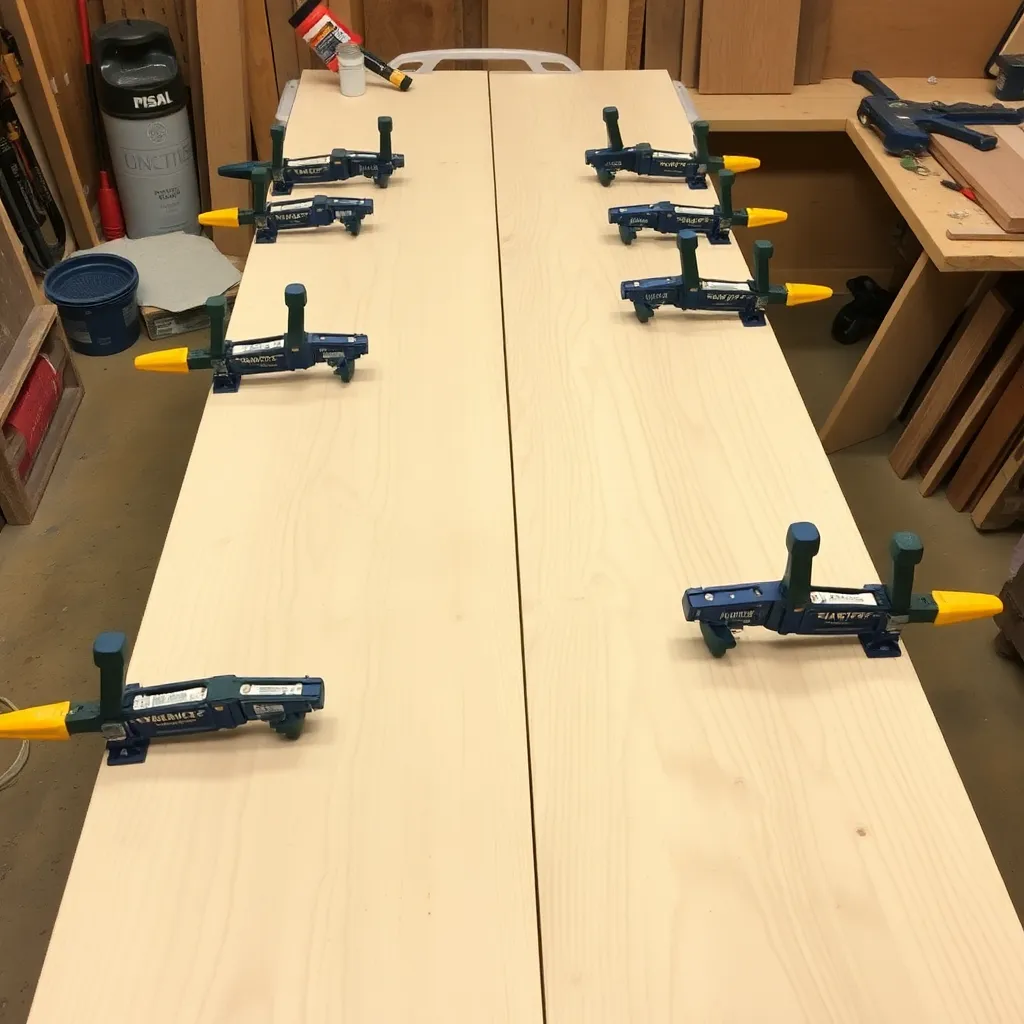
Goal: Laminate the two plywood panels and attach the top to the base.
Laminating the top:
- Apply wood glue to the face of one plywood panel using a brush or roller — even coverage, no bare spots
- Place the second panel on top, aligning all edges
- Clamp across the width every 8 inches — use at least 8 clamps for even pressure
- Allow the glue to cure for at least 4 hours (overnight is better) before removing clamps
Attaching the top:
The top should be attached so it can be replaced if it ever needs to be (a work surface that takes abuse will eventually need replacement). Drive 2-inch screws up through the top rails into the underside of the top panel, one screw every 12 inches. Do not glue the top to the base — this allows future removal.
Flush or overhang: the top can be flush with the outside of the legs (cleaner appearance) or overhang 2–3 inches on all sides (more clamping positions — you can hang a clamp off the edge). Overhang is more practical for a working bench.
Milestone: The completed top is flat (check with a straightedge), secure (no movement when pushed), and the top surface is at your target bench height.
Step 6: Add the Shelf and Finishing Details
Goal: Install the lower shelf and add any finishing features that make the bench more useful.
Lower shelf:
- Drop the shelf panel into the base, resting on the lower shelf rails
- The shelf can be simply dropped in place (not fastened) for easy removal when storing long material under the bench
- Or fasten with 2-inch screws from below for a permanent shelf
Planing stop: screw a 1×2 or 2×2 cleat to the end of the bench top, perpendicular to the bench length. This cleat is the planing stop — boards pushed against it while hand planing can’t slide away. Position it so the top of the cleat is flush with the bench surface (boards sit flat, not raised).
Tool tray (optional): rip a 1×3 board to 3 inches wide and screw it to the back edge of the bench top, creating a shallow tray for pencils, rules, and small tools. Traditional woodworking benches have a deeper tool tray, but a simple cleat works well.
Face vise (optional): a quick-release face vise can be added to the front left corner of the bench (for right-handed users). Mount the vise body to the front rail; the vise jaw mounts flush to the front edge of the bench top. This addition transforms a simple bench into a functional woodworking bench.
Milestone: Complete all finishing details and use the bench for a simple assembly project to identify any refinements needed.
DIY Workbench Plans FAQ
What size should my first workbench be?
For a one-car garage shop: 6 feet long × 24 inches deep. This fits along one wall with room for the shop to function around it. For a two-car garage or dedicated shop: 8 feet long × 24–30 inches deep — the extra length provides more assembly space and allows a second person to work alongside you. Depth (front-to-back): 24 inches is the traditional minimum; 30 inches is more practical for power tool work and accommodates full-depth drawers or cabinet storage below. Height: 34–36 inches for most people — calculate your personal knuckle height and target that dimension.
Can I build a workbench without a table saw?
Yes — this plan requires only a circular saw (or miter saw for crosscuts), a drill, and basic layout tools. All cuts are straight: crosscuts on the 4×4 and 2×4 lumber, and two rip cuts on the plywood (for the top and shelf panels). A circular saw with a straightedge guide handles the plywood cuts accurately. The complete bench can be built with the tools most beginners already own. Adding a miter saw makes the crosscuts faster and more consistent, but it’s not required.
Should I use 2×4 or 4×4 legs for a workbench?
4×4 legs are preferred for a workbench — they’re stiffer under lateral load (the bench won’t rack side-to-side when you push against it) and provide more meat for screwing the rails into. 2×4 legs work but require diagonal bracing or a plywood leg panel to resist racking. The material cost difference between 4×4 and 2×4 legs for a bench is approximately $10 — not worth compromising on. Use 4×4 legs for the bench base and 2×4s for the rails and shelf frame.
How do I make my workbench not wobble?
Four causes of bench wobble and their fixes: (1) unequal leg lengths — measure all four legs after cutting and trim the long ones; check that all four feet contact the floor and shim any short legs before trimming; (2) racking (the bench leans side-to-side) — add a plywood panel on one or both end frames, glued and screwed to the leg faces, which acts as a shear panel and eliminates racking; (3) top movement — check that the top is fastened to the rails with screws (not just resting) and add more screws if the top shifts; (4) floor unevenness — add adjustable feet (threaded inserts in the bottom of the legs with leveling feet from a hardware store) to compensate for uneven concrete floors.

“DIY woodworking enthusiast who started with zero experience and a YouTube tutorial.
I build simple, practical projects for my home and share free plans
so other beginners can skip the guesswork.If I can build it, you can too.”