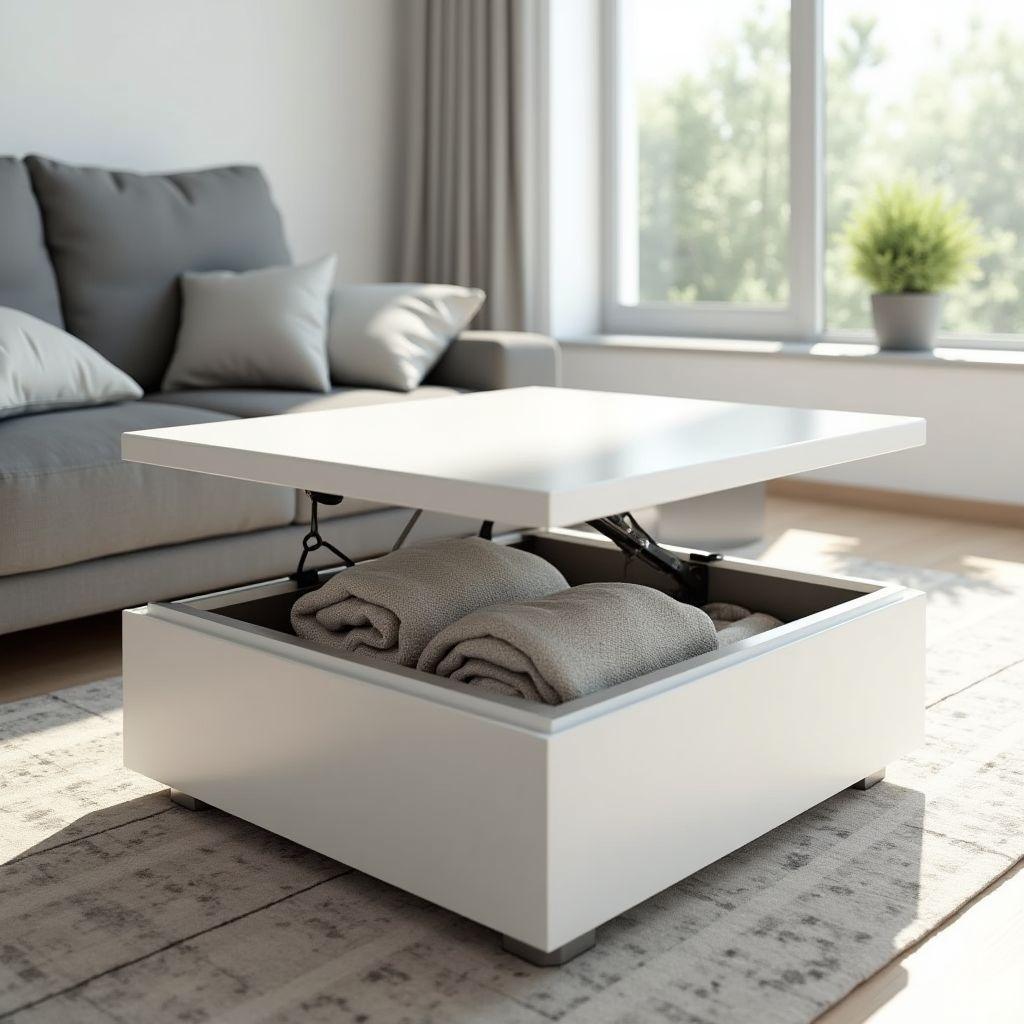
A standard coffee table wastes about 4.5 cubic feet of dead air under your sofa, and it forces you to hunch forward every time you open a laptop. A lift-top coffee table with storage fixes both problems at once. If you are browsing coffee table plans for a project that actually earns its floor space, this is the build to start with. Part of our coffee table furniture plans guide.
The top on this design pivots up and forward from 17 inches of resting height to a 28 to 30 inch working height, so you can eat, type, or play a board game from the couch. Underneath, the apron box hides everything from blankets to controllers.
This guide walks you through the whole build in the order that matters: selecting the right lift mechanism, designing the interior storage, cutting every part from a complete 2026 cut list, aligning the pivot so the top never binds, and finishing the plywood so it looks like furniture. Follow the steps and you can finish this in a weekend or two.
Step 1: Choose Your Lift Mechanism
Looking for more coffee table ideas?
This guide is part of our complete coffee table furniture plans series — compare all options by skill level, cost, and build time.
Want 16,000+ woodworking plans?
Ted’s Woodworking has step-by-step plans for every skill level. Browse Ted’s plans.

Pick your mechanism before you cut a single board. This one decision sets your budget, your interior clearance, and how heavy the top can be. Get it wrong and the top slams, racks, or refuses to stay open.
There are three types, and most competitors never compare them. Here is how they stack up in 2026.
| Mechanism | Price (pair) | Weight Capacity (top) | Smoothness | Best For |
|---|---|---|---|---|
| Spring-assist | $18-90 | 15-25 lbs | Good; jerky start; degrades 3-5 yrs | Budget builds, light plywood tops, first-timers |
| Gas-lift | $35-100 | 25-50 lbs | Smoothest; pressure-stable | Hardwood tops, daily/WFH use, furniture-quality feel |
| Scissor-arm | $45-80 | 40-60+ lbs | Smooth; most stable open | WFH/laptop use, heavy tops, precise builders |
Spring-assist is the cheapest and simplest to install. A coiled steel spring stores energy when you push the top down and releases it to help the lift. Budget ECLV pairs run $18 to $28 on Amazon. The Selby XPE287 at roughly $45 each is the industry standard for DIY builds. The tension is factory-set and degrades over 3 to 5 years, so never use spring-assist on a top over 25 lbs.
Gas-lift is the smoothest option. A sealed pneumatic cylinder, the same kind that raises an office chair, delivers steady force through the full range and never degrades. Expect $35 to $50 for an ECLV gas pair or $60 to $80 for a VIVO pair. One safety rule: never drill, puncture, or incinerate a gas cylinder.
Scissor-arm is the most stable at working height and can lock in place, which matters for laptop use. Rockler’s integrated scissor and spring unit runs $45 to $80 and demands the most precise install of the three.
Weight-matching rule: A 3/4″ birch 48″x24″ top weighs 16 to 18 lbs. The same top in solid oak weighs 22 to 28 lbs. Add a 5 lb buffer, then pick a mechanism rated at or above that number. Never underrate the mechanism.
Step 2: Design Your Storage

Now design the box interior. Aim for 6 inches of interior height at the absolute minimum for mechanism clearance, and 7 to 8 inches for storage you will actually use. That range fits a folded blanket, hardcover books, or a standard laptop.
You have three configurations to choose from.
| Config | Capacity / Layout | Best For | Build Complexity |
|---|---|---|---|
| Open box | ~4.5 cu ft single cavity | Blankets, board games, oversized items | Simplest |
| Center shelf (3.5″ from bottom) | Two zones (upper flat / lower bulky) | Remotes + books up, cables below | Moderate |
| Vertical dividers | 3 compartments | Organized by category/person | Most complex |
The open box is one cavity with nothing to build. It swallows about 4.5 cubic feet of blankets, board games, and oversized items. A center shelf set 3.5 inches from the bottom splits the space into two zones. Put remotes and books on top, cables and charging bricks below. Vertical dividers create three compartments so each category, or each family member, gets its own slot.
Design your storage after you choose the mechanism, not before. The lift hardware mounts in two corners of the apron and sweeps through an arc as the top rises. Any shelf or divider placed in that path will block the mechanism. Keep the storage out of the corners the hardware needs.
Step 3: Cut List and 2026 Material Costs
Here is every part for a 48″L x 24″W x 18″H table in 3/4″ birch plywood.
| Part | Qty | Dimensions | Material | 2026 Price |
|---|---|---|---|---|
| Tabletop | 1 | 3/4″ x 24″ x 48″ | 3/4″ birch plywood | from sheet |
| Apron long sides | 2 | 3/4″ x 8″ x 48″ | 3/4″ birch plywood | from sheet |
| Apron short ends | 2 | 3/4″ x 8″ x 22.5″ | 3/4″ birch plywood | from sheet |
| Box bottom | 1 | 1/4″ x 46.5″ x 22.5″ | 1/4″ birch plywood | $25-35 sheet |
| Center shelf (optional) | 1 | 3/4″ x 22.5″ x 46.5″ | 3/4″ birch plywood | from sheet |
| Vertical dividers (optional) | 2 | 3/4″ x 6.25″ x 22.5″ | 3/4″ birch plywood | from sheet |
| Legs (tapered) | 4 | 1.75″->1″ sq x 8″ | Poplar/pine 2×2 | $4-6/board |
| Face frame strips — long (optional) | 2 | 3/4″ x 1.5″ x 48″ | 1×2 poplar/pine | $4-7/board |
| Face frame strips — short (optional) | 2 | 3/4″ x 1.5″ x 24″ | 1×2 poplar/pine | included above |
Two 3/4″ birch 4×8 sheets at $55 to $75 each yield the top, apron, shelf, and dividers.
| Item | Price |
|---|---|
| Lift mechanism (spring/gas/scissor) | $18-100 |
| Pocket screws (1 lb, Kreg #8 x 1.5″) | $8-12 |
| Wood glue (Titebond II, 8 oz) | $5-8 |
| Brad nails (1″, 1000 ct) | $6-10 |
| Iron-on birch edge banding (25 ft) | $12-18 |
| Sandpaper assorted pack | $8-15 |
| Finish (stain + poly OR primer + paint) | $30-50 |
| Figure-8 top clips (8-pack) | $6-10 |
| Tier | Cost | What You Get |
|---|---|---|
| Budget | $120-160 | Pine plywood + ECLV spring pair + basic finish, no face frame |
| Mid | $200-280 | Birch plywood + Selby/Rockler mechanism + edge banding + stain & poly |
| Premium | $320-450 | Oak/hardwood top + premium gas-lift + face frame + pro finish |
Tools you need:
- Table saw or circular saw with a straightedge guide
- Kreg pocket-hole jig
- Drill/driver
- Brad nailer or hammer
- Clamps (bar and spring)
- Square and tape measure
- Torpedo level
- Household iron for edge banding
- Random-orbit sander
- Chisel or edge-band trimmer
If you plan to glue up a solid-wood top instead of using plywood, run the numbers through the board foot calculator first so you know the lumber cost before you buy.
For a complete library of printable lift-top coffee table plans, browse this recommended plan set.
Step 4: Cut and Build the Box

Cut all plywood parts to the cut-list dimensions and label each piece with a pencil as you go. Accurate cuts here keep every later step square, so use a table saw or a circular saw guided by a straightedge. Freehand cuts will telegraph through the whole build.
Assemble the apron box next. The two short ends fit between the two long sides. Drill pocket holes in the short ends, run a thin bead of Titebond II along each joint, and drive Kreg #8 x 1.5″ screws to pull the corners tight.
Check for square using the diagonal method. Measure corner to corner one way, then the other. When both diagonals match, the box is square. Clamp it there until the glue grabs.
Attach the box bottom. Set the 1/4″ plywood panel into a rabbet cut around the inside bottom edge, or pocket-screw it flush to the bottom of the apron. Either way it stiffens the whole frame.
Finish the box by adding the optional 1×2 face frame strips around the top opening. Glue and brad-nail them over the exposed plywood edges for a furniture-grade look. Clamp everything and let it cure for at least one hour before handling.
Step 5: Build and Attach the Top
Cut the top panel to 48″ x 24″ from 3/4″ birch plywood. For a premium build, glue up solid hardwood instead. The added weight has to match your mechanism rating from Step 1.
Apply iron-on real-wood edge banding to all four plywood edges. Set a household iron to medium-high with no steam, press it firmly along the banding for 3 to 4 seconds per inch to activate the hot-melt adhesive, then roll or press the banding while it is still warm. Let it cool 60 seconds, then trim it flush with a sharp chisel or an edge-band trimmer.
Sand the top through 120 then 150 grit before it goes on the mechanism. Do not permanently fix the top to the box yet. It attaches to the mechanism brackets in Step 6, and you need it loose for the dry-fit.
Step 6: Install the Lift Mechanism, the Critical Step

This is the section no competitor writes, and it is the number one reason DIY lift-tops bind, slam, or rack. The pivot has to be set relative to the top’s center of gravity and mounted symmetrically on both sides. Even 1/8″ of asymmetry between the left and right brackets is enough to cause binding.
The fix is a disciplined dry-fit. Never screw the brackets down until you have proven the alignment. Work through this sequence in order.
- Clamp the mechanism brackets to the apron without screws, using spring or bar clamps to hold each bracket temporarily.
- Set the top on the mechanisms and cycle it through the full range of motion 3 or 4 times, watching for binding or uneven rise.
- If it lifts smoothly and sits flush when down, mark all four bracket holes in pencil while the brackets are still clamped.
- Remove the top and brackets, then use a square to verify the marks sit at the same height on both sides.
- Shim the low side with a 1/16″ or 1/8″ hardboard shim if the marks are off, then re-clamp and re-test.
- Drill pilot holes at every mark using a bit 1/64″ smaller than the screw diameter to prevent splitting.
- Drive the screws partially, snug but not fully torqued.
- Re-attach the top and cycle it 5 times; if the motion is smooth, proceed.
- Final-tighten all screws and confirm the top is level when open and flush when closed with no corner gaps.
Skip this dry-fit and you will drill the brackets into the wrong spot permanently. The top then binds against the apron, and you have to re-drill and patch every hole. The same alignment principle applies to any lifting or folding top, so it is worth mastering here before you tackle a more advanced diy coffee table.
When you are done, the top should rise with 5 to 10 lbs of upward force on the front edge, sit level when open, and stay put for 60 seconds with no drift. Closed, it should sit completely flush with no gap at either corner.
Step 7: Add Your Storage Configuration
Install the storage you chose in Step 2 only after the mechanism is set and tested. That order guarantees nothing you add collides with the hardware.
For an open box, there is nothing to build. Sand the interior smooth and move on to finishing.
For a center shelf, cut the shelf to 44″ x 22.5″, then screw a 1×2 cleat to each long side 3.5 inches up from the box bottom. Rest the shelf on the cleats without glue so it stays removable when you need the full cavity.
For dividers, cut two vertical panels to the interior height and pocket-screw them from the box sides. Before you finish, cycle the top through its full range one more time and confirm the storage never contacts the mechanism.
Step 8: Sand and Finish

Sand the plywood in sequence: 120, then 150, then 220 grit. Wipe every surface with a tack cloth before you finish so no dust telegraphs through the coats.
For plywood, realwoodworkplans.com recommends paint. Brush one coat of shellac-based primer such as Zinsser BIN, especially on the exposed edges where water-based primer would fuzz, then apply 2 coats of satin latex or spray. Paint hides plywood grain and voids better than any other finish.
If you want a stained look, use gel stain, not oil stain. Oil stain soaks into plywood unevenly and telegraphs the grain, while gel stain sits on the surface and colors evenly. Follow it with 2 coats of oil-based polyurethane. A third option is to skip finishing headaches entirely by building with pre-finished veneer plywood.
Re-test the mechanism after the finish dries. The coats add weight and can shift the top’s balance, so a spring-assist unit may need you to confirm it still holds open cleanly.
5 Mistakes That Wreck Lift-Top Builds

- Underrating the mechanism. Symptom: the top slams or will not stay open. Fix: weigh the top, add a 5 lb buffer, and match a mechanism rated at or above that weight before you buy.
- Skipping the dry-fit. Symptom: the top binds after you have already screwed the brackets down permanently. Fix: always clamp and cycle the mechanism, mark, pilot-drill, and partial-screw before final tightening.
- Asymmetric bracket placement. Symptom: the top racks and twists when it opens and will not sit flush. Fix: measure from the box edge to each bracket identically on both sides, marking with a square.
- Using oil stain on plywood. Symptom: a blotchy finish with the grain telegraphing through. Fix: use gel stain or paint instead, with a conditioner if you must stain.
- Designing storage before choosing the mechanism. Symptom: a shelf or divider blocks the mechanism’s mounting zone. Fix: finalize and mount the mechanism first, then build the storage around it.
Frequently Asked Questions
What is a lift-top coffee table?
A lift-top coffee table has a top that pivots up and forward on a mechanical linkage, rising from a standard 17 to 18 inch coffee table height to a 28 to 30 inch working height. That lets you use it as a laptop desk, a dining surface, or a game table from the sofa without hunching forward. Most lift-top designs also build a storage box into the apron, which becomes accessible whenever the top is raised.
How does a lift-top coffee table mechanism work?
The top mounts to the apron frame through a set of brackets, either spring-assist, gas-lift, or scissor-arm. When you lift the front edge, the linkage raises the top and moves it forward at the same time, clearing the storage box below. A spring or gas cylinder supplies the assist so the top feels light to operate. On the way down, the mechanism guides the top back flat and flush against the apron.
How much does it cost to build a lift-top coffee table?
A budget build in pine plywood with a $20 to $25 Amazon spring mechanism runs $120 to $160 in materials. A mid-range build in birch plywood with a Selby or Rockler mechanism, edge banding, and stain costs $200 to $280. A premium build with a hardwood or oak plywood top and a gas-lift mechanism runs $320 to $450. These figures assume you already own basic tools. The lift mechanism is often the single largest hardware cost.
Which lift mechanism is best: spring, gas, or scissor?
It depends on your top weight and how you use the table. For a light 3/4″ plywood top under 25 lbs, spring-assist is fine and cheapest. For a hardwood top in the 25 to 50 lb range, gas-lift gives the smoothest, most consistent action. For WFH or laptop use where stability and a lock at working height matter, choose a scissor-arm. Never install a mechanism rated below your actual top weight.
How high does a lift-top coffee table lift?
Most standard mechanisms raise the top to 28 to 30 inches, comfortable laptop and dining height when you are seated on a sofa. The Rockler mechanism lifts 6.5 inches and travels 17 inches forward, while the Selby XPE287 lifts 10.75 inches. Total working height equals your closed table height plus the mechanism’s lift. Design the table so the open height lands in that 28 to 30 inch range for the intended user.
How do I stop my lift-top from slamming shut?
A top that slams down means the assist is too weak for its weight, either because the mechanism is underrated or the spring has worn out over the years. The fix is to swap in a mechanism rated for a higher weight. A top that slams up means it is too light for the assist. Switch to a gas-lift unit matched to the top’s weight. Lubricant does not fix slamming because it does not address the root cause.
How much weight can a lift-top coffee table hold?
The load you can place on the raised top depends on the mechanism rating. The Rockler lift-up mechanism supports 100 lbs of total load, top plus contents. Standard Amazon spring units typically handle 20 to 40 lbs on the raised surface. The apron storage box is a structural plywood frame and easily holds 50 to 100 lbs of stored items. Never stand on the raised top, since mechanisms are not rated for standing weight.
What can I store in a lift-top coffee table?
A 48″ x 24″ table with a 7 inch interior gives you about 4.5 cubic feet of storage. That covers throw blankets and pillows, books and tablets, remotes and gaming controllers, charging cables and power banks, board games, kids’ toys, and craft supplies. A 6 inch minimum interior fits most hardcover books flat and standard controllers. At 7 to 8 inches you can store a folded throw blanket or a standard laptop.
Related Articles

“DIY woodworking enthusiast who started with zero experience and a YouTube tutorial.
I build simple, practical projects for my home and share free plans
so other beginners can skip the guesswork.If I can build it, you can too.”