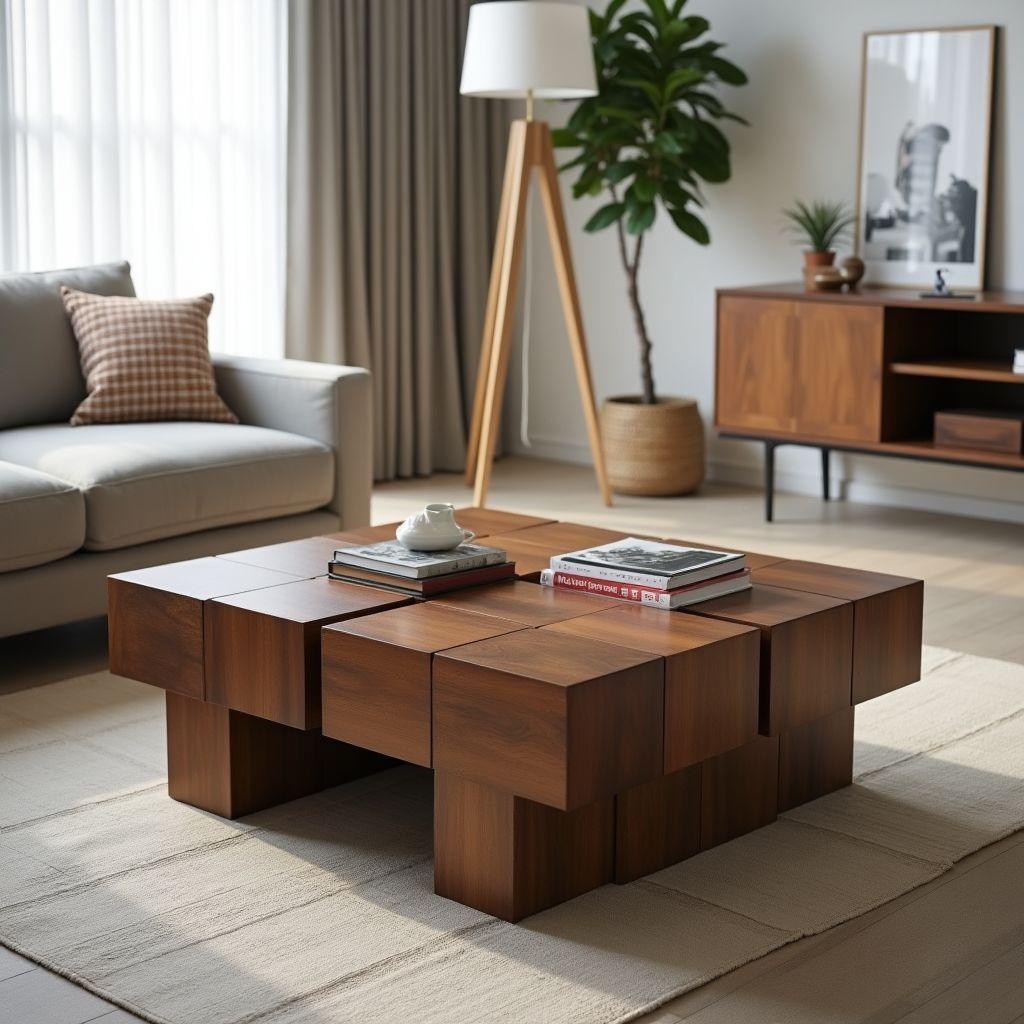

If you came looking for a flip-top table that stores an in-progress jigsaw puzzle, that is a different product entirely. This guide is part of our coffee table plans collection, and it covers a geometric interlocking coffee table whose base locks together with precision-cut wood joints and zero screws, bolts, or fasteners of any kind. Part of our coffee table furniture plans guide.
Think of it as joinery as sculpture. The base pieces slide into each other like a three-dimensional puzzle, and the weight of the tabletop is the only thing holding the whole structure in tension. Nothing hidden, nothing glued.
This is an intermediate-to-advanced build. You need to be comfortable at a router table and confident milling your own stock flat and square. In exchange, you get a conversation-piece table and a joint most woodworkers have never cut.
We are also giving you what most tutorials withhold: full slot dimensions, the wood species that keep a no-fastener joint working through the seasons, a complete free cut list, July 2026 material costs, and the finishing rules that make or break the entire project.
What Is a Puzzle Coffee Table?
Looking for more coffee table ideas?
This guide is part of our complete coffee table furniture plans series — compare all options by skill level, cost, and build time.
Want 16,000+ woodworking plans?
Ted’s Woodworking has step-by-step plans for every skill level. Browse Ted’s plans.

A puzzle coffee table is a table whose base components interlock through cross-lap (also called castle) joints. Each piece carries a slot cut exactly half the material thickness deep and cut to the width of the mating piece. Bring two pieces together at 90 degrees and they seat flush, locking into a rigid structure with no fasteners and no glue.
There are two designs worth building first. The T-base uses two identical boards that cross-lap at the center, and it is the simplest possible version, an ideal first build. The X-base uses four boards arranged in a pinwheel or X pattern for the most visually striking result. The joint geometry is identical in both. Only the number of slots changes.
The tabletop sits on the base as a separate glued panel. You can hold it with hidden figure-8 clips (which allow the top to move seasonally) or let its own weight do the work. Some designs integrate the top as a fifth interlocking piece.
For a standard room, build to 48 inches long by 24 inches wide by 18 inches tall. For a first build or a small space, scale down to 36 by 18 by 18. If you like geometric multi-piece furniture, our nesting tables coffee table build works from the same design instinct.
Step 1: Choose Your Wood

For a no-fastener joint, cross-grain wood movement is the single most important variable in the whole project. A slot cut at zero clearance in the dry air of winter can seize solid in humid summer. Species selection is not a cosmetic decision here. It is structural.
Choose a stable species, ideally quarter-sawn or rift-sawn, kiln-dried to 6 to 8 percent moisture content. Here is how the practical options compare:
| Species | Janka (lbf) | Movement | Price (July 2026) | Best For |
|---|---|---|---|---|
| Hard maple | 1,450 | 9.9% tangential / ~4.8% radial | $6–10/BF | Best beginner and value pick |
| QS white oak | 1,350 | ~5.6% radial (QS face) | $9–14/BF | Premium showpiece, ray fleck |
| Black cherry | 950 | 7.1% tangential / ~3.7% radial | $8–13/BF | Warmest tone, most stable |
| Baltic birch ply (void-free) | N/A | Near-zero seasonal movement | $55–70/sheet | Entry-level, dimensional stability |
| Poplar | 540 | 8.2% tangential | $3–5/BF | Practice only, too soft for joints |
Hard maple is the best pick for a first real build. It is widely available at hardwood dealers, machines cleanly, holds a crisp joint edge, takes a beautiful clear finish, and costs 30 to 40 percent less than quarter-sawn white oak. Quarter-sawn white oak is the premium choice when you want ray fleck figure on a portfolio piece.
Skip flat-sawn pine, standard poplar, and box-store birch plywood. Pine moves too much and is too soft to hold a durable joint face. Box-store birch ply hides internal voids that blow out at the slot edges. If you want the stability of plywood, use void-free Baltic birch only.
The movement math, worked out. A 6-inch flat-sawn hard maple board shifting from 6 percent MC in winter to 10 percent MC in summer moves about 0.060 inch, roughly 1.5mm across its width. At the 2-1/4 inch joint width, that is about 0.56mm of seasonal movement, enough to seize a joint you cut at zero clearance. Quarter-sawn stock moves radially at about half that rate: the same board moves closer to 0.75mm, and at the joint that drops to around 0.28mm, comfortably inside a 0.5mm tolerance. That difference is the difference between a joint that works and one that binds.
If this feels like a jump, build our simpler DIY coffee table first, then come back for the puzzle joints.
Step 2: The Geometry

This is the section that separates a puzzle table from a pile of firewood. Get the geometry right and everything else follows.
The 3:1 rule. The board width must be three times the board thickness. For 3/4-inch stock, rip your boards to 2-1/4 inches wide. This ratio gives the joint enough shoulder on each side of the slot to stay strong.
Slot depth equals exactly half the material thickness. For 3/4-inch stock, that means a 3/8-inch deep slot. For 1-1/2-inch stock, a 3/4-inch deep slot. This is non-negotiable. Half thickness on each mating piece is what lets the two faces seat perfectly flush when they interlock.
Slot width equals the full width of the mating board. With 3/4-inch stock ripped to 2-1/4 inches, every slot is cut 2-1/4 inches wide. The slot sandwiches the mating board so the two lock together at 90 degrees.
Here is the full worked example for standard 3/4-inch stock ripped to 2-1/4 inches wide:
| Spec | Value |
|---|---|
| Board thickness | 3/4″ |
| Board width (3:1 rule) | 2-1/4″ |
| Slot depth (half thickness) | 3/8″ |
| Slot width (mating board width) | 2-1/4″ |
| Clearance per joint face | 0.5–1mm |
Movement tolerance is the rule most builders get wrong. Build in 0.5 to 1mm of clearance per joint face. The field test is simple: the joint should slide together with hand or palm pressure only. If you need a mallet, the joint is too tight. Reduce the slot by 0.3 to 0.5mm and test again. A zero-tolerance joint cut in winter will not survive summer.
Router setup. Use a 1/2-inch or 3/4-inch spiral upcut carbide bit. Spiral upcut geometry pulls chips up and out of the slot and leaves far cleaner walls than a straight bit in hardwood. Run the router at 16,000 to 22,000 RPM with a slow, steady feed. No single 2-1/4-inch bit exists, so you cut the full slot width in multiple passes. Always cut a test piece in scrap of the same species before you touch final stock. A router table is strongly preferred over handheld for the repeatability this build demands.
Jig and layout. Clamp two fence pieces to the router table to define the slot width, and set a stop block for the slot length. Cut every slot in one setup so the pieces stay interchangeable. For layout, use a story stick and a marking gauge set to half the board thickness, and sandwich a scrap of the same stock between workpieces to center the slot perfectly.
Step 3: Cut List and 2026 Material Costs
Most sites paywall their cut list. Here is a complete free one for a 48 by 24 by 18 inch X-base puzzle coffee table.
Cut List (48″ x 24″ x 18″ X-base)
| Part | Qty | Material | Dimensions | Notes |
|---|---|---|---|---|
| Base component | 4 | 3/4″ hardwood | 2-1/4″ wide, cut to length | One 2-1/4″ x 3/8″ slot each, ~8 BF total |
| Tabletop panel | 1 | 3/4″–1″ hardwood | 48″ x 24″ | Glued-up panel, ~8 BF |
| Total solid wood | ~16 BF |
For the tabletop, 3/4 inch is the minimum for rigidity. At a 48-inch span, use 1-inch solid stock or 3/4-inch with a 1-1/2-inch edge-banded apron underneath to resist deflection. A thin top over that span will sag and telegraph every heavy object placed on it.
2026 Material Costs (July 2026 US retail)
| Tier | Wood + Finish | Total Estimate |
|---|---|---|
| Budget | Flat-sawn maple or void-free Baltic birch + Danish oil | $83–135 |
| Mid | Rift/QS hard maple or cherry + Osmo Polyx-Oil satin | $176–275 |
| Premium | QS white oak or QS cherry + Rubio Monocoat Oil Plus 2C | $264–384 |
Local hardwood prices swing 20 to 30 percent by region, so treat these as planning numbers, not quotes. One board foot (BF) equals 144 cubic inches of wood.
Want the fully measured plans for this table plus thousands of additional woodworking projects, all with cut lists and dimensions? Get the complete plans here. It is the fastest way to go from this guide to a shop full of ready-to-build projects.
Step 4: Mill and Prep Your Stock
Good joinery starts before the router ever spins. Rushed stock prep is where most puzzle tables fail.
Acclimate new stock in your shop for 48 to 72 hours before you mill it. Wood that arrives at a different moisture content than your shop will move after you cut the joints, and that ruins your clearances.
Joint and plane every board flat and square. Twisted or cupped stock produces joints that refuse to seat flush and a finished table that rocks on the floor. Check each board for twist with a winding stick before you cut any joinery, because twist cannot be corrected once the slots are in.
Rip each board to final width, 2-1/4 inches for 3/4-inch stock, and cut to length. Glue up the tabletop panel now so it can be flattened, sanded, and finished on the same schedule as the base components. Keeping everything on one timeline keeps the moisture content consistent across the whole table.
Step 5: Cut the Joints in Final Stock

Test pieces first, always. Cut 3 to 4 test slots in offcuts of the same species you are using for the table. Verify the depth reads exactly half thickness and the width matches the full mating-board width. Fit test with palm pressure only, and adjust the jig until it is right before you touch a single piece of final stock.
Cut all the base slots in one setup without moving the jig. This is the single guarantee that your pieces stay interchangeable and your slots line up. Move the jig mid-run and you will chase misaligned joints for the rest of the build.
Cut to depth in two passes, half depth first and then final depth. Two passes leaves cleaner slot walls in hardwood and reduces the load on the bit. Use stop blocks for slot-length repeatability from piece to piece.
If tearout shows up on the slot walls, confirm three things: that you are running a spiral upcut bit, that your RPM sits in the 16,000 to 22,000 range, and that your feed direction is correct. Rough walls add friction and make a joint harder to cycle, so it is worth stopping to fix.
Step 6: Dry-Fit and Stress Test
Assemble and disassemble the complete base three times with no finish on it. This is not optional. Three clean cycles are your proof that the joints are right before you commit to finishing.
For an X-base, the assembly sequence matters. Lay opposite pieces A and C down, drop B into A and D into C, then slide the two pairs together from opposite sides. A helper makes the final squeeze from all four sides much easier.
If a joint tightens after two or three cycles, that is fiber compression. Open the slot slightly with a light router pass or a sharp chisel pare, 0.2 to 0.3mm at a time. If a joint is sloppy with a visible gap, check for a measurement error, because a loose slot cannot be tightened. In that case, re-cut fresh stock. Only move to finishing once all three cycles feel consistent. The dry-fit also burnishes the joint faces and reveals any high spots.
Step 7: Finish the Components

The wrong finish will destroy a perfect joint, so this step deserves as much care as the joinery.
Never use polyurethane on puzzle joints. Each coat of oil-based poly dries to 2 to 3 mils of film. Three coats build 6 to 9 mils, about 0.006 to 0.009 inch, per surface. Apply that to both faces of an interlocking slot and you add up to 0.018 inch of lost clearance, more than enough to make a previously flawless joint impossible to assemble. Builders ruin finished projects this way constantly. Do not join their ranks.
Use penetrating finishes only. They soak into the wood instead of building a film, so you can finish the joint faces without masking anything.
- Rubio Monocoat Oil Plus 2C is the premium choice. It bonds molecularly in a single coat with zero film buildup, and the grain and figure read through clearly. It runs $95 to 130 per liter, and one liter covers roughly 500 square feet, far more than one table needs.
- Osmo Polyx-Oil is the strong mid-tier pick. It is a two-coat hardwax oil with a warmer amber tone and a more forgiving application, $60 to 90 per liter, and satin is the most popular sheen.
- Danish oil is the budget option, fine for a practice build but less durable and lower in clarity than the hardwax oils.
Finish every component before assembly. That is the whole advantage of a penetrating finish: no masking, no film on the joint faces. Finish each base piece and the tabletop separately and let them cure fully, 24 to 48 hours for Rubio, 12 to 24 hours per coat for Osmo, then assemble.
Prep sequence for hardwood. Sand 120, then 150, then 180. Raise the grain by wiping the surface with a damp cloth and letting it dry for about 30 minutes. Knock the raised fibers down with 220 grit, wipe with a tack cloth, then apply your finish. Satin is the professional standard for a geometric showpiece because it reads the grain without the plastic look of gloss. Do not oversand the joint faces. Crisp, flat slot walls matter far more than a mirror-smooth surface.
Common Mistakes to Avoid
Every one of these has ended a puzzle table build. Avoid them and you are most of the way home.
- Cutting the joint to zero clearance. It assembles fine in a cool, dry winter shop and seizes in summer humidity. Build in 0.5 to 1mm of clearance per face and aim for hand-pressure assembly, never mallet-required.
- Choosing the wrong species. Flat-sawn pine, poplar, and flat-sawn oak move too much or crush too easily, so the joint cycles between binding and sloppy and the slot walls can split. Use quarter-sawn or rift-sawn stable hardwood, or void-free Baltic birch.
- Finishing with polyurethane. Film builds up on the joint faces and prevents assembly. Use a penetrating finish, or mask every joint face completely before applying any film finish.
- Skipping the three-cycle dry-fit. Discover a joint problem after finishing and the fix means stripping and re-cutting. Cycle the complete base three times before you finish anything.
- Running a straight-flute bit in hardwood. It tears out the slot walls, and rough walls increase friction. Use a spiral upcut carbide bit for clean cuts and less heat.
- Moving the router jig between pieces. Slots stop lining up and your pieces are no longer interchangeable. Cut every slot in one setup with stop blocks.
- Not checking stock for twist or cup. A twisted base piece gives you a table that rocks and cannot be fully corrected. Flatten every board and check it with a winding stick before cutting joinery.
Frequently Asked Questions
What is a puzzle coffee table?
In woodworking, it is a table whose base components interlock through geometric cross-lap or castle joints, with no screws, bolts, or glue. The pieces slide together like a 3D puzzle, and the weight of the tabletop locks everything in place. Note that the term also refers to a flip-top storage table for jigsaw puzzles, which is a completely different product.
How hard is it to build a puzzle coffee table?
This is an intermediate project. You need to be comfortable at a router table, able to read a story stick layout, and confident milling stock flat. A 2-piece T-base is a weekend build. An X-base runs 2 to 3 days. The precision required is higher than basic box joints but lower than hand-cut dovetails.
What is a puzzle joint in woodworking?
A puzzle joint, also called a castle or cross-lap joint, is a slot-in-slot interlock. Each component has a slot cut exactly half the material thickness deep and exactly as wide as the mating piece. Brought together at 90 degrees, the two pieces seat flush and lock.
What is the best wood for interlocking joints?
Quarter-sawn white oak is the premium choice, hard maple is the best value and the best pick for a first build, and black cherry offers the warmest tone with the most stable movement. The property that matters is low cross-grain movement. Avoid flat-sawn pine, standard poplar, and box-store birch plywood.
How do you make a puzzle joint coffee table?
The core process runs eight steps: select stable hardwood and mill it flat, rip boards to three times their thickness (2-1/4 inches for 3/4-inch stock), set up a router table with a spiral upcut bit and a slot jig, cut slots to half the board thickness deep and the full mating-board width, test the fit in scrap first, dry-fit the base three times, apply a penetrating oil finish, then assemble. No fasteners needed.
Which finish should I use on a puzzle coffee table?
Use a penetrating finish only, never a film finish like polyurethane. Rubio Monocoat Oil Plus 2C is the premium single-coat pick, Osmo Polyx-Oil satin is the forgiving mid-tier choice, and Danish oil works for a budget or practice build. A penetrating finish lets you finish the joint faces without masking, because it leaves no film to steal your clearance.
How long does it take to build a puzzle coffee table?
A 2-piece T-base is achievable in a weekend once your stock is milled. A 4-piece X-base with a glued tabletop panel takes 2 to 3 days, mostly split between careful joinery and finish cure times. Budget extra time for wood to acclimate in your shop before you mill it.
What does a puzzle coffee table cost to build?
Expect roughly $83 to 135 for a budget build, $176 to 275 for a mid-tier hard maple or cherry build, and $264 to 384 for a premium quarter-sawn white oak build with Rubio Monocoat, in July 2026 US retail. Local hardwood prices swing 20 to 30 percent by region, so treat these as planning numbers.
Can you use plywood for a puzzle joint coffee table?
Yes, but only void-free Baltic birch. Standard box-store birch ply has internal voids that blow out at the slot edges and ruin the joint. Baltic birch gives you near-zero seasonal movement, so joint clearances stay stable year-round. The tradeoff is a layered edge instead of solid-wood grain, which suits a modern or industrial look.
What size should a puzzle coffee table be?
Build to 18 inches tall to match standard sofa seat height. For a standard room, go 48 inches long by 24 inches wide. For a first build or a small space, scale down to 36 by 18. Height stays at 18 inches either way.
Do puzzle joints need glue?
No. The joint geometry and the weight of the tabletop hold the structure together, which is the whole point of a no-fastener build. Adding glue defeats the disassemblable design and can trap a joint when the wood moves seasonally, forcing the slot faces against each other with nowhere to go.
Related Articles

“DIY woodworking enthusiast who started with zero experience and a YouTube tutorial.
I build simple, practical projects for my home and share free plans
so other beginners can skip the guesswork.If I can build it, you can too.”