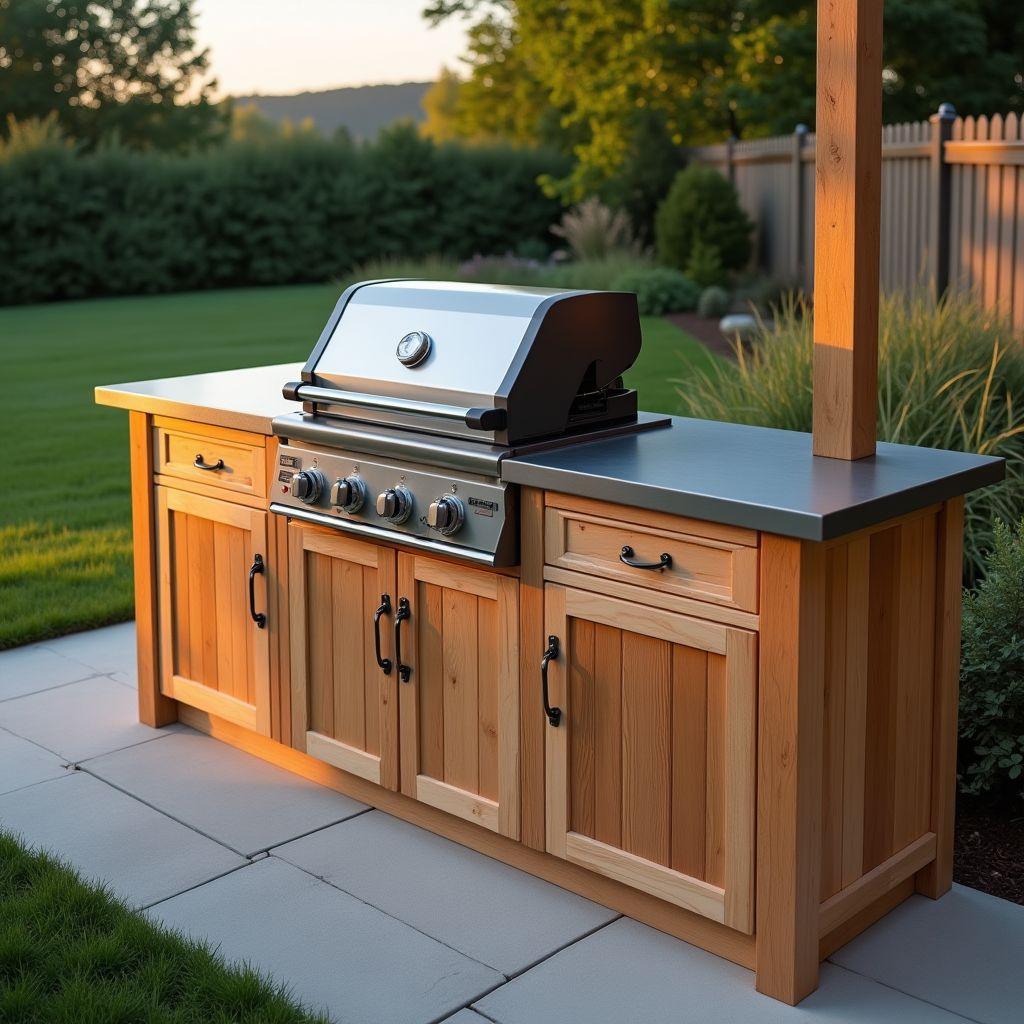
Picture a round kettle wobbling on a folding table, no room for a plate, and the propane tank sitting in the dirt. Your grill has no home. These outdoor grill station table plans are part of our broader collection of dining and outdoor table plans, and they fix every one of those problems with a single weekend build.
This guide gives you the complete blueprint. You will size the station to your exact grill, choose between a mobile and a fixed base, set safe clearances, pick the right wood and a heat-resistant top, design proper propane storage, and follow a full cut list through to the finish coat.
The build is beginner to intermediate. There is no advanced joinery here, just pocket holes, straight cuts, and careful measuring. Most people finish in one weekend.
Budget on $300 to $700 in materials depending on your spec. A pressure-treated frame with concrete pavers lands near the bottom. A premium cedar build with a stainless top climbs toward the top. Either way, you end up with a station built around your grill instead of the other way around.
Step 1: Measure Your Grill and Size the Station

Measure your actual grill, not the spec sheet. Handles, side shelves, and bumpers add 6 to 8 inches of depth that most spec sheets ignore, and that is the single most common sizing error people make.
Measure width, depth, and height with the lid both closed and open. Lid clearance matters later if you ever add a pergola overhead, so record the open height now.
Now apply the formula. Station length equals grill width plus 12 to 18 inches on each side. Twelve inches is the functional minimum, 18 inches is preferred for serious cooks, and 24 inches of uninterrupted counter is ideal for real food prep.
Station depth equals grill depth plus 7 inches for handle clearance, rounded up. Height lands between 34 and 36 inches. Choose 34 inches if you want extra lid clearance under a cover.
Here is the worked example that drives every cut list in this guide. Take a 36-inch 3-burner grill, add 14 inches on the left and 14 inches on the right, and you get a 64-inch station, roughly 6 feet long. Set it 30 inches deep and 36 inches tall.
| Grill type | Grill width | Recommended station length | Station depth |
|---|---|---|---|
| 2-burner | 26-30″ | ~5 ft (grill + 12″ each side) | ~26-28″ |
| 3-burner (worked example) | 36-42″ | ~6 ft (grill + 14″ each side) | ~30″ |
| 4-burner | 48-52″ | ~7-8 ft (grill + full prep/side burner) | ~32″ |
| 22-26″ kettle | 22-26″ dia. | ~4-5 ft (grill sits beside station) | ~26″ |
Step 2: Choose Mobile or Fixed

This decision changes your base hardware, so make it before you buy lumber. A mobile station rolls where you need it. A fixed station bolts down and never moves.
Mobile stations ride on 4 locking swivel casters rated 250 to 400 pounds each. That gives you 1,000 to 1,600 pounds of total capacity for a roughly 200-pound station plus a heavy grill. Choose polyurethane wheels for outdoor surfaces. Mobile is best for renters, small or apartment decks, seasonal winter storage, and chasing sun or shade.
Watch the trade-offs. Casters sink into soft grass, you must lock all 4 before grilling, and small wheels struggle across deck-board gaps.
Fixed stations anchor with concrete anchor bolts through the base frame on a slab, or with 3 to 4 inch structural screws driven into deck joists. Fixed is best for heavy 4-burner grills, frequent entertainers, and permanent patios.
The catch is permanence. You cannot roll a fixed station out for cleaning or a party, and it is harder to level on a sloped surface. Check your deck load capacity first. Most decks carry 40 to 50 psf, and a station plus grill adds roughly 300 to 500 pounds.
| Factor | Mobile (casters) | Fixed (anchored) |
|---|---|---|
| Best for | Renters, small decks, seasonal use | Permanent patios, heavy grills |
| Base hardware | 4 locking swivel casters (250-400 lb ea.) | Concrete anchor bolts or structural screws |
| Stability | Good when locked | Maximum |
| Movable later | Yes | No |
Step 3: Plan Your Safety Clearances
This is the step the popular plans skip, and getting it wrong makes your location unsafe. Set your clearances before you commit to a spot.
Per NFPA 1, keep the grill a minimum of 10 feet from the house structure, siding, eaves, and overhangs. Keep it at least 36 inches (3 feet) from a wooden fence or any combustible structure.
Overhead matters too. Maintain at least 36 inches of clearance from any combustible pergola, awning, or soffit. Only build under a metal pergola or one with more than 36 inches of overhead clearance.
There is a practical consequence here. Orient the station so the grill side faces away from the house. That single choice decides which end you build the propane cabinet on, so settle it now. Plan this alongside the rest of your layout using our outdoor patio dining table plans so the grill and the seating do not crowd each other.
The manufacturer clearance specs on your grill label always take precedence. NFPA applies when the manufacturer is silent. Verify your local codes before buying lumber, because some municipalities are stricter.
Step 4: Choose Your Wood
Never use untreated pine outdoors. It rots within 1 to 2 seasons, and it is the mistake that sinks more DIY grill stations than any other.
realwoodworkplans.com recommends a hybrid: pressure-treated pine for the structural frame, meaning the legs, cross-members, and lower shelf, paired with cedar for every visible and food-adjacent surface. That combination gives you the best balance of value, longevity, and food safety.
Cedar is naturally rot and insect resistant, carries no chemical concerns near food, stays lightweight, and does not corrode fasteners. It costs 30 to 50 percent more than pressure-treated pine.
Pressure-treated pine is the cheapest structural option, very strong, and available everywhere. ACQ treatment resists rot for 40-plus years. It demands ACQ-compatible fasteners, and you must never use it as a food prep surface or burn it, because it releases toxic copper compounds.
Redwood offers superior rot resistance and dimensional stability, but it is the most expensive at $2.50 to $5.00 per board foot and is mostly a Western-US option.
The food-safe rule is simple. ACQ pressure-treated wood is fine for framing and benches, but never as a cutting or direct food-contact surface. Use cedar or tile there. Price your exact list with our board foot calculator before you head to the store.
| Species | Cost (per board foot) | Rot resistance | Food-safe for prep surfaces? | Best use |
|---|---|---|---|---|
| Western red cedar | $1.50-3.50 | Excellent (natural) | Yes | Visible + prep surfaces |
| PT pine (ACQ) | $0.90-1.60 | Excellent (treated) | No | Structural frame only |
| Redwood | $2.50-5.00 | Excellent (natural) | Yes | Premium visible surfaces |
| Untreated pine | Lowest | Poor | N/A | Avoid outdoors |
Step 5: Choose Your Top Material

The area near the grill needs a heat-resistant top. Combustible wood slats across the whole top, as seen in many popular plans, are a fire risk when the grill is integrated into the station. Match the top to how close it sits to the flame.
Concrete pavers are the budget champion. They handle up to 1,200°F, cost $30 to $80 for a 6-foot top, and dry-lay on plywood with no adhesive. They are heavy at 18 to 22 pounds per paver, adding 100 to 150 pounds, and they can thermal-shock crack if cold water hits a hot surface.
Tile on cement board runs $80 to $180. You screw non-combustible board to the substrate, set tile with exterior thinset, and get a granite or slate look that wipes clean. The trade-offs are more labor and grout that can crack in freeze-thaw cycles.
For a premium build, use 16-gauge 304 stainless, or 316 within 10 miles of the coast. Expect $150 to $400 for a DIY sheet. It is food-safe, lightweight, and the easiest to clean, with the cleanest pro look. It is the priciest option and shows scratches, so choose a brushed #4 finish.
Wood slats are acceptable only on the prep counter, 24 inches or more from the grill opening, never adjacent to or beneath the grill box. Pick your top by budget tier and match it to the wood choices from Step 4.
| Material | Heat resistance | Cost | Weight added | Best for |
|---|---|---|---|---|
| Concrete pavers | Up to 1,200°F | $30-80 | 100-150 lbs | Budget builds |
| Tile on cement board | 400°F+ routine | $80-180 | 80-120 lbs | Custom look, mid-range |
| 16-ga 304 stainless | Excellent | $150-400 | Light | Premium, food-safe, easy clean |
| Cedar slats | Combustible | Low | Light | Prep area only, 24″+ from grill |
Step 6: Plan Propane Tank Storage

No competitor plan covers this, which makes it your biggest differentiator and a genuine safety issue. Design the propane compartment with the same care as the frame.
A standard 20-pound tank measures 12.5 inches in diameter and about 18 inches tall, and weighs 37 pounds full. Store it upright so the relief valve never contacts liquid propane.
Build a slatted side cabinet. Give it a minimum interior of 14 inches wide by 14 inches deep to clear the tank with wiggle room, and 22 inches of interior height for the tank plus its valve and connector.
Use 1×4 cedar slats with 1-inch gaps on at least 2 sides. Propane is heavier than air and sinks, so bottom venting is critical. Leave the bottom open or use metal mesh, and never build a solid, sealed enclosure.
Position the cabinet beside the grill, never below it. If the tank sits side-by-side with the grill, install a non-combustible barrier, a plenum wall, between them.
Size the access opening at least 18 inches wide by 22 inches tall so you can change the tank easily. NFPA 58 governs propane storage, so verify your design with your local AHJ before you build.
Step 7: Cut List and 2026 Material Costs

Here is the concrete cut list for the worked 6-foot station: 64 inches long, 30 inches deep, 36 inches tall, with a pressure-treated pine frame and cedar top surfaces.
For the frame, cut 4 legs from 4×4 pressure-treated pine to about 35 inches. Cut the upper aprons from 2×4 pressure-treated pine: two 57-inch long rails and two 23-inch end rails. Mirror those dimensions for the lower shelf frame, and add cross stretchers for rigidity.
For the top, build a cedar top-frame perimeter with cedar slat supports. Add a 3/4-inch plywood substrate if you are running pavers or tile. Cut cedar 1×4 boards for the propane cabinet slats.
For hardware, use hot-dipped galvanized or stainless exterior screws: 2.5 inch for frame joints, 3 inch for leg-to-frame connections, and 1.5 inch for top attachment. Use ACQ-compatible fasteners with the pressure-treated pine, and Kreg Blue-Kote pocket screws for the cedar joinery.
On 2026 pricing, budget $6 to $10 for a pressure-treated 2x4x8, $8 to $16 for a cedar 2x4x8, and $14 to $22 for a cedar 2x6x8. Add $40 to $80 for proper exterior fasteners and hinges.
A full printable cut list with dimensioned drawings saves trips to the store. For a complete library of printable, dimensioned grill station and outdoor project plans, see this recommended plan set.
| Tier | Wood + top | Total materials |
|---|---|---|
| Budget | PT pine frame + concrete pavers | $300-450 |
| Mid-range | Cedar frame + tile on cement board | $500-700 |
| Premium | Cedar + 16-ga stainless top | $700-1,200 |
Step 8: Build the Frame
A square, level foundation is everything. If the frame is off, the grill can bind or the top can rock. Follow the sequence in order.
- Drill pocket holes with the Kreg jig in the aprons and shelf rails.
- Join the legs and upper aprons into the base rectangle.
- Check that the diagonals are equal for square before driving screws fully home.
- Add the lower shelf frame and the cross stretchers.
- Build and attach the top frame.
- Confirm the top is flat and level across its full length with a 4-foot level.
Pre-drill every joint in pressure-treated pine to prevent splitting. Wear gloves and a dust mask when cutting it, because the copper dust is an irritant.
Now add the base hardware you chose in Step 2. Bolt on the 4 locking casters for a mobile build, or pre-drill the anchor-bolt holes and set the structural screws for a fixed install.
The most common error here is attaching the top before the frame is confirmed level. Do not skip that check. A frame that is out of level will haunt every later step, from the top install to the way the grill sits.
Step 9: Install the Top and Finish

Install the top based on the material you chose in Step 5.
For pavers, dry-lay them on the 3/4-inch plywood substrate, then sweep polymeric sand into the joints. For tile, screw HardieBacker cement board to the plywood, set the tile in exterior thinset, cure 24 to 48 hours, then grout with unsanded grout. For stainless, screw down the pre-cut sheet and finish the edges.
Seal all wood, even cedar, with 2 to 3 coats of a penetrating exterior oil like Penofin or TWP before first use. Sealing extends the station’s lifespan from 2 or 3 years to 10 or 15.
Run this first-use checklist before you light the grill:
- All 4 casters locked, or all anchors tight
- Station 10 feet from the house and 36 inches from any fence or overhead combustible
- Propane cabinet venting clear and the tank upright
- No wood within 24 inches of the grill opening
- Top confirmed level so the grill sits flat
Work through every item. Each one traces back to a decision you made earlier in the build, and together they turn a finished frame into a station you can trust.
Frequently Asked Questions
How do I size my grill station to fit my grill?
Measure your actual grill width, not the spec sheet, then add 12 to 18 inches of prep space on each side for your minimum station length. Add 6 to 8 inches to the depth for handle clearance. A 36-inch 3-burner grill needs a 64-inch station, about 5.3 feet, which this guide rounds to the 6-foot build.
Can I store my propane tank inside the grill station cabinet?
Yes, but only in a ventilated slatted compartment with 1-inch gaps between boards on at least 2 sides. Never use a sealed cabinet, because propane sinks and needs to escape. Position the tank beside the grill, never below it, with a non-combustible barrier between them.
How far does a grill station need to be from my house?
Per NFPA 1, keep the grill at least 10 feet from your house siding, eaves, and overhangs. Keep it at least 36 inches from a wooden fence or any combustible structure. Always check your local codes, since some municipalities are stricter than the national standard.
Is pressure-treated wood safe to use near food?
Modern ACQ-treated pressure-treated pine is safe for structural frames, legs, and shelves, but not for food prep surfaces or cutting boards. Never burn pressure-treated wood, because it releases toxic copper compounds. Use cedar or tile for any surface that contacts food directly.
What is the best wood for an outdoor grill station?
Cedar is the best all-around choice, being naturally rot-resistant, food-safe, and good-looking. To save money, use pressure-treated pine for the structural frame and cedar for visible and food-adjacent surfaces. Avoid untreated pine outdoors, because it will rot within 1 to 2 seasons.
What countertop material should I use for a grill station?
Near the grill, use concrete pavers, the cheapest and most heat-resistant choice, or tile on cement board. Pavers at $30 to $80 are unbeatable on a budget. For a premium look, use 16-gauge 304 stainless at $150 to $400. Never place combustible wood adjacent to the grill.
Should I use casters or fixed legs?
Use locking casters if you rent, want seasonal storage, or need flexibility to reposition. Choose fixed legs for a permanent patio, a heavy 4-burner grill, or a deck installation. If using casters, select 4 locking swivel casters rated 250 to 400 pounds each for ample capacity.
How much does it cost to build a 6-foot outdoor grill station?
A budget build with pressure-treated pine and concrete pavers runs $300 to $450 in materials. A mid-range cedar frame with a tile top runs $500 to $700. A premium cedar build with a stainless top runs $700 to $1,200. Add $40 to $80 for proper exterior hardware.
How long does it take to build a grill station?
Most intermediate builders complete a basic 6-foot grill station in one weekend, roughly 8 to 16 hours. Add extra time if you tile the top, since the thinset needs 24 to 48 hours to cure before grouting. Simple portable carts can be finished in a single day, about 6 to 8 hours.
What screws should I use for outdoor grill station construction?
Use hot-dipped galvanized or stainless steel screws rated for exterior or ACQ-compatible use. Never use zinc or drywall screws, which corrode rapidly outdoors and fail fast with pressure-treated lumber. Use 2.5-inch screws for frame joints and 3-inch screws for leg connections.

“DIY woodworking enthusiast who started with zero experience and a YouTube tutorial.
I build simple, practical projects for my home and share free plans
so other beginners can skip the guesswork.If I can build it, you can too.”