Part of: Wood Finishing Techniques →
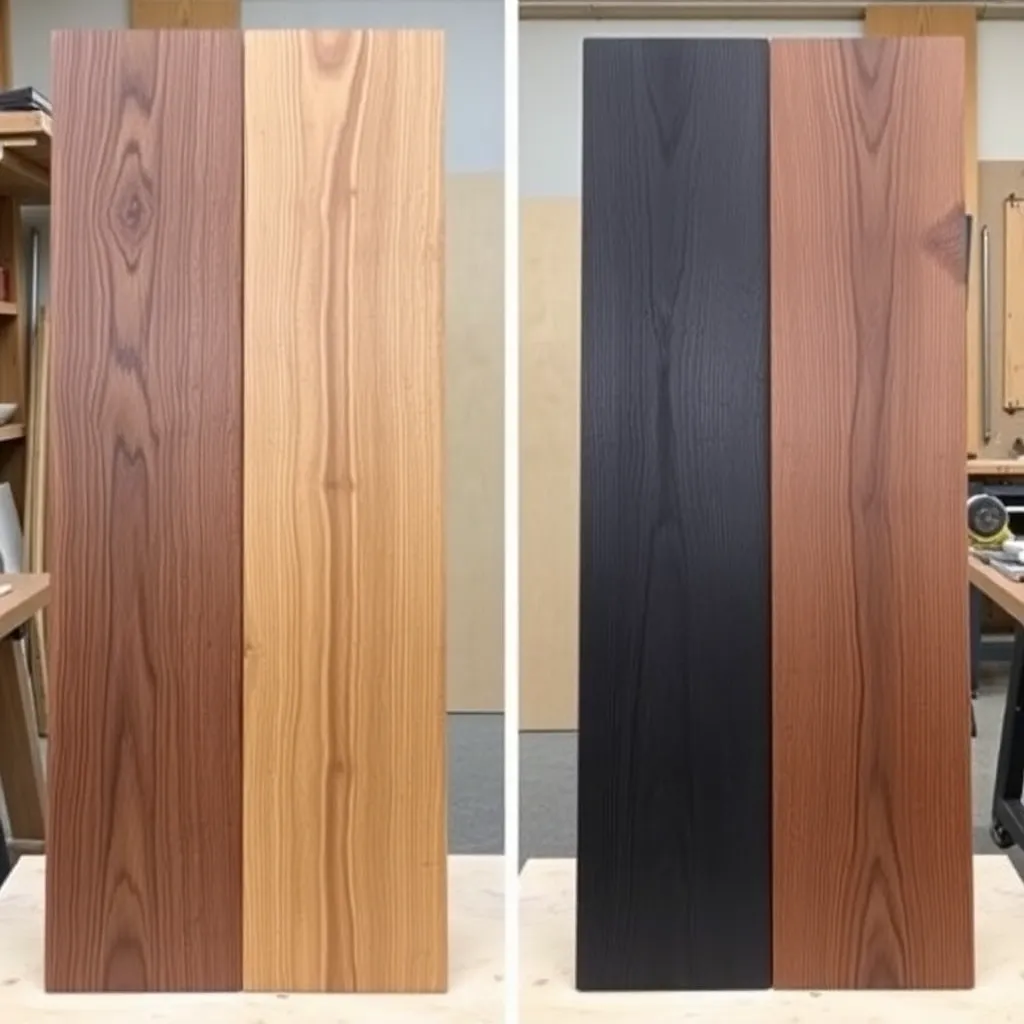
Darkening wood without painting it keeps the grain visible while adding depth, age, or drama to a project. The method you choose depends on how dark you want to go, how much grain you want to retain, what species you’re working with, and how permanent the result needs to be. From a simple second coat of oil stain to ammonia fuming that turns oak the color of aged leather in 24 hours, each method produces a distinct character — some are reversible, some aren’t, and some only work on specific species.
Ted’s Woodworking has 16,000+ plans with finishing guides for every wood species and project type. Browse Ted’s plans →
Step 1: Use Dark Wood Stain for Controlled, Predictable Results
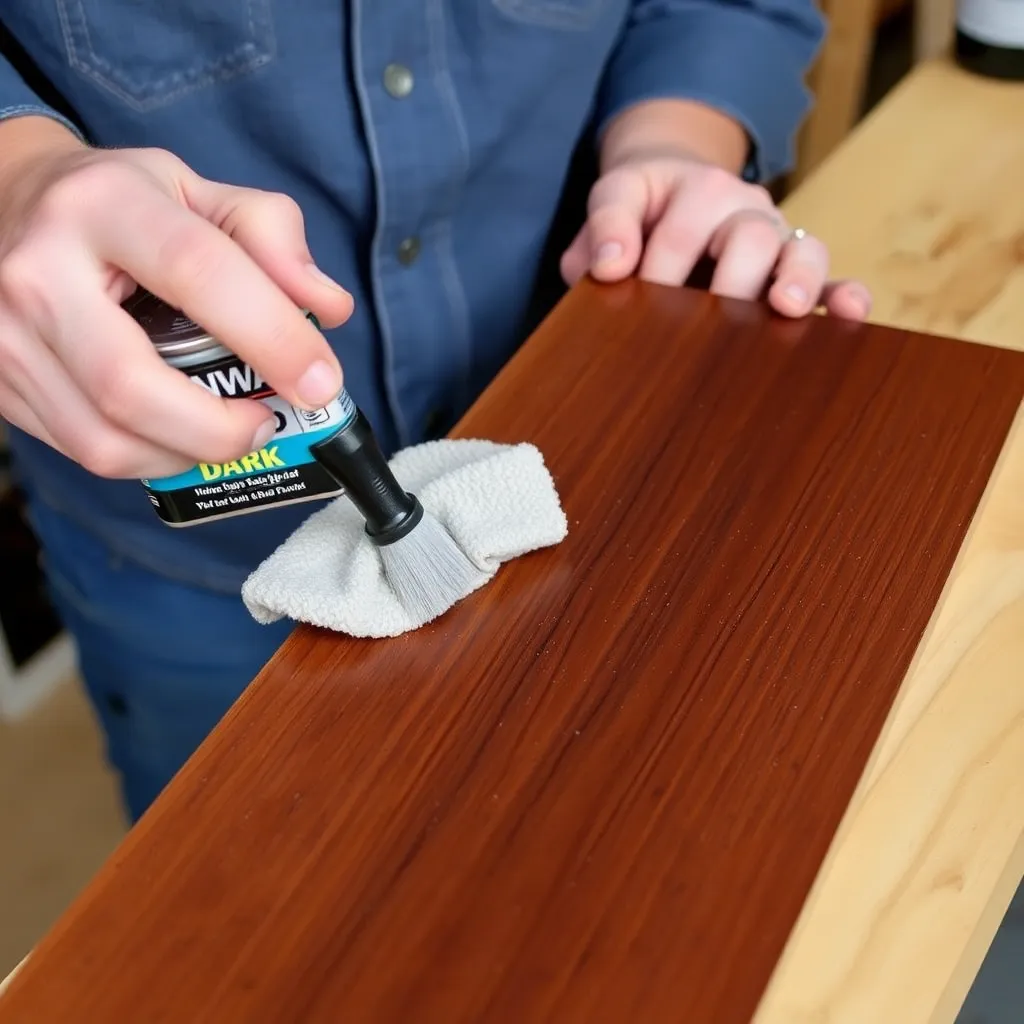
Goal: Apply a dark oil-based or gel stain to achieve consistent darkening on any species.
Dark stain is the most predictable method — the color on the can lid is close to what you’ll get on the wood, it’s available at any hardware store, and the technique is the same as any other stain application. The trade-off: dark stain is pigment-based and sits in the wood’s pores; it can slightly obscure the grain compared to methods that chemically react with the wood.
Recommended dark stains:
- Minwax Dark Walnut (2716W): warm brown-black, one of the most popular finishing colors — works well on pine, poplar, and oak
- Minwax Ebony (2718): near-black with a slight warm undertone — the darkest standard stain color available
- General Finishes Espresso: rich dark brown with excellent color consistency across species
- Old Masters Dark Walnut: richer color than Minwax equivalents, higher pigment concentration
Application for maximum darkness:
- Sand the wood to 120–150 grit (don’t sand finer — finer sanding closes pores and reduces stain penetration)
- Apply stain with a rag or brush, flooding the surface
- Allow to penetrate 5–10 minutes (longer penetration = darker result)
- Wipe off minimal excess — on the first coat, wipe lightly; leaving more stain produces a darker result
- Allow to dry 24 hours
- Apply a second coat for additional depth
- Topcoat with oil-based polyurethane to protect the color
- Boiled linseed oil (BLO): the most darkening of common oils. Adds a warm amber-yellow tone as it penetrates; repeating multiple coats builds a rich amber depth. Dries slowly (24–48 hours between coats). Yellows significantly over time. Best for: tool handles, exterior wood, reclaimed wood where some yellowing adds character.
- Danish oil: oil+varnish blend that darkens less dramatically than BLO but builds more protection. Good balance of darkening effect and practical protection.
- Teak oil: formulated for oily exotic hardwoods; penetrates well and darkens moderately. Useful for teak, rosewood, cocobolo.
- Sand to 150 grit
- Apply oil liberally with a cloth
- Allow 20–30 minutes for full penetration
- Wipe off all excess
- Allow to cure 24–48 hours
- Repeat 3–5 coats — each coat deepens the color incrementally
- The final coat can be left as the finish or topcoated
- Sand the wood to final grit (150–180); the fumed surface is the final surface — no more sanding after fuming or the color will be uneven
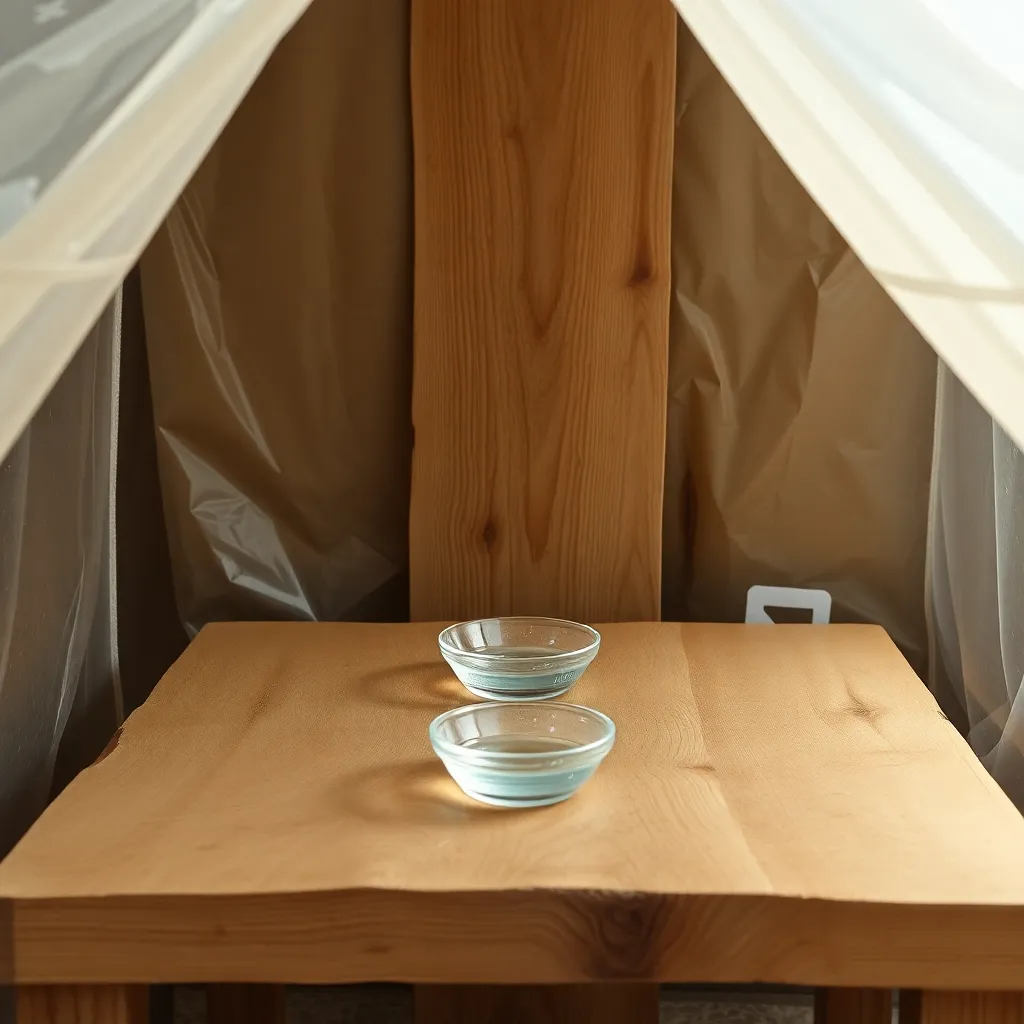
- Set up a sealed tent: plastic sheeting and tape over a frame large enough to contain the project, or a large plastic tub with a lid
- Place the project in the tent
- Pour household ammonia (26% concentration, not the 3% household cleaner — find 26% at farm supply or hardware stores for maximum effect) into flat saucers inside the tent
- Seal the tent completely — no leaks; the ammonia vapor must build up inside
- Time the fuming: 24 hours for a medium warm brown; 48+ hours for darker results. Check hourly after 12 hours to monitor color
- Ventilate the tent outdoors — the ammonia concentration inside is significant
- Remove the project; allow to air out for 30+ minutes before handling
- Apply finish immediately to stop further reaction and protect the surface
- Shred a pad of #0000 steel wool (the finest grade) into a glass jar
- Pour white vinegar over the steel wool until submerged
- Leave uncapped in a ventilated area for 24–48 hours — the reaction produces hydrogen gas
- The solution turns amber, then dark brown as it strengthens
- Strain out the steel wool remnants through a coffee filter or cheesecloth
- The strained solution is the iron acetate — use full strength for maximum effect; dilute 1:1 with water for a lighter result
- Brush or wipe the iron acetate solution onto the prepared wood (sanded to 150 grit)
- Watch the color develop — the reaction is immediate on high-tannin species
- Allow to dry fully (30–60 minutes)
- The color will continue to develop and darken for 24–48 hours as the iron oxidizes further
- Evaluate the color after 48 hours before topcoating
- Topcoat with water-based finish (oil-based finishes can interfere with the patina)
- Work outdoors or in a very well-ventilated space
- Keep a bucket of water and a fire extinguisher nearby
- Clear the work area of all flammable materials
- Allow the scorched surface to cool completely before handling
- Never scorch resinous species (pine, fir) indoors — they produce flammable vapor
The blotch concern: very dark stains on blotch-prone species (pine, birch, poplar) will blotch dramatically. On these species: apply pre-stain conditioner or use gel stain to get a more even result.
Milestone: Apply the darkest stain to a scrap piece and evaluate it after drying — stain appears darker when wet; the dry color is the actual result.
Step 2: Darken Wood with Oil Finishes
Goal: Use penetrating oil to naturally deepen and enrich the wood color.
Penetrating oils (linseed oil, Danish oil, teak oil) naturally darken wood as they soak into the fibers. The effect is subtle — not as dramatic as stain — but it enhances the wood’s natural color in a way that looks more organic than stain.
Which oils darken the most:
Darkening technique:
Warming effect: oil finishes on light-colored woods (maple, ash, poplar) produce a warm, golden tone rather than a true darkening. On already-dark woods (walnut, dark cherry), oils deepen the existing color and add richness rather than shifting the color dramatically.
Milestone: Apply 3 coats of boiled linseed oil to a maple and a walnut scrap. Compare the color shift — the lightening effect on maple vs the deepening effect on walnut shows the different behaviors on light vs dark species.
Step 3: Ammonia Fuming for Oak and High-Tannin Species
Goal: Use household ammonia vapor to chemically darken oak to a deep tobacco brown.
Ammonia fuming is a chemical process rather than a surface application — the ammonia vapor reacts with the tannins naturally present in the wood to produce a color change from within. The result on white oak is a rich, warm tobacco-brown that penetrates deep into the wood (not just surface color), shows the grain with extreme clarity, and ages gracefully because it’s not a surface coating that can peel.
Which species fume well:
Species must contain significant tannins. Best candidates: white oak (the classic), red oak (lighter response), chestnut, cherry, walnut, and some mahoganies. Low-tannin species (maple, pine, poplar, birch) show minimal response — you can paint these with a tannic acid solution before fuming to introduce the chemical reaction.
The fuming process:
Safety: ammonia fumes are irritating and at high concentrations harmful. Never fume indoors without sealing the tent; the tent’s exterior should be in a ventilated area (outdoors or in a well-ventilated garage with the door open). Don’t open the tent while the fumes are concentrated — ventilate before opening.
Milestone: Test fume a small piece of white oak for 24 hours alongside an unfumed piece for comparison. The color difference is dramatic and reveals whether the expected result matches the goal.
Step 4: Iron Acetate Patina for Gray-Brown Darkening
Goal: Use vinegar and steel wool to create a chemical patina that darkens with tannin-rich species.
Iron acetate (ferrous acetate) is created by dissolving steel wool in vinegar. Applied to wood, the iron ions react with the tannins in the wood to produce a gray-brown patina that darkens over time and with light exposure. The effect is particularly beautiful on oak, cherry, and walnut — it produces an aged, weathered look without the harsh gray of actual weathering.
Making iron acetate:
Application:
Adding tannins to low-tannin species: brew strong black tea and apply it to maple, pine, or other low-tannin species before applying iron acetate. Let the tea dry, then apply the iron acetate — the tea introduces tannins that react with the iron.
Milestone: Test iron acetate on scrap oak and oak pretreated with tea. The oak will gray-brown within minutes; the tea-treated oak will show a similar reaction even without natural tannins.
Step 5: Scorching (Shou Sugi Ban) for Dramatic Dark Effects
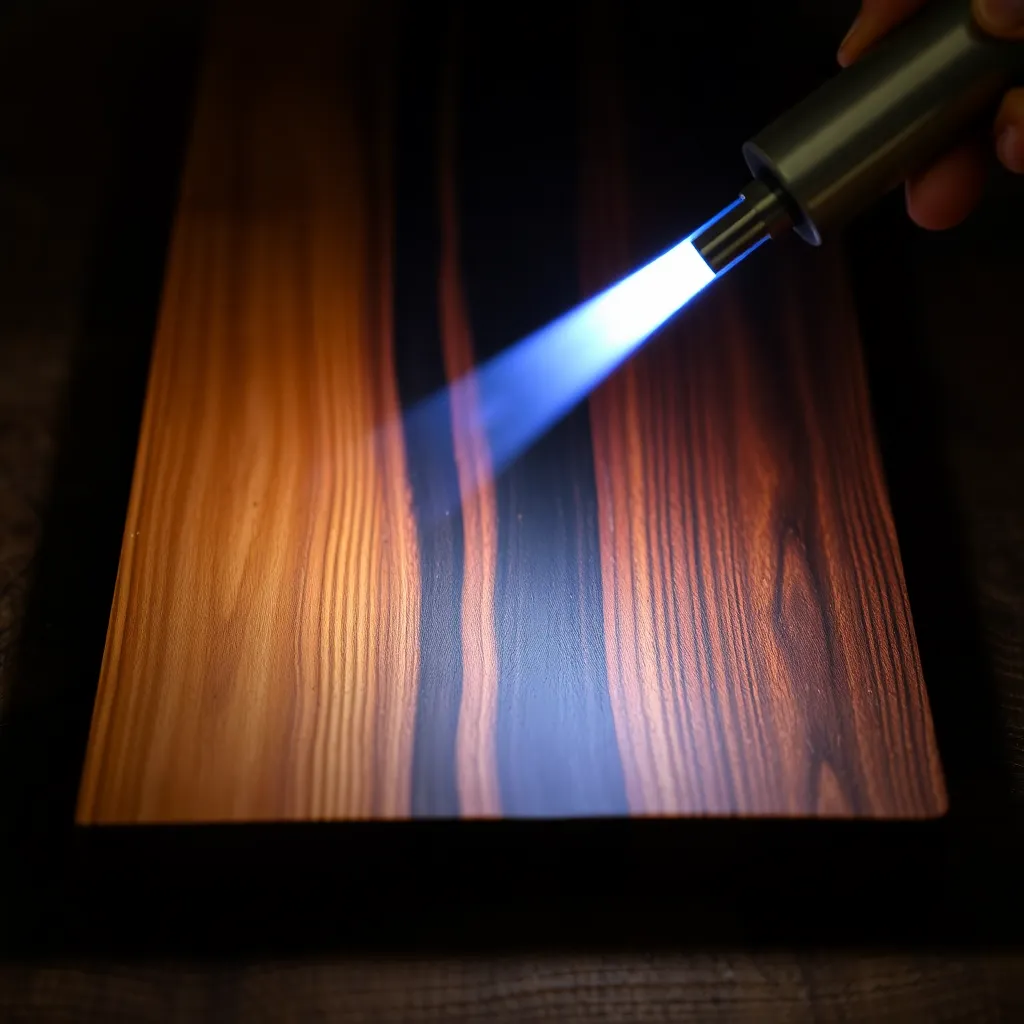
Goal: Use torch scorching to add depth, color, and texture to wood surfaces.
Scorching wood with a torch (the traditional Japanese technique called shou sugi ban uses full charring of cedar boards for exterior siding) produces a darkening effect that ranges from a light golden-brown (brief torch pass) to near-black (heavy charring). The scorched surface, when the loose carbon is removed, reveals the grain with unusual clarity — the dense latewood resists charring more than the softer earlywood, producing a dramatic grain contrast.
Light scorching (golden-brown):
Move a propane torch quickly over the wood surface, keeping the flame moving. The surface browns without charring deeply. Wire brush to remove the loose surface carbon — the remaining color is warm golden-brown with enhanced grain contrast. Seal with tung oil or Danish oil.
Heavy scorching (near-black):
Apply the torch more slowly and evenly, charring the surface to a consistent black. Allow to cool. Brush firmly with a stiff brush to remove loose carbon — the deep grain channels retain more carbon than the surface, producing a silver-black surface with dark grain accent. Seal with tung oil.
Full shou sugi ban (exterior use):
Char the board completely — the entire surface should be uniformly black and the char approximately 1/16″ deep. Wire brush to remove the loose carbon. The remaining surface is a deeply carbonized layer that is naturally weather-resistant, insect-resistant, and very stable. Traditionally used as siding; increasingly used for interior accent panels and furniture.
Safe scorching practice:
Milestone: Test scorching on several scrap pieces at different intensities (brief pass, medium, heavy) and evaluate the color range before committing to the technique on actual project parts.
Step 6: Ebonizing for Near-Black Results
Goal: Achieve a deep black finish that retains grain visibility using dye or chemical methods.
Ebonizing produces a near-black surface that looks like ebony — the grain is visible but very dark. True ebony is extremely expensive and rare; ebonized lighter species achieve a similar visual effect at a fraction of the cost.
Black dye stain (easiest method):
Water-based black wood dye (Rit Dye Dark Brown + black, or dedicated wood dyes from TransTint) applied full strength with a cloth. Dye is more transparent than pigment stain — the grain remains visible through multiple dye coats. Apply, let dry, apply again — build color until the desired depth is achieved. Seal with any topcoat.
India ink ebonizing:
India ink (waterproof drawing ink) diluted 1:1 with water applied with a cloth. Very deep black, slightly glossy, very transparent to grain. Multiple coats build opacity. Less expensive than wood dye; widely available.
Chemical ebonizing with iron acetate (best result on high-tannin species):
Apply iron acetate (see Step 4) full strength over white oak or white ash pretreated with strong black tea. The deep tannin reaction produces a near-black surface with the grain perfectly visible. Unlike surface dyes, the chemical reaction penetrates into the wood — the ebonized surface holds up well to light scratches because the color goes below the surface.
Topcoat for ebonized surfaces:
Water-based topcoats maintain the cool, dark tone of ebonized surfaces. Oil-based topcoats add a warm amber tone that fights the cool black of ebonizing — use water-based polyurethane, water-based lacquer, or shellac (which adds warmth but produces a beautiful antique tone on ebonized surfaces).
Milestone: Ebonize three scrap pieces — one with black dye, one with India ink, one with iron acetate over tannin — and compare the results after topcoating. Each produces a distinctly different character.
How to Darken Wood FAQ
What is the best way to darken wood without stain?
Ammonia fuming (for oak and high-tannin species) and iron acetate patina produce the most natural-looking darkening without surface stain — the color comes from a chemical reaction within the wood rather than from deposited pigment. The result is deeper, more grain-revealing, and more aged-looking than stain on the right species. For species without adequate tannins: boiled linseed oil (repeated coats build a warm amber depth) or black dye (transparent, grain-visible, works on any species) are the best stain alternatives.
Will polyurethane darken wood?
Yes — oil-based polyurethane has a significant amber tone that warms and darkens wood visibly. On light-colored woods like maple or ash, the first coat of oil-based polyurethane produces a noticeable color shift toward yellow-brown. Repeated coats build this amber tone. This is why water-based polyurethane is preferred when you want to maintain the natural color of the wood — it’s nearly colorless. If you want the warming effect without applying stain: oil-based polyurethane provides it on every coat. The difference is most visible on light woods (maple, ash, birch) and less visible on already-dark species (walnut, cherry).
How do you darken wood that has already been finished?
Darkening a finished piece requires either: (1) removing the existing finish (stripping or sanding back to bare wood) and then darkening the bare wood, or (2) applying a glaze over the existing finish (a tinted glaze is wiped on and off the flat surfaces, leaving color in the grain and details — adds depth without changing the overall color dramatically). Full stripping and re-staining is the most controlled approach. Glazing is faster but limited in how much overall color shift is achievable. Applying stain over an intact finish doesn’t work — the stain won’t penetrate the finish film.
Does boiled linseed oil turn wood dark?
Boiled linseed oil darkens and warms wood as it penetrates the fibers, particularly on light-colored species. The initial application typically adds a golden-amber tone that makes maple look like it’s been stained a warm honey color. Repeated coats deepen this effect. On dark species (walnut, mahogany), BLO deepens the existing color rather than shifting the hue dramatically. The darkening from BLO is permanent — the oil oxidizes within the wood fibers and the color can’t be lightened without sanding back to bare wood. BLO also continues to yellow slightly over years as the oil ages — this is expected behavior and many woodworkers find the aging character desirable.

“DIY woodworking enthusiast who started with zero experience and a YouTube tutorial.
I build simple, practical projects for my home and share free plans
so other beginners can skip the guesswork.If I can build it, you can too.”