
Starting woodworking feels overwhelming when you face rows of unfamiliar tools, confusing wood grades, and complex project instructions. Many beginners abandon their first project halfway through because they lack clear guidance on where to start and what truly matters. This guide walks you through selecting simple projects, gathering essential tools, mastering basic techniques, and avoiding the common mistakes that frustrate 60% of newcomers, so you can build confidence and create beautiful pieces from your first weekend onward.
Table of Contents
- Introduction To Beginner Woodworking Projects
- Prerequisites: Tools, Materials, And Safety Gear You Need
- Step-By-Step Building Process For Beginner Projects
- Common Mistakes Beginners Make And How To Fix Them
- Expected Timelines, Costs, And Outcomes For Beginner Projects
- Finishing Techniques To Give Your Projects A Polished Look
- Discover More Woodworking Plans And Tips
- Frequently Asked Questions
Key Takeaways
| Point | Details |
|---|---|
| Start Small | Simple projects like crates or birdhouses build foundational skills without overwhelming complexity. |
| Essential Tools | You need only two key tools to begin: a drill/driver and a beginner saw, plus basic safety gear. |
| Follow Process | Measure twice, cut once, sand progressively, and apply finishing touches for professional results. |
| Avoid Errors | Over 60% of beginners make measurement mistakes, skip sanding, or ignore wood grain direction. |
| Quick Wins | Complete beginner projects within 1 to 2 days using materials costing under $30. |
Introduction to Beginner Woodworking Projects
Starting with simple builds like crates, shelves, and birdhouses helps you gain confidence without investing weeks or hundreds of dollars upfront. Simple projects keep skills development manageable and achievable within weekends, making them perfect for maintaining motivation. You avoid the frustration of tackling advanced joinery or expensive hardwoods before mastering basic techniques.
Ideal beginner projects share common traits. They require few tools, use affordable softwoods, and teach fundamental skills you will apply to every future build. Consider these beginner-friendly options:
- Basic storage crates that teach measuring, cutting, and assembly
- Small wall shelves introducing simple joinery and mounting techniques
- Bird feeders combining outdoor durability with decorative finishing
- Picture frames focusing on precision miters and corner joints
These easy woodworking project ideas teach essential techniques like accurate measuring, straight cutting, secure assembly, and smooth finishing. Each completed project builds your skill foundation while creating functional items for your home. Small projects reduce frustration because mistakes cost little and repairs take minutes, not hours. Success with your first few builds creates momentum that carries you toward more ambitious furniture and décor pieces.
Prerequisites: Tools, Materials, and Safety Gear You Need
You do not need a workshop full of expensive equipment to start woodworking. The two essential tools are a drill/driver and a beginner-friendly saw such as a small circular saw or jigsaw. A drill/driver handles all fastening and pilot holes, while a jigsaw cuts curves and straight lines in softwood with minimal setup. Add a tape measure, combination square, pencil, and assorted sandpaper grits to complete your starter toolkit.
Safety gear such as eye protection goggles and earplugs are essential even for small projects to prevent injuries and hearing damage. Sawdust and wood chips fly during cutting and sanding, making safety glasses non-negotiable. A dust mask protects your lungs from fine particles that accumulate quickly in enclosed spaces. Ear protection matters because power tools produce noise levels that cause hearing damage over time.
| Tool Category | Recommended Items | Estimated Cost |
|---|---|---|
| Power Tools | Drill/driver, jigsaw or small circular saw | $80 to $150 |
| Hand Tools | Tape measure, combination square, pencil, clamps | $30 to $50 |
| Safety Gear | Safety goggles, ear plugs, dust mask | $15 to $25 |
| Consumables | Sandpaper assortment (80, 120, 220 grit), screws | $15 to $30 |
Recommended wood for beginner projects is softwoods like pine or fir, costing $2 to $4 per board foot, which keeps starter costs low and wood easy to work with. Pine cuts cleanly, accepts screws without splitting, and sands smoothly with minimal effort. These wood types for beginners remain widely available at home improvement stores year-round, eliminating specialty supplier trips.
Regular tool maintenance ensures better cuts and safety. Keep saw blades clean and sharp, tighten loose fasteners on power tools, and store everything in a dry location to prevent rust. Clean sawdust from tool vents after each session to prevent overheating.
Pro Tip: Organize your workspace and tools beforehand to improve efficiency and safety. Designate specific spots for measuring tools, fasteners, and safety gear so you spend time building instead of searching.
Step-by-Step Building Process for Beginner Projects
A logical sequence from project selection, measurement, cutting, assembly, sanding to finishing is essential for beginners to succeed. Following consistent steps reduces errors and builds muscle memory for techniques you will use across every project. Here is the proven workflow that experienced woodworkers rely on:
- Plan your project with accurate measurements and a simple design, sketching dimensions on paper before touching tools.
- Measure twice, cut once by checking measurements carefully before making any cuts to avoid wasting materials.
- Cut wood following grain direction to avoid rough edges and tear-out that require excessive sanding.
- Assemble pieces with basic joinery and fasteners like screws or nails, starting with dry fits to verify alignment.
- Sand progressively starting with coarse grit and finishing with finer grits for smoothness that showcases your work.
- Apply finishing touches such as paint, stain, or sealant to protect and beautify your completed project.
Each phase builds on the previous step. Accurate measuring prevents cutting errors. Clean cuts simplify assembly. Proper assembly creates a stable foundation for sanding. Thorough sanding prepares surfaces for finishing that protects your work for years.
| Build Phase | Key Actions | Recommended Tools | Common Pitfalls to Avoid |
|---|---|---|---|
| Planning | Sketch design, list materials, verify dimensions | Paper, pencil, calculator | Skipping measurements, unclear plans |
| Measuring | Mark cut lines, double-check dimensions | Tape measure, square, pencil | Single measurements, unclear marks |
| Cutting | Follow grain, secure workpiece, use sharp blades | Saw, clamps, safety gear | Dull blades, unsecured wood |
| Assembly | Dry fit first, drill pilot holes, fasten securely | Drill, screws, clamps | Skipping dry fits, overtightening |
| Sanding | Start coarse, progress to fine, sand with grain | Sandpaper 80/120/220 grit | Skipping grits, cross-grain sanding |
| Finishing | Apply thin coats, sand between coats, allow drying | Brush, stain or paint | Thick coats, inadequate drying time |
These wood project design tips emphasize simplicity and accuracy. Start with rectangular projects before attempting angles or curves. Master butt joints and pocket screws before moving to dadoes or mortise-and-tenon joinery. This woodworking project workflow ensures you develop skills incrementally instead of facing overwhelming challenges.
Pro Tip: Keep your tools sharp and clean to improve cutting quality and safety. A sharp blade requires less force, giving you better control and producing smoother cuts that need minimal sanding.
Common Mistakes Beginners Make and How to Fix Them
Over 60% of beginners make mistakes like inaccurate measurements, dull tools, and ignoring wood grain direction, causing frustration and wasted materials. Understanding these pitfalls helps you avoid costly setbacks and maintains your motivation through early projects. Most mistakes stem from rushing steps or skipping preparation, not lack of talent.

Measurement inaccuracies are the most frequent error. Beginners often measure once or misread tape measures under poor lighting. Fix this by using quality measuring tools, marking clearly with a sharp pencil, and always double-checking dimensions before cutting. Write measurements directly on the wood near cut lines to prevent confusion.
Using dull blades leads to rough cuts that require excessive sanding and compromise joint quality. Dull tools also increase kickback risk and require more force to cut. Maintain and sharpen tools regularly, replacing disposable blades when they bind or burn wood. A $10 blade replacement saves hours of remedial sanding.
Ignoring wood grain causes tear-out and rough surfaces that ruin otherwise solid projects. Always cut and sand with the grain, planning your cuts so blade movement follows wood fibers. When grain direction changes within a board, adjust your approach or switch to a finer blade.
Skipping sanding or improper grit progression leaves rough finishes that collect dirt and feel unpleasant. Follow progressive sanding steps, starting with 80-grit to remove mill marks, moving to 120-grit for smoothing, and finishing with 220-grit for silky surfaces. Never jump from coarse to ultra-fine grits.
Disorganized workspaces contribute to errors and accidents. Keep the area neat and tools accessible so you focus on building instead of searching. Store loose hardware in labeled containers and return tools to designated spots immediately after use.
These woodworking beginner mistakes tips emphasize patience and preparation. Successful woodworkers invest time upfront measuring and planning because correcting mistakes takes far longer than preventing them.
Pro Tip: Set aside time to maintain tools and organize your workspace before starting projects. A clean, organized shop with sharp tools makes building enjoyable instead of frustrating.
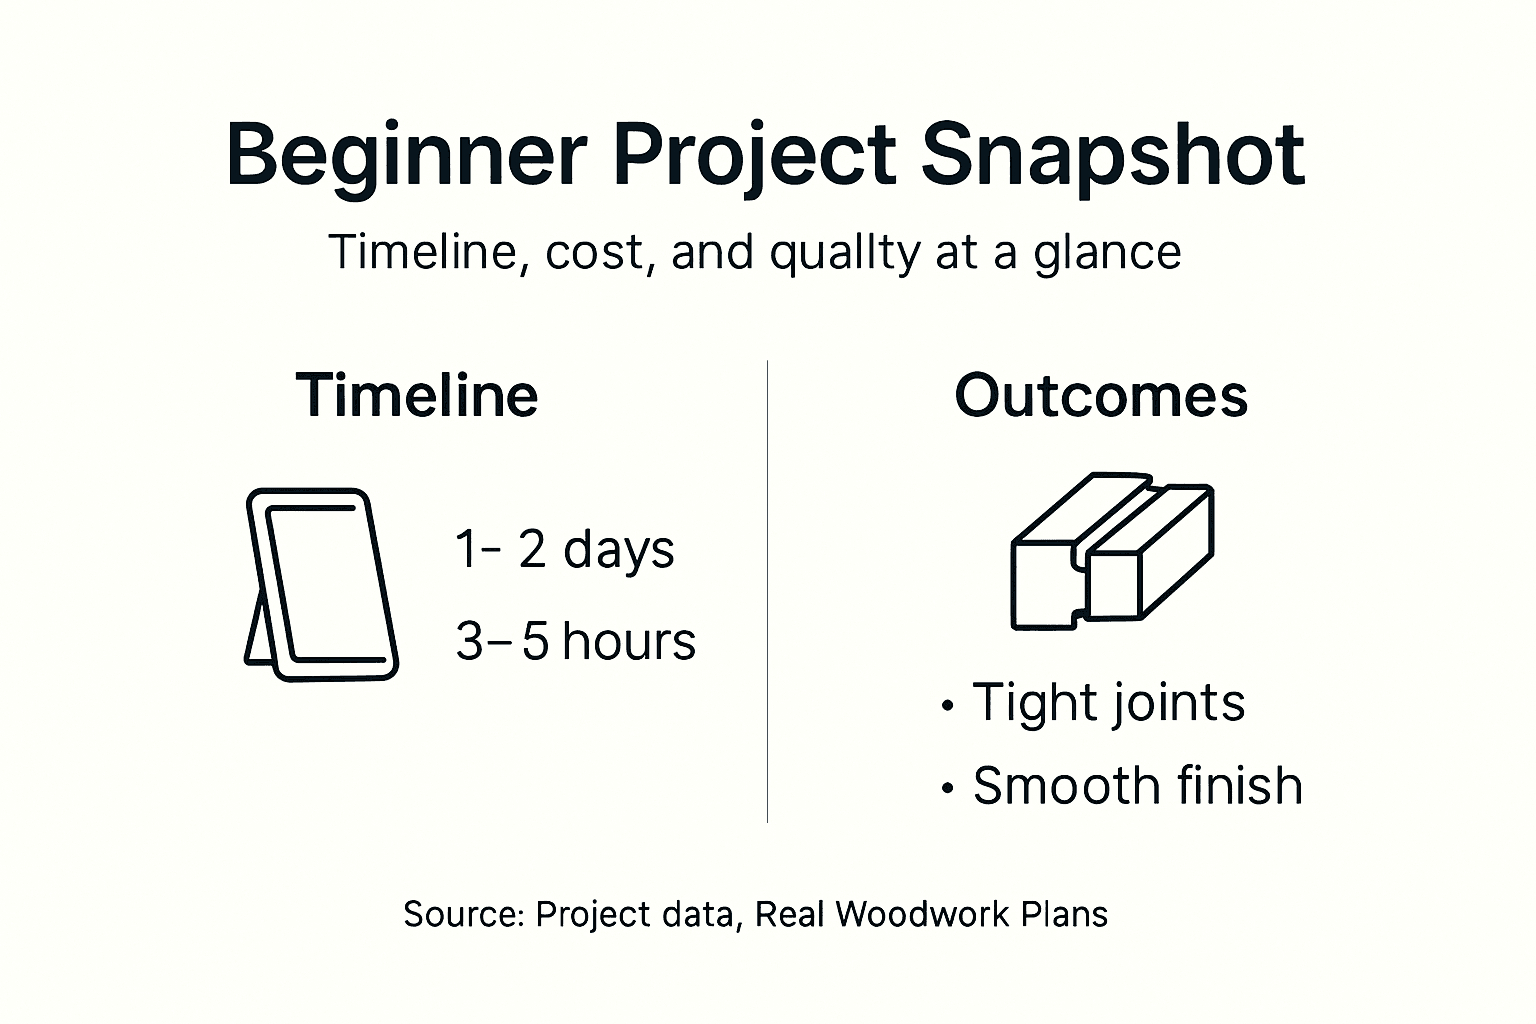
Expected Timelines, Costs, and Outcomes for Beginner Projects
Typical beginner projects like small shelves or birdhouses can be completed within 1 to 2 days, costing under $30, and resulting in satisfying skill growth. These realistic timeframes keep you motivated by delivering quick wins that build confidence. Weekend projects fit naturally into busy schedules, letting you progress without disrupting family time or other commitments.
Material costs stay low because beginner projects use small quantities of affordable softwoods. Softwoods cost about $2 to $4 per board foot, helping control starter project expenses. A simple shelf requires 6 to 8 board feet, totaling $15 to $30 in lumber plus another $10 for screws, sandpaper, and finishing supplies. Starting inexpensively reduces pressure and allows experimentation without financial stress.
Success includes smooth sanding, tight joints, and using safety gear consistently. Your first projects may show minor imperfections, but each build improves your accuracy and finish quality. Measure success by comparing your third project to your first rather than against professional furniture. Skill growth becomes visible when cuts become straighter, joints fit tighter, and finishes appear more uniform.
| Project Type | Average Time | Material Cost | Key Quality Indicators |
|---|---|---|---|
| Storage Crate | 4 to 6 hours | $15 to $25 | Square corners, smooth interior, sturdy joints |
| Wall Shelf | 3 to 5 hours | $20 to $30 | Level mounting, even finish, clean edges |
| Bird Feeder | 5 to 7 hours | $15 to $20 | Weather-resistant finish, secure assembly |
| Picture Frame | 2 to 4 hours | $10 to $15 | Tight miters, smooth surface, even stain |
These beginner woodworking project timelines account for learning time, setup, and finishing. Experienced woodworkers complete the same projects faster, but beginners benefit from working slowly and carefully to develop proper techniques. Rushing leads to mistakes that require time-consuming corrections.
Skill growth can be measured by improving accuracy and finish quality with each project. Track your progress by photographing completed projects and noting techniques you mastered. This documentation shows how quickly your abilities develop and provides motivation during challenging builds.
Finishing Techniques to Give Your Projects a Polished Look
Multi-stage sanding from coarse to fine grit removes imperfections and prepares wood for finishing. Start with 80-grit sandpaper to eliminate mill marks, saw burns, and surface irregularities. Progress to 120-grit for general smoothing, then finish with 220-grit for silky surfaces that feel pleasant and accept stain evenly. Sand with the grain in long, consistent strokes to avoid cross-grain scratches.
Choosing the right finish depends on wood type, use, and aesthetic goals. Paint provides complete color coverage and hides wood grain, making it ideal for projects using mixed wood species or lower-grade lumber. Stain enhances natural grain while adding color, perfect for showcasing attractive wood patterns. Clear sealants like polyurethane protect wood without changing its appearance, working well for projects where natural color matters.
Avoid common finishing mistakes that compromise appearance and durability:
- Applying thick coats that drip, sag, or take days to dry completely
- Neglecting to sand between coats, leaving rough surfaces that feel unpleasant
- Skipping wood conditioner on softwoods before staining, causing blotchy results
- Finishing in dusty environments that embed particles in wet finishes
- Rushing drying times between coats, preventing proper curing
Sanding protects the wood and improves finish adhesion and durability. Smooth surfaces allow stain and sealant to penetrate evenly, creating uniform color and protection. Rough surfaces absorb finish unevenly, wasting material and producing blotchy results. Thorough sanding between finish coats removes dust nibs and creates mechanical tooth for subsequent layers.
Final finishing transforms basic projects into polished home furnishings. A well-finished piece resists moisture, cleans easily, and maintains its appearance for years. The wood finishing benefits extend beyond aesthetics to include protection from humidity changes, UV damage, and everyday wear. Investing time in proper finishing pays dividends through longevity and pride in your craftsmanship.
Discover More Woodworking Plans and Tips
Ready to expand your skills beyond these foundational techniques? Real Woodwork Plans offers free woodworking plans and expert guidance designed specifically for builders at your level. Our curated collection includes detailed instructions, cutting lists, and assembly diagrams that eliminate guesswork and frustration.

Explore woodworking tips for beginners that complement this guide with practical workflow strategies and troubleshooting advice. Discover our woodworking project ideas 2026 collection featuring trending designs and seasonal builds that match your growing abilities. Each resource builds on the foundations covered here, helping you progress from simple projects to impressive furniture pieces with confidence.
Frequently Asked Questions
What basic tools do I need to start woodworking?
You need only a drill/driver, beginner-friendly saw like a jigsaw, tape measure, combination square, and safety gear including goggles and ear protection. This minimal toolkit costs $125 to $225 total and handles most beginner projects. Add clamps and sandpaper assortments as your first consumables.
How much space do I need for beginner projects?
A 6 by 8 foot area provides enough room for cutting, assembly, and tool storage for beginner projects. Garages, basements, or even porches work well if you can secure workpieces safely. Adequate lighting and ventilation matter more than square footage for small projects.
How do I know which wood is best for my project?
Choose pine or fir for indoor projects requiring painting or staining, as these softwoods cut easily and cost $2 to $4 per board foot. Select cedar for outdoor projects needing weather resistance. Avoid hardwoods like oak until you master basic techniques, as they require sharp tools and more experience.
What are the most important safety tips for beginners?
Always wear safety goggles and hearing protection when operating power tools. Secure workpieces with clamps before cutting to prevent movement. Keep hands at least 6 inches from blades and disconnect power when changing blades or bits. Never remove safety guards from tools.
How long does a beginner project typically take?
Simple projects like crates or small shelves take 3 to 6 hours spread across one or two days, including drying time for finishes. Your first attempt takes longer as you learn techniques, but the third similar project proceeds twice as fast. Budget extra time for setup, cleanup, and inevitable learning moments.
Can I build furniture without expensive joinery tools?
You can create sturdy, attractive furniture using basic butt joints reinforced with screws or pocket holes instead of advanced joinery. Simple joints work perfectly for beginner projects and many intermediate builds. Master fundamental techniques before investing in specialty joinery equipment.
Recommended
- Woodworking Tips for Beginners: Build Skills Step-by-Step
- Master Your Woodworking Project Workflow for DIY Success
- Why Use Woodworking Plans for DIY Success
- How to Design Wood Projects for Stunning DIY Results

“DIY woodworking enthusiast who started with zero experience and a YouTube tutorial.
I build simple, practical projects for my home and share free plans
so other beginners can skip the guesswork.If I can build it, you can too.”