
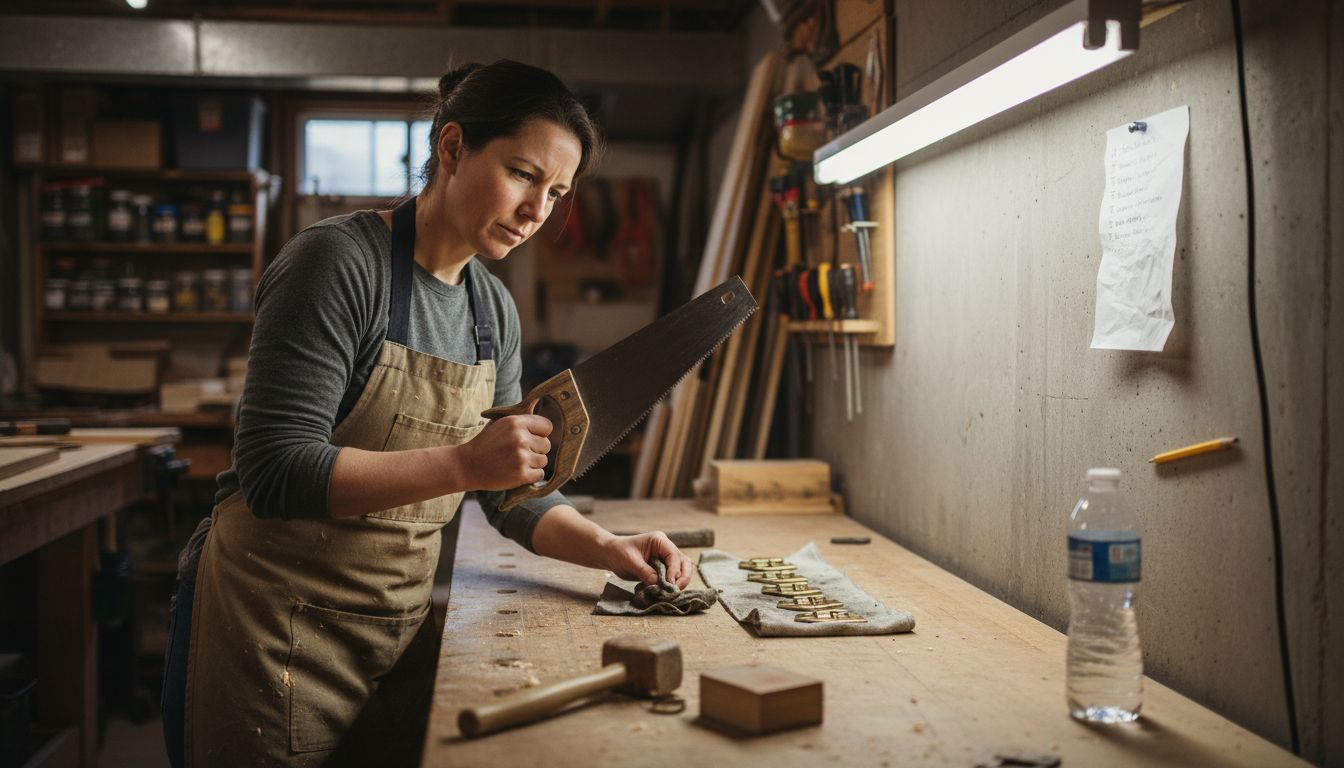
Starting a woodworking project without a clear plan is a recipe for wasted materials and frustration. Many beginner woodworkers dive in enthusiastically only to face missteps, budget overruns, and disappointing results. Structured project planning improves success rates by around 40%, transforming chaotic attempts into rewarding builds. This guide walks you through proven woodworking tips for beginners that teach step-by-step planning strategies, ensuring your next project delivers quality results with less stress and waste.
Table of Contents
- Introduction To Project Planning And Its Importance
- Tools And Resources Needed Before You Start
- Material And Tool Preparation
- Stepwise Workflow And Task Organization
- Safety And Workspace Setup
- Common Mistakes And How To Avoid Them
- Setting Realistic Timelines And Goals
- Planning Approaches And Tradeoffs
- Expected Results And Success Metrics
- Discover Expert Woodworking Plans And Resources
- Frequently Asked Questions
Key Takeaways
| Point | Details |
|---|---|
| Planning reduces waste | Structured planning lowers failure rates by about 40% and cuts material waste by 20%. |
| Pre-project preparation | Organize tools, measure accurately, and set up a clean workspace before starting any build. |
| Workflow sequencing | Following a logical step sequence boosts efficiency by 35% and prevents costly rework. |
| Safety first | Proper safety gear and workspace organization reduce injury risk by 45% and keep projects on schedule. |
| Choose your approach | Structured planning suits beginners best, while experienced hobbyists may blend methods for flexibility. |
Introduction to Project Planning and Its Importance
Structured project planning transforms how you approach woodworking. Instead of jumping straight to cutting wood, you map out every step, anticipate challenges, and prepare solutions. This disciplined method contrasts sharply with freeform building, where improvisation often leads to expensive mistakes and frustration.
Structured planning lowers failure rates by about 40%, giving beginners a competitive edge. It also builds confidence as you see projects completed on time and within budget. Following woodworking tips for beginners and using a detailed wood project design guide prevents the common pitfalls that derail first-time builders.
Without planning, hobbyists commonly face:
- Buying too much or too little material, wasting money and time
- Cutting pieces in the wrong order, forcing awkward assembly
- Overlooking safety hazards until accidents happen
- Running out of time and rushing final steps, compromising quality
These obstacles discourage many beginners from continuing their woodworking journey. Planning eliminates guesswork, allowing you to focus on craftsmanship. It also accelerates skill development because you learn proper sequencing and problem-solving. Whether you’re tackling easy woodworking project ideas or more complex furniture builds, starting with a solid plan sets you up for satisfaction and success.
Tools and Resources Needed Before You Start
Before cutting your first board, gather the right tools and resources. Effective planning requires both physical equipment and digital aids that streamline design and measurement tasks.
Essential measuring and marking tools include:
- Tape measure for accurate dimensions
- Carpenter’s square to ensure 90-degree angles
- Pencil and marking gauge for precise layout lines
- Bar clamps to hold pieces securely during assembly
These basics prevent measurement errors that compound throughout a build. Digital tools amplify your planning power. Software like SketchUp lets you visualize projects in 3D before touching wood, catching design flaws early. Many free woodworking plans include dimensioned drawings that you can import into design software, saving hours of manual drafting. Explore woodworking planning software alternatives to find options that match your skill level and budget.
Your workspace setup directly impacts planning success. A clean, organized bench with good lighting allows accurate measurements and reduces mistakes. Store tools within arm’s reach and dedicate a wall or board for pinning cut lists and sketches. This visual reference keeps you on track throughout the build.
| Category | Must-Have Items | Purpose |
|---|---|---|
| Measuring | Tape measure, square, marking gauge | Ensure accurate dimensions and angles |
| Cutting | Hand saw or circular saw, miter box | Execute precise cuts per plan |
| Holding | Bar clamps, spring clamps | Secure workpieces during assembly |
| Safety | Safety glasses, dust mask, ear protection | Protect against injury and health hazards |
| Digital | SketchUp or similar CAD software | Visualize design and spot errors early |
Investing in quality measuring tools pays dividends. A warped square or stretched tape measure introduces errors that ruin entire projects. Buy once, measure confidently, and enjoy repeatable success.
Material and Tool Preparation
Accurate material estimation prevents the frustration of mid-project shortages and the waste of unused lumber sitting in your shop. Start by creating a detailed cut list that specifies every piece’s dimensions, quantity, and wood type. Structured material planning reduces waste by 20%, stretching your budget and minimizing environmental impact.
Follow these steps to estimate materials effectively:
- Break your project into individual components and list each piece
- Calculate board footage required, adding 10 to 15% for mistakes and offcuts
- Compare prices at multiple suppliers to find the best value without sacrificing quality
- Purchase lumber slightly oversized to allow for trimming and squaring edges
Budgeting wisely means balancing cost and quality. Cheap lumber often contains more defects, leading to wasted time sorting through boards. Mid-grade hardwoods offer the sweet spot for hobbyists, providing workable material at reasonable prices. Using woodworking plans for beginners with built-in cut lists simplifies estimation and gives you confidence at the lumberyard.
Before starting your build, prepare all tools and safety gear. Sharpen saw blades, oil hinges and moving parts, and confirm clamps operate smoothly. Dull tools increase effort, reduce precision, and raise injury risk. Lay out safety glasses, dust masks, and hearing protection within easy reach so you never skip protection steps.
Pro Tip: Print your cut list and check off each piece as you purchase it. This simple habit prevents forgotten items and duplicate buying. Keep the list posted in your workspace as a visual guide throughout the build, crossing off pieces as you cut them to track progress and avoid mistakes.
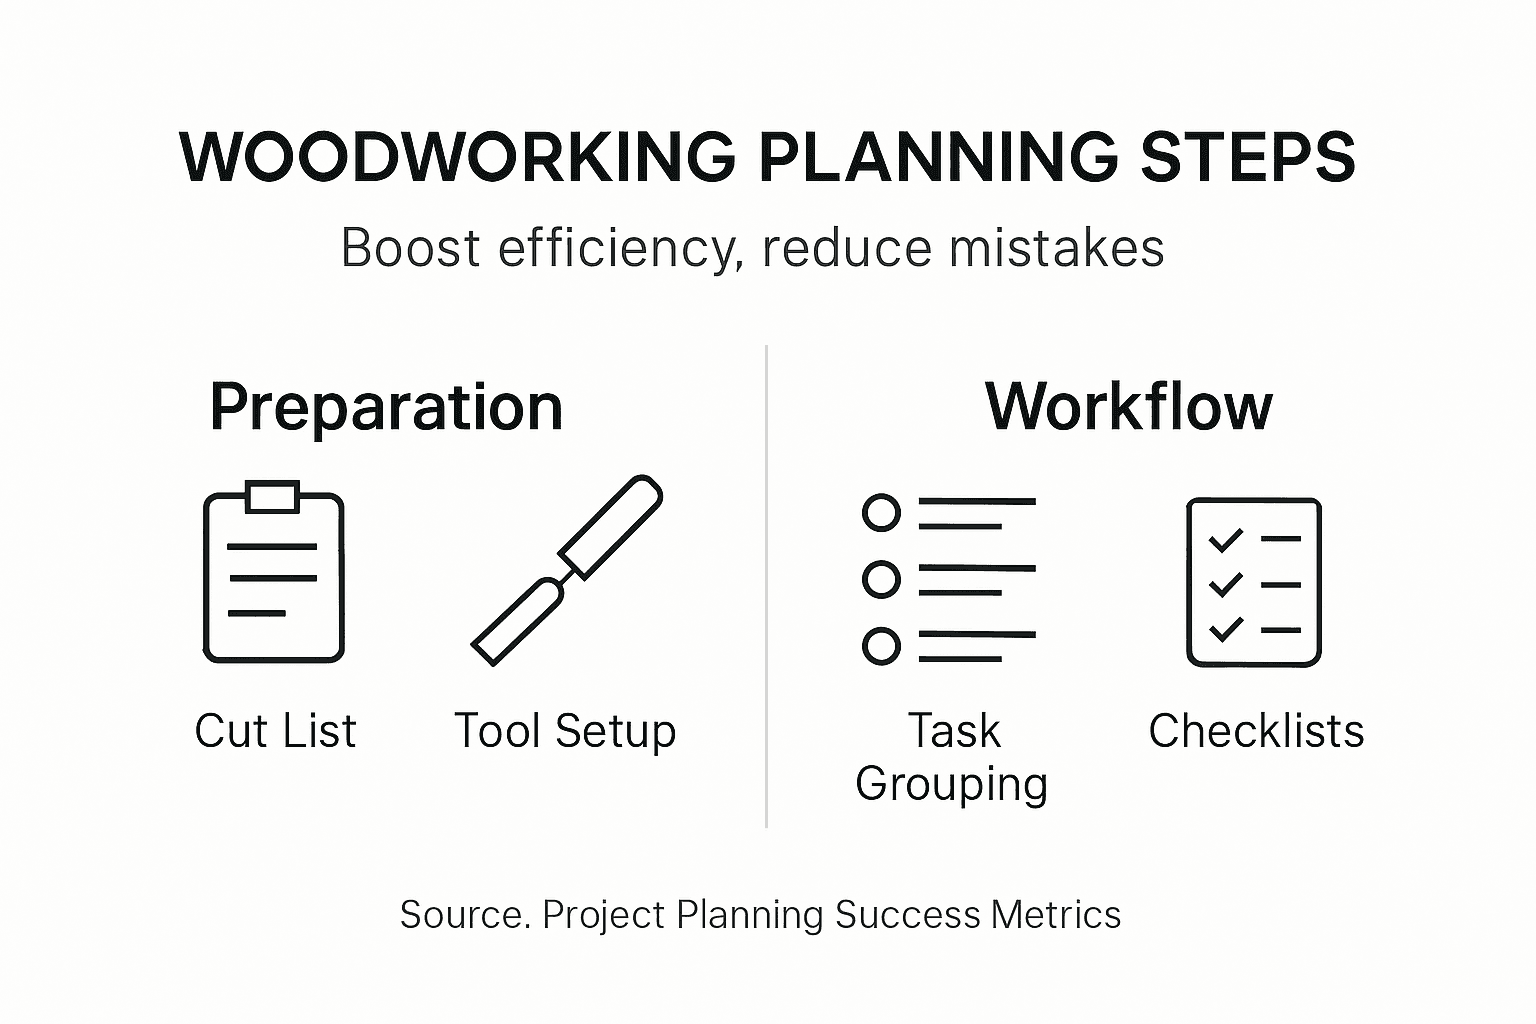
Stepwise Workflow and Task Organization
Organizing woodworking tasks into a logical sequence maximizes efficiency and minimizes frustration. Sequencing workflow steps can increase efficiency by 35%, allowing you to complete projects faster with fewer errors. A structured woodworking project workflow guide helps beginners avoid the confusion of figuring out what comes next.
Follow this six-step planning workflow:
- Define project scope and choose a design that matches your skill level
- Create detailed drawings with exact dimensions and joinery methods
- Prepare materials by cutting all pieces to rough size before final shaping
- Sequence tasks logically, grouping similar operations like all drilling or all sanding
- Build in safety checkpoints at each major stage to confirm accuracy
- Track progress daily, adjusting timelines if you encounter unexpected challenges
Structured planning contrasts sharply with freeform approaches. The table below shows why beginners benefit from discipline:
| Approach | Time Efficiency | Error Rate | Material Waste | Flexibility |
|---|---|---|---|---|
| Structured | High, 35% faster | Low, 40% fewer mistakes | Reduced 20% | Moderate, follows plan |
| Freeform | Lower, frequent pauses | Higher, learning by trial | Increased 25% | High, adapt on the fly |
Cut lists and task sequencing form the backbone of efficient workflow. Your cut list details every piece’s final dimensions, allowing you to mill all components before assembly. This batch processing approach prevents constant tool changes and maintains consistent accuracy. Sequencing assembly steps logically means you complete structural joints before adding decorative elements, ensuring a sturdy foundation.
Pro Tip: Group similar tasks together to avoid rework and tool changes. Cut all pieces to rough size, then move to joinery, followed by sanding and finishing. This assembly line method keeps momentum high and reduces the mental load of constantly switching between operations. You’ll finish faster and maintain better quality throughout the project.
Safety and Workspace Setup
Safety and organization directly impact project success. A cluttered workspace increases accident risk and slows progress, while a well-organized shop promotes focus and precision. Safety glasses alone reduce injury rates by 45%, making protective gear non-negotiable.
Implement these safety practices before every session:
- Wear safety glasses, dust mask, and hearing protection throughout all cutting and sanding operations
- Keep your workspace clean by sweeping up sawdust and organizing offcuts immediately
- Ensure adequate ventilation when using finishes or adhesives to prevent respiratory issues
- Maintain tools regularly, sharpening blades and checking electrical cords for damage
Proper workspace setup goes beyond safety. Position your workbench near natural light or install bright overhead lighting to catch measurement errors early. Store frequently used tools on a pegboard or magnetic strip for instant access. Dedicate a corner for assembly, keeping it clear of clutter so you can maneuver large pieces without obstruction.
A clean workspace is a safe workspace. Removing sawdust and organizing tools between tasks reduces injury risk and keeps your mind focused on the craft rather than navigating obstacles.
Ventilation deserves special attention. Wood dust and finish fumes accumulate quickly in enclosed spaces, posing long-term health risks. Open windows, use a fan, or invest in a dust collection system to maintain air quality. Good ventilation also improves finish quality by reducing dust settling on wet surfaces. Applying woodworking safety tips consistently protects your health and ensures projects turn out as planned.
Common Mistakes and How to Avoid Them
Even well-intentioned beginners stumble into predictable traps that derail projects. Recognizing these mistakes before they happen saves time, money, and frustration. Learning from others’ experiences accelerates your skill development and builds confidence.
Skipping the design phase causes 20 to 30% of project failures. Jumping straight to cutting without drawings or a clear plan leads to mismatched joints, incorrect dimensions, and wasted materials. The solution is simple: invest time upfront creating detailed sketches and cut lists. Use common beginner woodworking mistakes as a checklist to verify your plan covers all critical details.
Underestimating materials ranks as another frequent error. Beginners often calculate exact board footage without accounting for defects, mistakes, or offcuts. This leads to mid-project trips to the lumberyard, breaking momentum and inflating costs. Always add 10 to 15% buffer to your material estimates. Double-check quantities before purchasing to avoid woodworking mistakes that disrupt workflow.
Poor time management causes rushed final steps and compromised quality. Hobbyists frequently underestimate how long tasks take, leading to late nights and hasty finishing work. Combat this by setting realistic timelines with buffer days built in. Track your actual time spent on each phase to improve future estimates.
Key solutions to avoid common pitfalls:
- Create detailed plans and drawings before purchasing materials or cutting wood
- Add 10 to 15% extra material to your estimates to cover mistakes and defects
- Build buffer time into your schedule, especially for unfamiliar techniques
- Review your cut list twice before making the first cut to catch errors early
These preventive steps transform potential disasters into smooth builds. Planning ahead costs little time but saves enormous frustration down the line.
Setting Realistic Timelines and Goals
Realistic timelines keep projects enjoyable rather than stressful. Typical beginner woodworking projects take 12 to 20 hours of actual work, spread over days or weeks depending on your schedule. Underestimating this leads to rushed steps and disappointment, while padding your timeline allows learning without pressure.
Setting achievable goals starts with honest assessment of your available time. If you can dedicate two hours per weekend day, a 16-hour project spans four weekends. Add buffer days for unexpected challenges, drying time for finishes, and the inevitable real-world interruptions. This realistic approach prevents the frustration of perpetually unfinished projects cluttering your shop.
Break projects into milestones to maintain momentum:
- Milestone one: Complete all cutting and milling by end of week one
- Milestone two: Finish joinery and dry-fit assembly by end of week two
- Milestone three: Apply finish coats and let cure by end of week three
- Milestone four: Final assembly and installation by end of week four
Tracking progress against these milestones reveals when you’re falling behind, allowing proactive adjustments. Maybe joinery takes longer than expected, signaling you should simplify remaining steps or extend your timeline. This flexibility reduces stress and maintains quality. Use woodworking project milestones as benchmarks to gauge your pacing.
Buffer time proves essential for skill development. Beginners spend extra hours figuring out new techniques, and that’s perfectly normal. Plan for a 20 to 30% time cushion on your first attempts at unfamiliar joinery or finishing methods. As skills improve, your estimates become more accurate and buffers shrink naturally.
Planning Approaches and Tradeoffs
Choosing between structured and freeform planning depends on your skill level, project complexity, and personal preferences. Each approach offers distinct advantages and drawbacks that affect efficiency, waste, and creative flexibility.
Structured planning reduces waste by 20% and boosts efficiency by 35%, making it ideal for beginners who benefit from clear guidance. This method involves detailed drawings, comprehensive cut lists, and step-by-step instructions that eliminate guesswork. You know exactly what to do next, reducing decision fatigue and maintaining steady progress. The trade-off is reduced flexibility. Once committed to a plan, making design changes requires reworking multiple steps.
Freeform approaches offer maximum creative flexibility, allowing experienced woodworkers to adapt designs as they build. This spontaneity can lead to unique solutions and artistic expression. However, material waste increases by 25% as improvisation produces more offcuts and errors. Freeform building demands strong visualization skills and deep knowledge of joinery techniques, making it risky for beginners.
| Factor | Structured Planning | Freeform Approach |
|---|---|---|
| Efficiency | 35% faster completion | Slower due to decision points |
| Material Waste | 20% reduction | 25% increase |
| Flexibility | Moderate, plan-dependent | High, adapt easily |
| Error Risk | Low, 40% fewer mistakes | Higher learning curve |
| Best For | Beginners, complex projects | Experienced hobbyists, simple builds |
Most successful woodworkers blend approaches based on project demands. Use structured planning for challenging joinery or unfamiliar techniques, then allow freeform creativity in decorative details or finish choices. This hybrid method balances efficiency with personal expression, letting you complete projects successfully while developing your unique style.
Expected Results and Success Metrics
Measuring woodworking success goes beyond simply finishing a project. Tracking specific metrics helps you evaluate progress, identify improvement areas, and celebrate achievements. Clear success criteria also guide your planning decisions for future builds.
Your completed project should meet these benchmarks:
- Finished within your planned timeframe of 12 to 20 hours actual work
- Material waste kept under 10% of total lumber purchased
- Final dimensions match your design drawings within 1/8 inch tolerance
- Joints fit snugly without gaps or forcing pieces together
- Finish applied evenly with no runs, sags, or bare spots
These concrete metrics provide objective feedback. If material waste exceeded 10%, review your cut list accuracy or lumber selection process. Dimension errors beyond 1/8 inch suggest measuring or cutting technique needs refinement. Each metric points toward specific skills to practice.
Beyond physical results, track your confidence and satisfaction levels. Successful projects boost your willingness to tackle more challenging builds. You gain practical knowledge about wood behavior, tool capabilities, and your own working pace. This experiential learning compounds over time, transforming beginners into skilled craftspeople.
Quality craftsmanship reveals itself in details: smooth surfaces free of tear-out, tight joints that showcase precision, and finishes that enhance wood’s natural beauty. These hallmarks of success develop through consistent planning and execution. Each project completed within your metrics builds skills and confidence for the next challenge.
Discover Expert Woodworking Plans and Resources
Ready to apply your project planning knowledge? Real Wood Work Plans offers comprehensive resources that transform planning theory into finished projects. Our free woodworking plans provide detailed cut lists, dimensioned drawings, and step-by-step instructions that eliminate guesswork for beginners.

Explore the benefits of woodworking plans to understand how pre-designed projects accelerate your learning curve. Each plan incorporates proven planning strategies, letting you focus on building skills rather than figuring out dimensions. Our woodworking project workflow tips complement your newfound planning knowledge, offering advanced techniques to refine your process further.
Whether you’re building your first bookshelf or tackling a complex dining table, starting with a solid plan sets you up for success. Browse our collection today and discover how structured planning transforms your woodworking experience from frustrating to fulfilling.
Frequently Asked Questions
What are the essential tools I need before planning a woodworking project?
Measuring tape, carpenter’s square, saw, bar clamps, and safety gear like glasses form your essential toolkit. Access to design software or detailed woodworking plans significantly enhances planning quality by catching design flaws before you cut wood. Quality measuring tools prevent compounding errors that ruin entire projects.
How can I avoid running out of materials mid-project?
Use detailed cut lists and double-check all measurements before purchasing lumber. Add 10 to 15% buffer material to cover mistakes, defects, and offcuts. Print your cut list and verify each piece at the lumberyard to prevent forgotten items that interrupt workflow.
How long does a typical beginner woodworking project take to complete?
Most beginner woodworking projects require 12 to 20 hours of planned work spread over several sessions. Build in 20 to 30% buffer time to accommodate learning curves and unexpected challenges. This realistic timeline reduces stress and allows you to focus on quality craftsmanship.
Should I use a freeform or structured planning approach?
Structured planning reduces waste and errors significantly, making it ideal for beginners and complex projects. Experienced hobbyists may blend approaches, using structured methods for challenging joinery while allowing creative flexibility in decorative details. Your choice depends on skill level, project complexity, and personal working style.
Recommended
- Woodworking Trends 2026: Innovations Shaping DIY
- Real Woodwork Plans – Free Woodworking Plans
- Master Your Woodworking Project Workflow for DIY Success
- Why Use Woodworking Plans for DIY Success

“DIY woodworking enthusiast who started with zero experience and a YouTube tutorial.
I build simple, practical projects for my home and share free plans
so other beginners can skip the guesswork.If I can build it, you can too.”