
TL;DR:
- Structured planning and proper tools are essential to successful woodworking projects.
- Follow each step carefully, from measurement to finishing, to ensure quality results.
- Learning from mistakes and practicing techniques builds skills and long-lasting furniture.
Starting a woodworking project feels exciting until you’re standing in your garage holding a board you’ve already cut twice and it’s still too short. That frustration is more common than you think, and it almost always traces back to one thing: jumping in without a clear, ordered plan. This guide walks you through every stage of a typical home woodworking build, from picking up the right tools to inspecting your finished piece. Whether you’re building a simple shelf or your first coffee table, following a structured process is what separates a project you’re proud of from one you hide in the corner.
Table of Contents
- Gathering the right tools and materials
- Step-by-step process for your first project
- Common mistakes and troubleshooting tips
- Inspecting and enjoying your finished project
- A fresh perspective on mastering woodworking, one project at a time
- Ready for your next woodworking adventure?
- Frequently asked questions
Key Takeaways
| Point | Details |
|---|---|
| Preparation is crucial | Having the right tools and materials before you start saves time and prevents frustration. |
| Follow steps precisely | A clear, ordered process greatly improves project quality and confidence. |
| Mistakes are learning tools | Address errors early and use them to build your woodworking skill set. |
| Inspect your work | Reviewing your finished project ensures it’s both safe and satisfying to use or display. |
Gathering the right tools and materials
Now that you know the power of structured instructions, let’s start by ensuring you have everything you need before making the first cut. Walking into a project underprepared is one of the fastest ways to waste both money and motivation. A good setup before you begin saves you mid-project hardware store runs and keeps your momentum going.
For most beginner to intermediate home projects, you’ll need a mix of hand tools and power tools. Your essential woodworking tools list should cover a tape measure, a combination square, a hand saw or circular saw, a mallet, chisels, clamps, a drill with bits, and sandpaper in multiple grits. Power tools like a jigsaw or a random orbital sander are not required, but they speed up repetitive tasks significantly.
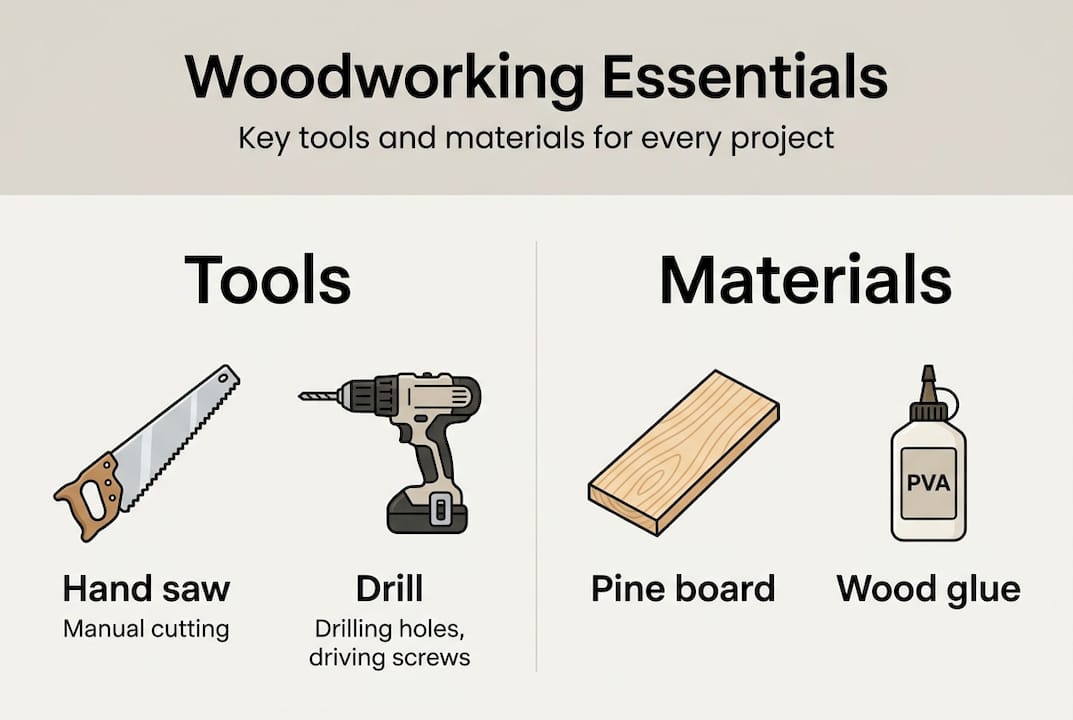
Choosing the right wood matters just as much as having the right tools. Understanding wood types for DIY helps you match the material to the project. Softwoods like pine and poplar are affordable, widely available, and easy to cut and sand, making them ideal for beginners. Hardwoods like oak or maple are more durable but harder to work with and more expensive. Start with softwood until your technique is solid.
Safety gear is non-negotiable. Always wear safety glasses, hearing protection when using power tools, and a dust mask when sanding. Keep a first aid kit nearby and make sure your workspace has good lighting and ventilation.
| Tool or material | Type | Primary use |
|---|---|---|
| Tape measure | Hand tool | Measuring cuts accurately |
| Combination square | Hand tool | Checking 90-degree angles |
| Circular saw | Power tool | Making straight cuts in boards |
| Drill with bits | Power tool | Driving screws, boring holes |
| Clamps | Hardware | Holding pieces during glue-up |
| Pine or poplar boards | Softwood | Main project material |
| Wood glue | Adhesive | Strengthening joints |
| Sandpaper (80, 120, 220 grit) | Finishing | Smoothing surfaces progressively |
Key materials to have on hand:
- Wood boards in your required dimensions
- Wood screws in two or three sizes
- Wood glue and a small brush for spreading it
- Finishing supplies: stain, paint, or clear coat
- Pencil and marking knife for layout lines
Pro Tip: Always buy 10 to 15 percent more wood than your cut list calls for. Practice cuts and small mistakes are part of the process, and having extra material means you won’t stall your project waiting on a new delivery.
Step-by-step process for your first project
With your workspace prepped and materials ready, you can dive into each woodworking stage step by step. Skipping stages or rushing through them is where most beginner projects go sideways. Each step builds on the last, so treat the sequence as your safety net.
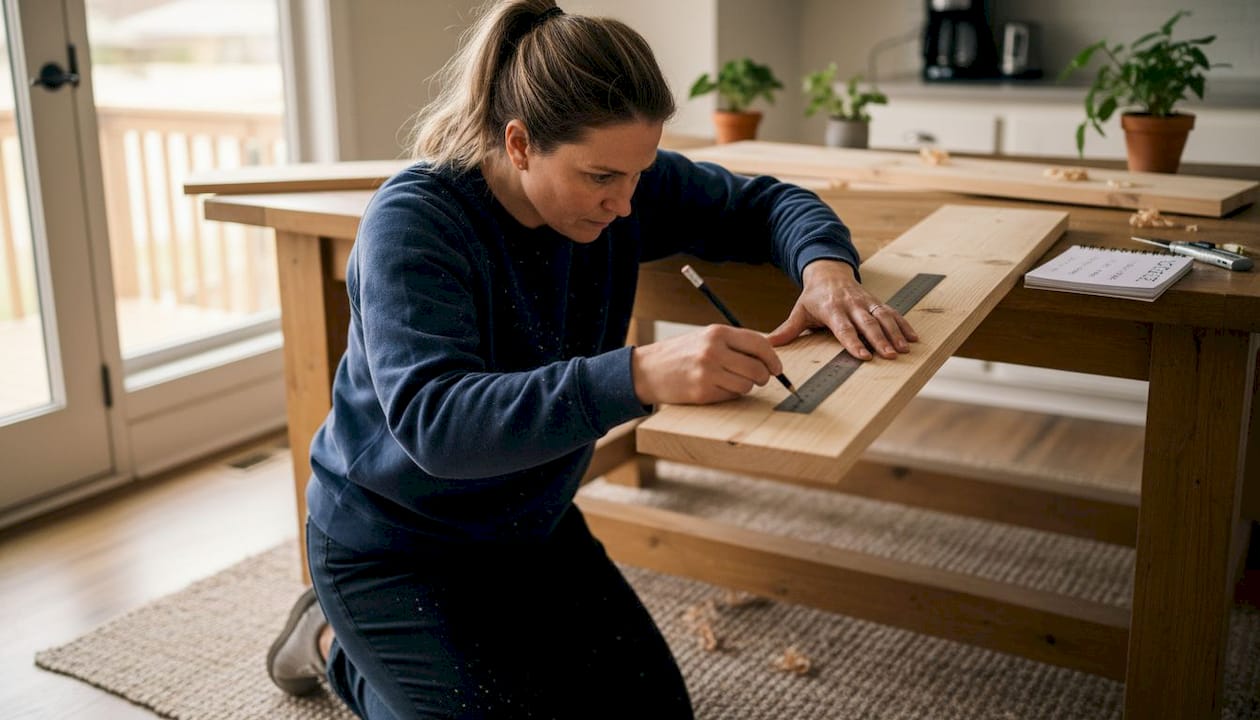
- Plan your project on paper. Sketch your design with dimensions before touching any wood. Even a rough drawing helps you spot problems early. List every piece you need with its exact length, width, and thickness.
- Create a cut list. Transfer your sketch into a written cut list. Group similar cuts together so you can batch them efficiently on the saw.
- Mark your wood. Use a pencil and a combination square to mark every cut line clearly. A marking knife gives you a finer, more accurate line for joinery cuts.
- Make your cuts. Cut on the waste side of your line, not through it. Always clamp your workpiece before cutting. Check your step-by-step woodworking tips to make sure your saw technique is solid before cutting expensive boards.
- Dry-fit all pieces. Before any glue or fasteners, assemble every part without adhesive. This is your chance to catch gaps, misalignments, and fit issues.
- Cut and fit joinery. Pocket holes, butt joints, and mortise and tenon joints each have their place depending on the project’s demands. Reviewing essential joinery methods before this step pays off.
- Glue and assemble. Apply glue evenly, clamp firmly, and check for square using a diagonal measurement. If both diagonals match, your assembly is square.
- Sand progressively. Start at 80 grit to remove mill marks and tool marks, move to 120, then finish at 220 before applying any finish.
- Apply your finish. Whether you use stain, paint, or a clear protective coat, apply thin coats and allow full drying time between them.
“Mortise and tenon joints provide exceptional strength for load-bearing furniture like tables and chairs through mechanical interlocking and large glue surfaces.”
| Joinery method | Difficulty | Best use | Strength |
|---|---|---|---|
| Butt joint | Beginner | Basic boxes, frames | Low |
| Pocket hole | Beginner | Cabinet face frames, shelves | Medium |
| Mortise and tenon | Intermediate | Tables, chairs, doors | High |
| Dovetail | Advanced | Drawer boxes, decorative joints | Very high |
Pro Tip: Measure twice before every single cut, not just the first one. Wood moves slightly with humidity changes, and your reference edge may shift between sessions if the project spans multiple days.
Common mistakes and troubleshooting tips
Even with step-by-step instructions, some hiccups are inevitable. Here’s how to troubleshoot and correct them for best results. Knowing what to look for before it becomes a bigger problem is a skill that separates good builders from frustrated ones.
The five most common beginner mistakes:
- Rushing measurements and cutting too short
- Choosing wood with too many knots or warps for a first project
- Skipping the dry-fit step and discovering gaps only after gluing
- Applying too much glue, causing squeeze-out that stains the wood under finish
- Not checking for square during assembly, leading to a racked or twisted frame
Troubleshooting solutions:
- Gaps in joints: Use wood filler for small gaps in painted projects. For stained wood, recut the piece if the gap is wider than 1/16 of an inch.
- Misaligned pieces: Loosen clamps immediately after noticing the issue, realign, and re-clamp before the glue sets. You have about 10 minutes with most standard wood glues.
- Glue squeeze-out: Wipe excess glue with a damp cloth while it’s still wet. Dried glue under a stain finish creates light blotches that are very hard to fix.
- Wobbly assembly: Check diagonal measurements. If they don’t match, apply pressure diagonally across the longer measurement until they equalize.
Knowing when to start over is just as important as knowing how to fix things. If a board has a severe warp that causes the joint to spring open under pressure, replace it. Forcing a bad board into a project creates structural problems that worsen over time.
“Mortise and tenon joints provide exceptional strength for load-bearing furniture like tables and chairs through mechanical interlocking and large glue surfaces.”
Following a solid woodworking workflow from the start reduces the chance of hitting these problems in the first place. Prevention is always faster than repair.
Pro Tip: Before final assembly, label every piece with a pencil on the hidden face. Number them in assembly order. This simple habit makes glue-ups far less stressful, especially when you’re working alone.
Inspecting and enjoying your finished project
Once your pieces are dry and assembled, it’s time to inspect your craftsmanship and appreciate the results. A thorough inspection is not about being overly critical. It’s about making sure your project is safe, solid, and built to last.
- Check every joint. Press firmly on each joint with your hand. There should be no movement or flex. Any give in a joint means the glue bond is weak or the fit was too loose.
- Inspect the finish. Look at the surface under a raking light, meaning a light source held at a low angle to the surface. This reveals drips, brush marks, or areas where the finish is uneven.
- Test structural integrity. For furniture, apply realistic load to it. Sit on a stool, stack books on a shelf. If anything creaks or shifts, find the weak joint and reinforce it with a screw or additional glue.
- Sand and touch up. If the finish raised the wood grain, lightly sand with 320 grit and apply one more thin coat.
- Evaluate the overall fit. Doors should swing without binding, drawers should slide smoothly, and shelves should sit level.
Quality furniture joinery strength is a major factor in how long a piece lasts. Well-made furniture with proper joinery can last generations, with many antique pieces still in daily use after 100 or more years. That kind of durability starts with the decisions you make during the build, not after.
Once your inspection is complete and you’re satisfied, take a moment to actually enjoy what you built. Share it with friends or post it in a woodworking community. Feedback from other makers is one of the most useful tools for growing your skills faster.
A fresh perspective on mastering woodworking, one project at a time
Here’s something most woodworking content won’t tell you: experienced woodworkers still follow detailed plans. The idea that skill means improvising freely is a myth that causes beginners to rush past structure before they’re ready. Professionals use plans because they know that memory is unreliable and that a well-written step catches errors before they happen.
The real growth in woodworking doesn’t come from the projects that go perfectly. It comes from the ones that go sideways and force you to problem-solve. Every miscut board and every gap you had to fill taught you something that no tutorial can fully replicate. The key is to record those lessons. Keep a simple notebook or phone note where you jot down what went wrong and what you’d do differently. Over time, that becomes your most valuable reference.
Building skills step-by-step also means accepting that project three will be better than project one, and project ten will make you wonder how you ever thought project three was good. That progression is the point. Share your work with others, ask for honest feedback, and stay curious about techniques you haven’t tried yet.
Ready for your next woodworking adventure?
Completing your first project is a real milestone, and the best way to keep that momentum going is to jump into the next one with even better resources at your side.

At Real Wood Work Plans, you’ll find free woodworking plans covering projects at every skill level, from beginner boxes to full furniture builds. Understanding the woodworking plan benefits of working from a structured plan helps you grow faster and waste less material. Browse a wide range of woodworking project ideas to find your next build, whether you want something functional for your home or a creative challenge to push your skills further. Every project you finish makes the next one easier.
Frequently asked questions
What is the easiest woodworking project for a beginner?
Small projects like a basic bookshelf, step stool, or planter box are good beginner options since they use straight cuts and simple joints. These builds teach core skills without overwhelming you with complex joinery.
How can I avoid common woodworking mistakes?
Always double-check measurements, use practice cuts, and dry-fit parts before final assembly to minimize errors. Rushing any of these steps is where most beginner mistakes start. Strong joinery techniques also reduce structural failures down the line.
Which wood is best for beginner woodworking?
Softwoods like pine or poplar are affordable and easy to work with, making them ideal for first projects. They cut cleanly, sand quickly, and accept stain and paint well.
Is it necessary to use power tools for woodworking?
No, many projects can be built with hand tools, although power tools can save time and improve consistency. A good hand saw, chisels, and a hand drill are enough to complete most beginner builds.
How important are joinery techniques in woodworking?
Joinery methods like mortise and tenon are critical for making strong, durable furniture. The right joint for the right application is what determines whether a piece holds up for years or fails under normal use.
Recommended
- Woodworking Tips for Beginners: Build Skills Step-by-Step
- Master Your Woodworking Project Workflow for DIY Success
- What is woodworking: a beginner’s guide to the craft
- How to make wooden joints: beginner’s guide in 2026
- Deck Safety Inspection Guide for Massachusetts Homeowners | Sabatalo Contracting

“DIY woodworking enthusiast who started with zero experience and a YouTube tutorial.
I build simple, practical projects for my home and share free plans
so other beginners can skip the guesswork.If I can build it, you can too.”