
Many DIY woodworkers assume furniture grade wood is simply any hardwood that looks nice, but this oversimplification leads to poor material choices and disappointing results. Understanding what truly defines furniture grade lumber, from grading standards to grain characteristics, transforms your ability to select materials that deliver both structural integrity and visual appeal. This guide clarifies the actual criteria that separate furniture grade wood from standard lumber, compares key wood types, and provides actionable selection and finishing strategies to elevate your woodworking projects from amateur to professional quality.
Table of Contents
- What Does Furniture Grade Wood Mean? Defining Standards And Qualities
- Furniture Grade Wood Vs. Other Lumber: Comparison And Implications
- How To Identify And Select Furniture Grade Wood For Your Diy Projects
- Treating And Finishing Furniture Grade Wood For Durability And Beauty
- Explore Woodworking Plans Crafted For High-Quality Furniture Projects
- FAQ
Key takeaways
| Point | Details |
|---|---|
| Furniture grade criteria | Hardwoods with high durability, minimal defects, straight grain, and uniform appearance suitable for visible furniture components |
| Selection importance | Choosing wood based on strength, aesthetics, and workability directly impacts furniture longevity and beauty |
| Grade distinctions | Furniture grade differs from construction and craft lumber in defect levels, consistency, and finishing characteristics |
| Treatment essentials | Proper sanding, sealing, and finishing protect wood while enhancing natural grain and color |
| Project resources | Quality plans paired with premium lumber maximize DIY woodworking success and craftsmanship |
What does furniture grade wood mean? Defining standards and qualities
Furniture grade wood isn’t just marketing language. It represents hardwoods with high durability, low defects, and fine grain patterns specifically suited for visible furniture components where both strength and appearance matter. Industry grading systems evaluate lumber based on the presence and size of natural defects like knots, splits, mineral streaks, and grain irregularities. The fewer and smaller these imperfections, the higher the grade and the more suitable the wood becomes for quality furniture construction.
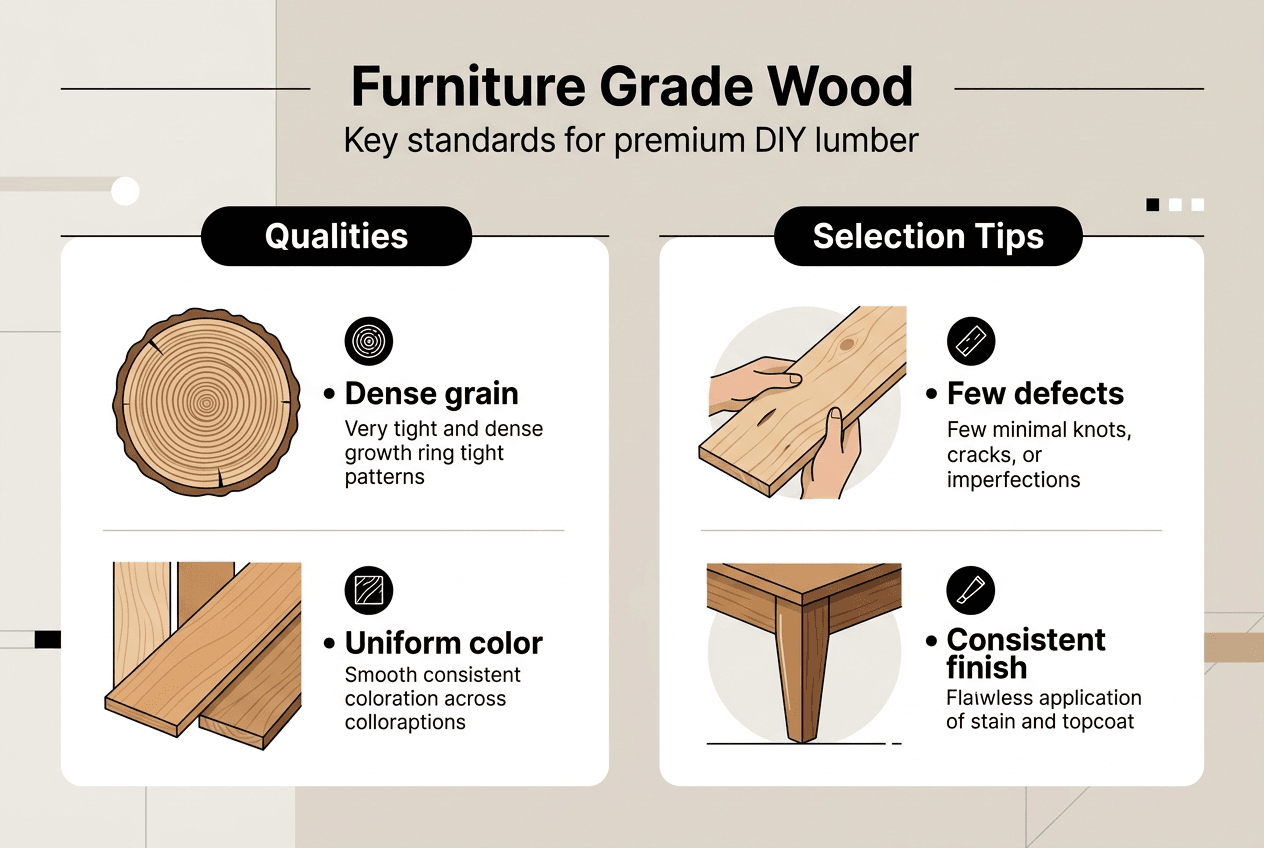
Several characteristics define furniture grade lumber:
- Straight, consistent grain patterns that resist warping and splitting over time
- Minimal knots, particularly tight knots that won’t loosen or create weak points
- Uniform color throughout the board without dramatic sapwood variations
- Smooth surface texture that accepts finishes evenly without blotchiness
- Appropriate moisture content, typically 6 to 8 percent for indoor furniture
These qualities directly impact both structural integrity and aesthetic appeal. Straight grain provides predictable wood movement as humidity changes, preventing joints from failing or panels from cracking. Minimal defects mean more usable wood per board and surfaces that showcase natural beauty rather than requiring strategic placement to hide flaws. Color consistency allows you to match multiple boards in a single project without dramatic visual breaks.
The wood types for furniture durability you choose should align with your project’s functional demands. A dining table endures different stresses than a bookshelf, and selecting appropriate hardness prevents premature wear.
“The Janka hardness rating provides critical insight into a wood species’ ability to resist denting and wear, making it essential for furniture that will see daily use and contact.”
This measurement quantifies the force required to embed a steel ball into wood, giving you concrete data to compare species. Maple rates around 1450 on the Janka scale, making it ideal for tabletops and chair seats. Walnut measures approximately 1010, offering sufficient hardness for most furniture while remaining easier to work. Cherry falls near 950, providing adequate durability for case goods and decorative pieces. Understanding these numbers helps you match wood characteristics to specific furniture applications rather than guessing based on appearance alone.
Furniture grade wood vs. other lumber: comparison and implications
Recognizing the distinctions between furniture grade and other lumber categories prevents costly material mistakes. Construction grade lumber prioritizes structural strength over appearance, often containing large knots, sapwood, and grain irregularities that would ruin furniture aesthetics. Craft wood typically consists of smaller dimensional pieces suitable for decorative items but lacking the size and quality needed for substantial furniture components. Dimensional lumber refers to standardized sizes like 2x4s and 2x6s, usually softwood species processed for framing rather than finish work.
| Lumber Type | Primary Use | Defect Tolerance | Finishing Quality | Typical Species |
| — | — | — |
| Furniture Grade | Visible furniture components | Very low, minimal knots | Excellent, even absorption | Hardwoods like oak, maple, cherry |
| Construction Grade | Structural framing, hidden elements | High, knots acceptable | Poor, inconsistent surface | Pine, fir, spruce |
| Craft Wood | Small decorative projects | Medium, some defects okay | Good for paint, variable for stain | Mixed hardwoods and softwoods |
| Dimensional Lumber | Building framework | High, strength focused | Not intended for finishing | Softwoods, primarily pine |
Durability differences stem from both species selection and grade standards. Furniture grade hardwoods possess dense cellular structures that resist compression and surface damage. Their tight grain patterns minimize seasonal wood movement, keeping joints stable and panels flat. Construction lumber often comes from faster growing softwoods with wider growth rings and lower density, making them prone to denting and wearing when exposed to regular contact.
Appearance variations prove equally significant. Furniture grade boards undergo selection for color matching and grain appeal, while construction lumber may include dramatic color shifts from heartwood to sapwood within a single board. Large knots common in lower grades create dark spots that bleed through stain, and loose knots leave voids requiring filling. Grain tear out during planing occurs more frequently with construction grade material, leaving fuzzy surfaces that never achieve the smooth finish furniture demands.

Finishing characteristics separate grades most noticeably. Furniture grade wood accepts stains uniformly because consistent density prevents blotching. Sanding progresses smoothly without grain tear out or fuzzy areas. Topcoats like polyurethane or lacquer flow evenly and cure to glass smooth surfaces. Construction lumber’s inconsistent density causes stain to absorb unevenly, creating dark and light patches. Resinous areas in softwoods can reject finishes entirely, leaving sticky spots that never fully cure.
Pro Tip: Reserve your highest grade boards for visible surfaces like tabletops and door fronts, then use slightly lower grades with minor defects for internal components like drawer sides and cabinet backs where appearance matters less but structural integrity remains important.
How to identify and select furniture grade wood for your DIY projects
Successful lumber selection begins before you reach the lumberyard. Know your project requirements including finished dimensions, species preferences based on color and grain, and the specific characteristics each component demands. A table apron tolerates minor defects better than a tabletop, while chair legs need straight grain to prevent breaking under stress. This clarity guides your inspection process and prevents impulse purchases of beautiful but unsuitable boards.
Follow this systematic approach when evaluating lumber:
- Inspect both faces and all edges for knots, checking that any present are small, tight, and located where you can work around them
- Sight down the board’s length from one end to detect warping, cupping, bowing, or twisting that indicates instability
- Examine grain direction and figure, looking for straight, consistent patterns rather than wild grain that’s difficult to plane and finish
- Check color uniformity across the board, noting dramatic sapwood areas that will stain differently than heartwood
- Verify thickness consistency by measuring at multiple points, as variations complicate milling and joinery
- Assess surface quality for mill marks, tear out, or damage from handling that increases your prep work
Moisture content verification ranks among your most critical checks. Wood that’s too wet will shrink after you build with it, causing joints to loosen and panels to crack. Insert a pin type or pinless moisture meter into the board’s center, not just the surface which dries faster. Target 6 to 8 percent moisture for indoor furniture, slightly higher for pieces destined for covered outdoor spaces. Reject boards reading above 10 percent unless you can properly acclimate them in your shop for several weeks before milling.
Look for grade stamps or certifications when available, though specialty hardwood dealers often sell unstamped lumber graded by visual inspection. The National Hardwood Lumber Association establishes grading rules, with FAS (Firsts and Seconds) representing the highest grade containing boards at least 6 inches wide and 8 feet long with 83 percent clear face cuttings. Select grade allows slightly more defects, while Common grades contain increasing defect levels unsuitable for most furniture applications.
Storage conditions at the yard provide clues about lumber quality. Well maintained operations store wood under cover, stacked with spacers for air circulation, and protected from ground moisture. Boards exposed to weather, stacked directly on concrete, or showing mold and staining have likely experienced moisture cycling that reduces stability. Even if current moisture readings seem acceptable, this wood may move unpredictably after you bring it home.
Pro Tip: Purchase lumber several weeks before you need it and store it in your shop environment, allowing the wood to equalize to your workspace humidity. This acclimation period reveals any hidden instability through warping or movement before you invest hours of work, and it ensures your finished furniture remains stable in its final environment.
Treating and finishing furniture grade wood for durability and beauty
Proper finishing transforms raw lumber into furniture that withstands daily use while showcasing natural beauty. The process follows a systematic workflow where each step prepares the surface for the next. Skipping stages or rushing through them compromises both appearance and protection, wasting the premium lumber you carefully selected.
Begin with thorough sanding using progressively finer grits. Start at 80 or 100 grit to remove mill marks and level any surface irregularities, then progress through 120, 150, and 180 grits. Each grit removes scratches from the previous one while creating finer scratches of its own. Stop at 180 or 220 grit for most projects, as finer grits can burnish the surface and prevent stain absorption. Sand with the grain direction to avoid cross grain scratches that show through finish. Remove all dust between grits using a vacuum followed by a tack cloth.
Raise the grain before final sanding by lightly misting the wood with distilled water and letting it dry completely. This swells wood fibers that will rise again when you apply water based finishes, creating a rough surface. Sand these raised fibers smooth with your final grit, and you’ll maintain smoothness through the finishing process. Skip this step with oil based finishes that don’t raise grain.
Finish selection depends on your aesthetic goals and the furniture’s intended use:
| Finish Type | Appearance | Durability | Application Difficulty | Maintenance |
|---|---|---|---|---|
| Oil (Tung, Linseed) | Natural, low sheen | Moderate, needs recoating | Easy, wipe on | Regular reapplication required |
| Oil/Varnish Blend | Warm, satin glow | Good, better than pure oil | Easy, wipe or brush | Occasional renewal |
| Polyurethane | Clear, multiple sheens | Excellent, highly protective | Moderate, brush or spray | Minimal, very durable |
| Lacquer | Clear, builds quickly | Very good, repairable | Difficult, spray recommended | Easy to repair damage |
| Water Based Poly | Clear, non yellowing | Excellent, eco friendly | Moderate, brush or spray | Minimal, very durable |
Avoid these common finishing mistakes that compromise results:
- Applying finish in humid conditions above 70 percent relative humidity, which causes blushing and slow curing
- Using old or contaminated brushes that leave bristles and debris in your finish
- Applying thick coats that run, sag, or take forever to dry instead of building thin layers
- Sanding between coats with too coarse a grit, creating deep scratches visible under subsequent layers
- Skipping the final rubout with fine abrasives and compounds that transforms good finishes into glass smooth surfaces
Staining requires testing on scrap pieces from your actual project lumber, as different boards absorb stain differently even within the same species. Apply pre stain conditioner to woods like pine, cherry, and maple that tend to blotch, allowing more uniform color absorption. Wipe stain on following grain direction, let it penetrate for the manufacturer’s recommended time, then wipe off excess thoroughly. Leaving too much stain on the surface creates a sticky mess that never fully dries.
Finishing protects and enhances your furniture investment by sealing wood pores against moisture, dirt, and spills while highlighting grain patterns and color depth. Multiple thin topcoat layers build better protection than single thick applications, and light sanding between coats with 320 grit paper removes dust nibs and improves adhesion. Three to four coats provide adequate protection for most furniture, while high use surfaces like tabletops benefit from five or more coats.
Maintenance preserves your finish over years of use. Dust regularly with microfiber cloths that trap particles rather than spreading them. Clean spills immediately before they penetrate finish and stain wood. Use appropriate cleaning products matched to your finish type, avoiding harsh chemicals and excessive water. Periodically apply furniture polish or wax to oil finished pieces, refreshing the protective layer. Repair minor scratches and worn areas promptly before damage reaches bare wood, using compatible touch up products or carefully applied finish.
Explore woodworking plans crafted for high-quality furniture projects
Applying your knowledge of furniture grade wood becomes dramatically easier with detailed plans designed specifically for quality construction. Our free woodworking plans provide step by step guidance that eliminates guesswork, showing you exactly how much lumber to purchase, which grades work best for each component, and how to mill and assemble pieces for professional results. Following proven plans means you’ll waste less material through cutting mistakes and poor layout decisions.

Expert plans account for wood movement, grain direction, and joinery techniques that maximize your furniture grade lumber’s natural strengths. You’ll learn which joints provide adequate strength for different applications, how to orient grain for stability and visual appeal, and where you can use lower grades strategically without compromising quality. The combination of premium materials and professional techniques produces furniture that rivals commercial pieces at a fraction of the cost.
Explore our collection of woodworking plans for project success to find designs matching your skill level and available tools. Each plan includes cut lists optimized for standard lumber dimensions, detailed drawings showing joinery and assembly sequences, and finishing recommendations suited to the project type. Understanding furniture making terminology explained in our guides helps you communicate effectively with lumber suppliers and follow plans with confidence.
Pro Tip: Invest in quality lumber and follow detailed plans for your first few furniture projects rather than attempting to save money with marginal materials or improvised designs. The skills and confidence you build through successful projects far outweigh any initial cost savings, and you’ll create pieces you’re proud to use and display.
FAQ
What is the best wood for furniture grade projects?
Popular furniture grade hardwoods include maple, cherry, walnut, oak, and birch, each offering distinct color, grain, and working properties. Maple provides exceptional hardness and a clean, light appearance ideal for modern designs. Cherry develops rich reddish brown tones over time and machines beautifully with hand and power tools. Walnut delivers dark chocolate colors and striking grain figure prized for premium furniture. Red and white oak offer strong, open grain character perfect for mission and craftsman styles. Select based on your project’s aesthetic goals, required durability, and your comfort level working with different hardness levels.
How can I tell if wood is furniture grade at a lumberyard?
Look for minimal knots, consistent grain running the board’s length, and smooth surfaces free from tear out or excessive mill marks. Check that any knots present are small, tight, and sound rather than loose or missing. Wood selection at lumberyards requires verifying moisture content between 6 and 8 percent using a moisture meter, and sighting down boards to detect warping, cupping, or twisting. Examine color uniformity across faces and edges, avoiding boards with dramatic sapwood streaks unless you plan to work around them. Boards meeting these criteria indicate furniture grade quality suitable for visible components.
Why is finishing important for furniture grade wood?
Finishing protects wood from moisture damage, scratches, stains, and daily wear that would otherwise degrade your furniture over time. Topcoats seal wood pores against spills and humidity changes that cause swelling, shrinking, and eventual joint failure. Quality finishes also enhance natural grain patterns and color depth, transforming plain lumber into visually striking furniture. The right finish matched to your furniture’s use location and exposure level ensures your investment in premium lumber delivers decades of service rather than requiring replacement after a few years.
Can I use construction lumber for furniture if I select carefully?
Construction lumber rarely meets furniture standards even with careful selection because grading prioritizes strength over appearance and workability. Large knots, wild grain, and inconsistent density create finishing problems including blotching, tear out, and uneven stain absorption. Softwood species common in construction grades lack the hardness needed for furniture surfaces that resist denting and wear. While you might find occasional clear boards suitable for painted furniture or hidden components, the time spent sorting through construction lumber typically exceeds the cost savings compared to purchasing properly graded furniture lumber from the start.
Recommended
- Wood Types Explained: Choosing for DIY Projects
- Role of Wood Selection in DIY Woodworking Projects
- Types of wood for furniture: 6 options with Janka ratings
- Furniture Making Terminology: Key Concepts for DIY Success

“DIY woodworking enthusiast who started with zero experience and a YouTube tutorial.
I build simple, practical projects for my home and share free plans
so other beginners can skip the guesswork.If I can build it, you can too.”