
Beginner woodworkers often struggle to identify which skills truly matter for furniture making. You don’t need to master every technique before starting your first project. By focusing on a core set of essential skills including safety, tool use, joinery, and finishing, you can confidently build durable furniture while avoiding wasted time on less critical abilities. This guide prioritizes the exact skills that will accelerate your progress from novice to capable furniture maker.
Table of Contents
- Selection Criteria For Essential Woodworking Skills
- Understanding Woodworking Skill Levels And Safety
- Essential Tools And Their Uses
- Selecting Wood And Understanding Grain
- Mastering Measurement And Layout
- Mastering Joinery Techniques
- Applying Finishing Techniques
- Skill Development Pathways
- Summary Comparison Of Essential Skills For Beginner Woodworkers
- Situational Recommendations Based On Woodworking Goals
- Explore Woodworking Plans And Resources To Build Your Skills
- Frequently Asked Questions About Essential Woodworking Skills
Key takeaways
| Point | Details |
|---|---|
| Safety comes first | Master protective equipment and supervised machine operation before advancing to complex techniques. |
| Joinery builds strength | Techniques like mortise and tenon or dovetails create durable furniture that lasts for years. |
| Measurement impacts quality | Accurate layout and double-checking dimensions prevent fit issues and material waste. |
| Finishing protects your work | Sanding, staining, and sealing enhance appearance and guard against moisture damage. |
| Progress step by step | Build skills gradually from basic hand tools to power tools and complex joints. |
Selection criteria for essential woodworking skills
Before you invest time learning new techniques, you need a framework for prioritizing which skills deserve your attention first. Not every woodworking skill holds equal value for beginners focused on furniture projects. Four criteria help you make smart choices about where to focus your energy.
Safety impact ranks highest. Skills that prevent injury or build safe workshop habits must come first, regardless of their direct contribution to finished pieces. Tool handling and machine operation fall into this category because accidents derail progress and confidence.
Project relevance matters significantly. Focus on skills that directly support the furniture you want to build. If you plan to make tables and chairs, joinery techniques take priority over decorative carving. Match your learning to your actual project goals rather than chasing every technique you see online.
Skill progression creates a logical path. Some abilities serve as foundations for others. You must master measurement before tackling complex joints. Hand tool control prepares you for power tool use. Build skills in sequence rather than jumping to advanced techniques without proper groundwork.
Accessibility considerations include:
- Tool and material availability in your area
- Budget constraints for equipment purchases
- Space requirements for different techniques
- Time investment needed to reach competence
- Physical demands of specific skills
These criteria help you avoid the trap of learning impressive but impractical skills early in your journey. When a technique scores high across multiple criteria, it belongs on your priority list. When it only checks one box, consider deferring it until you’ve built a stronger foundation.
Understanding woodworking skill levels and safety
Woodworking skills progress through defined levels that mark your journey from beginner to expert. Woodworkers at the basic skill level have sufficient ability to work safely and complete tasks on set-up machines under supervision, focusing on fundamental skills. This Level 1 designation sets realistic expectations for what you can accomplish as you start.
Safety equipment forms your first line of defense against workshop hazards. Every session requires these essentials regardless of the task:
- Safety glasses to protect against flying debris and sawdust
- Ear protection when operating loud power tools
- Dust masks or respirators to prevent respiratory irritation
- Work gloves for handling rough lumber (removed during machine operation)
Machine operation demands supervised practice until you demonstrate consistent safe technique. Table saws, planers, and routers present serious injury risks when used improperly. Work alongside an experienced woodworker or instructor for your first 10 to 20 hours with each major power tool. This supervision catches dangerous habits before they become ingrained.
Workshop organization directly reduces accident frequency. Keep floors clear of scrap wood and cords. Store sharp tools in designated locations rather than leaving them on work surfaces. Maintain adequate lighting so you can see cut lines and potential hazards clearly. A well-organized space lets you focus on technique rather than navigating obstacles.
Pro Tip: Create a pre-work safety checklist covering equipment inspection, proper clothing (no loose sleeves), and workspace clearing. Run through it before every session until the routine becomes automatic.
Your confidence grows naturally as safety becomes second nature. Beginning woodworkers who prioritize protection over speed develop better technique because they’re not rushing or distracted by fear. For detailed safety practices, review woodworking safety basics and explore our woodworking tips for beginners step guide for comprehensive startup advice.
Essential tools and their uses
Your tool collection directly determines which projects you can tackle and how efficiently you work. Start with fundamental hand and power tools rather than collecting every specialty item you see.
Basic woodworking hand tools like chisels, hand planes, and saws are essential, serving diverse functions from shaping to cutting. Chisels remove material in joints and clean up saw cuts. Hand planes smooth boards and adjust thickness. Hand saws let you make controlled cuts without electricity. These tools build your understanding of how wood behaves under different cutting actions.
Power tools accelerate production and improve consistency. Among power tools, the table saw, miter saw, and drill are most commonly used by beginners for precise cuts and drilling. The table saw handles rip cuts along grain and crosscuts across boards. Miter saws excel at angled cuts for frames and trim. Drills create holes for screws and dowels while also driving fasteners.
Each tool serves specific purposes in furniture construction:
- Chisels: mortise creation, tenon fitting, joint cleanup
- Planes: surface smoothing, thickness adjustment, edge squaring
- Table saw: ripping lumber to width, cutting panels, dado creation
- Miter saw: crosscutting to length, cutting angles for joints
- Drill: boring holes, driving screws, sanding with attachments
Tool maintenance extends lifespan and preserves cutting performance. Keep blades and bits sharp because dull edges require excess force and produce rough cuts. Clean pitch and resin buildup from saw blades after heavy use. Apply light oil to metal surfaces to prevent rust. Store tools in dry locations away from temperature extremes.
Pro Tip: Buy fewer high-quality tools rather than many cheap ones. A sharp, well-made chisel outperforms three dull budget versions and teaches you proper technique through predictable performance.
Our hand tool woodworking essentials guide covers detailed selection advice. For power tool specifications, consult resources on beginner woodworking power tools to match equipment to your project needs and budget.
Selecting wood and understanding grain
Wood selection impacts every aspect of your project from cutting ease to final durability. Understanding material properties helps you choose appropriate lumber for each furniture piece.
Hardwoods like oak, maple, and walnut offer superior strength and wear resistance for furniture that sees daily use. Tables, chairs, and cabinet frames benefit from hardwood construction. Softwoods including pine, cedar, and fir cost less and work more easily but dent and scratch more readily. Reserve softwoods for projects with less physical stress or plan to apply protective finishes.
Wood grain direction is critical: cutting against the grain causes tear-out while cutting along the grain yields smoother finishes. Examine boards before cutting to identify grain direction. Plane and sand with the grain to avoid rough, splintered surfaces. Grain also affects joint strength because wood splits more easily along grain lines than across them.
Wood characteristics shape project outcomes in multiple ways:
- Density affects weight, durability, and fastener holding power
- Grain pattern influences appearance and finishing results
- Moisture content impacts dimensional stability as wood acclimates
- Species-specific properties like rot resistance matter for outdoor furniture
Match your wood choice to project requirements and your skill level. Beginners find success with straight-grained softwoods that cut and shape predictably. As your skills improve, move to figured hardwoods that showcase your finishing abilities. Consider your finish goals too because some woods accept stain evenly while others create blotchy results without careful preparation.
Our wood types for DIY projects resource provides detailed species comparisons to guide your material selection for specific furniture applications.
Mastering measurement and layout
Precise measurement separates successful projects from frustrating failures. Small errors compound through multiple cuts and joints, creating parts that don’t fit together properly.
Using correct measuring tools such as squares, rulers, and tape measures ensures accuracy critical to successful project outcomes. Combination squares check right angles and mark parallel lines. Steel rulers provide precise measurements for layout work. Tape measures handle longer dimensions across full boards and assemblies. Each tool serves specific measurement tasks.
Double-checking critical dimensions prevents costly mistakes. Measure twice before cutting, especially on expensive hardwoods. Verify that opposite sides of frames match in length. Confirm that angles total correctly in multi-sided assemblies. This habit takes seconds but saves hours of rework.
Common layout techniques improve cut accuracy:
- Mark cut lines with sharp pencils or marking knives for visibility
- Use story sticks to transfer repeated measurements without math errors
- Create templates for complex shapes that appear multiple times
- Mark waste sides of cut lines to avoid removing material from the wrong side
Measurement accuracy correlates directly with how well parts fit during assembly. Gaps in joints reveal measurement problems. Doors that don’t hang square trace back to inaccurate case dimensions. Invest attention in measurement and your projects will require less correction later.
Explore our woodworking project workflow diy success guide for systematic approaches to measurement, cutting, and assembly that minimize errors throughout your build.
Mastering joinery techniques
Joinery creates the structural connections that hold furniture together under stress and use. Your choice of joint determines both strength and appearance.
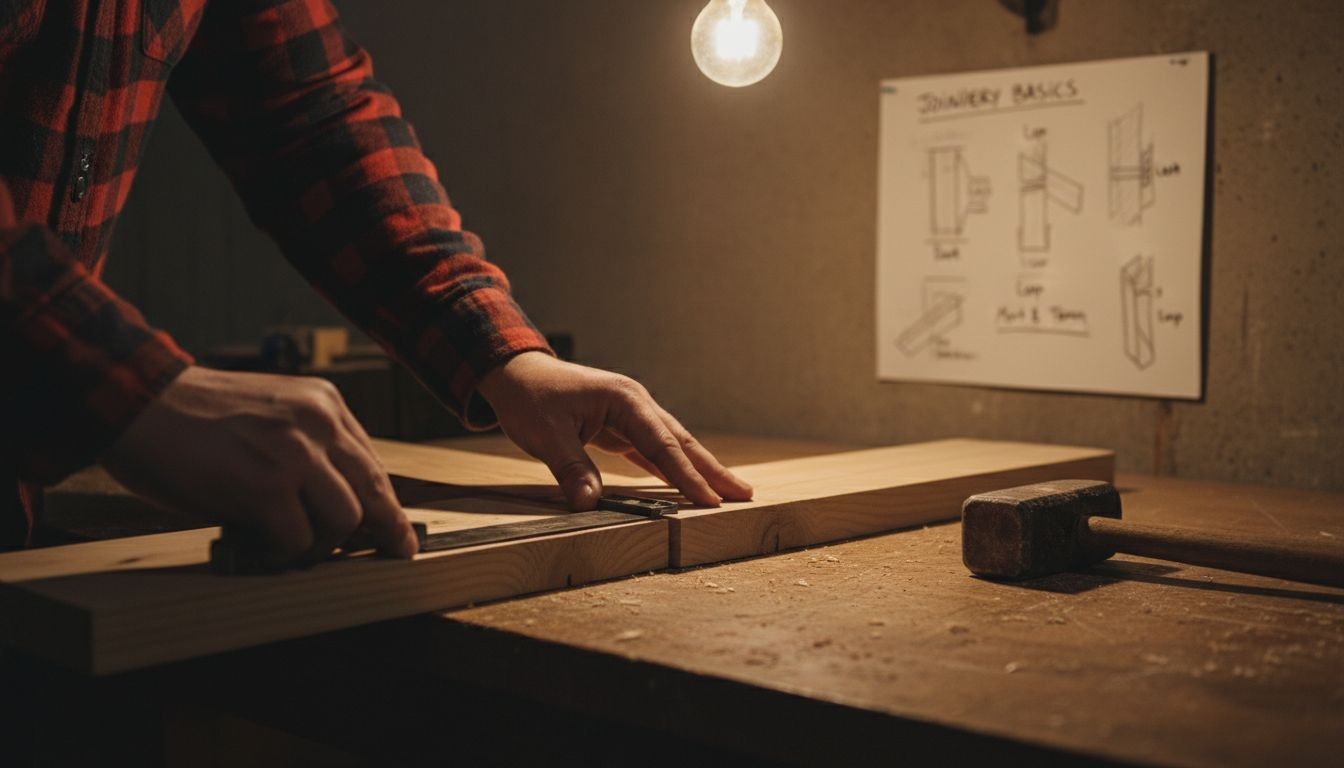
Basic joinery techniques such as butt joints, dovetails, and mortise and tenon provide structural integrity essential for furniture projects. Butt joints simply glue two pieces edge to edge or end to edge. They’re fast but weak without reinforcement. Dovetails interlock boards at right angles with wedge-shaped pins and tails that resist pulling apart. Mortise and tenon joints insert a tongue (tenon) into a socket (mortise) for exceptional strength in frames and legs.
Selecting appropriate joints affects how long your furniture lasts. Chairs require strong joints because they experience racking forces. Tables need joints that support weight without deflection. Cabinets benefit from joints that align panels precisely. Match joint complexity to structural demands rather than using complicated techniques where simple ones suffice.
Clean joints require proper tools and careful technique. Sharp chisels and snug-fitting saw kerfs produce tight-fitting mortises. Accurate marking ensures dovetails align correctly. Test-fit joints before gluing because adjustments become impossible after adhesive sets. Common beginner errors include rushing cuts, skipping test fits, and applying too little glue to joint surfaces.
| Joint Type | Strength | Difficulty | Best Applications |
|---|---|---|---|
| Butt Joint | Low | Easy | Non-structural panels, face frames with fasteners |
| Pocket Hole | Medium | Easy | Face frames, cabinet assembly, quick projects |
| Mortise and Tenon | High | Moderate | Table legs, chair frames, door frames |
| Dovetail | High | Advanced | Drawer boxes, fine casework, visible joints |
| Dado | Medium | Moderate | Shelf installation, cabinet dividers |
Our joinery techniques furniture strength benefits article details how to execute these joints and select the right one for each furniture component you build.
Applying finishing techniques
Finishing protects your woodwork from damage and enhances its natural beauty. Without proper finishing, furniture absorbs moisture, accumulates stains, and degrades quickly.
Effective finishing techniques including sanding, staining, and sealing enhance wood appearance and durability, essential final steps in furniture making. Sanding prepares surfaces by removing mill marks and creating uniform smoothness. Start with coarse grits (80-100) to level surfaces, then progress through medium (120-150) and fine (180-220) grits. Each grit removes scratches from the previous one.
Stains add color while allowing wood grain to show through. Oil-based stains provide longer working time for even application. Water-based stains dry faster with less odor. Apply stain with brushes or rags, working in manageable sections. Wipe off excess after a few minutes to prevent blotching. Test stain on scrap pieces from your project to preview the final color.
Sealants create protective barriers against moisture, scratches, and UV damage:
- Polyurethane offers durable protection for high-use surfaces like tabletops
- Tung oil penetrates wood fibers for a natural, low-sheen appearance
- Lacquer dries quickly for production efficiency but requires spray equipment
- Wax provides subtle protection and easy application for decorative pieces
Multiple thin coats outperform single heavy applications. Allow each coat to dry completely, then lightly sand between coats with 320-grit paper. This removes dust nibs and creates mechanical bonding for the next layer. Three to four coats typically provide adequate protection for indoor furniture.
Our why finish wood benefits guide explains the science behind finishing and helps you choose appropriate products for different furniture types and usage environments.
Skill development pathways
Structured learning accelerates your progress from uncertain beginner to confident furniture maker. Random project attempts teach lessons but take longer than systematic skill building.
Workshops structured around progressive skill levels help woodworkers build capabilities stepwise, improving confidence and competence. Beginner series classes typically cover safety, basic tools, fundamental joints, and simple projects over 6 to 12 weeks. Hands-on instruction lets you ask questions and receive immediate feedback on technique.
Self-directed learning works when you follow proven plans and tutorials. Novice woodworkers following structured guidance on basic techniques report higher project completion and skill retention. Choose projects slightly beyond your current ability to stretch skills without overwhelming yourself.
Validate your skills through incremental projects:
- Build a simple box using only hand tools to practice measurement and basic joinery
- Construct a small shelf with dadoes to apply power tool skills safely
- Create a step stool incorporating mortise and tenon joints for strength
- Make a side table combining multiple joint types and finishing techniques
- Advance to chairs or cabinets after mastering foundational skills on simpler pieces
Each completed project demonstrates competence at your current level and prepares you for the next challenge. Keep early projects as references for how far your skills have progressed. The visible improvement motivates continued learning.
Increasing complexity gradually builds confidence without the frustration of tackling projects beyond your abilities. You develop problem-solving skills by working through challenges at an appropriate difficulty level. Review our woodworking tips for beginners step guide for detailed progression strategies.
Summary comparison of essential skills for beginner woodworkers
Comparing skills across multiple dimensions helps you prioritize learning and allocate resources effectively. This table synthesizes the key factors affecting each essential skill area.
| Skill Area | Importance | Required Tools | Learning Time | Project Types |
|---|---|---|---|---|
| Safety Practices | Critical | Safety glasses, ear protection, dust mask | 2-4 weeks ongoing | All projects |
| Basic Hand Tools | High | Chisels, planes, hand saws | 4-8 weeks | Simple boxes, small furniture |
| Measurement & Layout | Critical | Tape measure, square, marking tools | 2-3 weeks | All projects |
| Power Tool Operation | High | Table saw, miter saw, drill | 6-10 weeks | Medium to large furniture |
| Wood Selection | Medium | Knowledge only | 1-2 weeks | All projects |
| Basic Joinery | High | Chisels, saws, drills | 8-12 weeks | Tables, chairs, frames |
| Finishing Techniques | Medium | Sandpaper, brushes, finish products | 3-5 weeks | All projects |
Importance ratings reflect how essential each skill is for creating functional, durable furniture. Critical skills cannot be skipped without compromising safety or project success. High-importance skills significantly impact quality but allow some flexibility in execution methods. Medium-importance skills enhance results but offer more learning timeline flexibility.
Learning time estimates assume regular practice of 3 to 5 hours per week. Actual time varies based on prior experience, instruction quality, and natural aptitude. These ranges help you set realistic expectations rather than becoming discouraged by slow initial progress.
Tool requirements directly affect startup costs. Safety equipment and measurement tools require minimal investment. Power tools represent larger purchases that you can phase in over time as projects demand their capabilities. Consider renting or borrowing expensive tools for your first few projects before committing to purchases.
Situational recommendations based on woodworking goals
Your specific furniture goals should shape which skills you prioritize and how quickly you need to develop them. Tailoring your learning path to your actual projects creates motivation and relevance.
Beginners with limited tools should focus initial efforts on safety practices, hand tool mastery, and measurement accuracy. Hand tools alone can produce quality furniture when you develop proper technique. A bench, chisels, hand saws, and planes cost less than a single quality table saw while teaching fundamental wood behavior. Add power tools gradually as project complexity increases.
Builders focused on durable furniture must prioritize joinery skills and thorough finishing. Mortise and tenon joints combined with proper glue application create heirloom-quality pieces. Invest extra time in finish coats because inadequate sealing allows moisture damage that ruins structural integrity over months or years. Don’t rush assembly or finishing steps even when excitement pushes you toward completion.
Formal instruction accelerates skill development:
- Classes provide supervised practice with expensive tools before you buy them
- Instructors catch and correct technique problems early
- Structured curricula ensure you don’t skip foundational skills
- Workshop access lets you attempt larger projects than home shops accommodate
Balance safety priority with skill development based on project ambition. Simple boxes and shelves require basic safety awareness but minimal joint complexity. Chairs and tables demand both advanced safety consciousness for extended power tool use and sophisticated joinery for structural integrity. Match your current skill reality to appropriate project challenges.
Explore our beginner woodworking projects guide for project recommendations aligned with different skill levels and tool availability.
Explore woodworking plans and resources to build your skills
Putting these essential skills into practice requires good project plans and ongoing learning resources. Our website offers both to support your furniture making journey.

Access free woodworking plans tailored for beginner furniture projects that guide you step by step through cuts, joints, and assembly. Each plan specifies required skills, tools, and materials so you can select projects matching your current abilities. As you complete projects, you’ll naturally develop the skills covered in this article through practical application.
Discover fresh woodworking project ideas 2026 ranging from simple starter pieces to more ambitious furniture builds. These project ideas help you practice specific skills in context rather than drilling techniques in isolation. Our woodworking tips for beginners step guide provides additional confidence-building strategies throughout your learning process.
Frequently asked questions about essential woodworking skills
What is the single most important skill for beginner woodworkers?
Safety awareness and proper tool handling form the foundation for everything else. You cannot develop other skills if accidents derail your progress or damage your confidence. Master safety equipment use and supervised machine operation before advancing to complex techniques.
How long does it take to learn basic woodworking skills?
Most beginners reach functional competence in fundamental skills within 3 to 6 months of consistent practice. Expect to invest 50 to 100 hours developing proficiency with essential tools, basic joints, and finishing. Advanced mastery continues developing over years of progressively challenging projects.
Can I learn woodworking without expensive power tools?
Hand tools alone can produce quality furniture when you develop proper technique. Chisels, hand planes, and hand saws cost substantially less than power equipment while teaching you how wood behaves under different cutting actions. Add power tools gradually as your projects and budget grow.
Which joinery technique should beginners learn first?
Pocket hole joinery offers the easiest entry point with immediate success. The jig guides drilling precisely and screws pull joints tight during assembly. After mastering pocket holes, progress to dadoes and rabbets before attempting mortise and tenon or dovetails.
How do I know when I’m ready for more advanced projects?
Complete three to five projects at your current skill level with decreasing errors and frustration. When you anticipate problems before they occur and correct mistakes efficiently, you’re ready for the next difficulty tier. Consistent success indicates solid skill foundations.
What’s the best way to practice woodworking skills without wasting expensive hardwood?
Use construction-grade pine or poplar for skill practice because these woods cost far less than furniture-grade hardwoods. Build test joints and practice cuts on scrap pieces before working on actual project parts. Many woodworkers keep a scrap bin specifically for technique experiments.