Wood carving is often seen as a complex craft reserved for experts with expensive power tools and years of experience. In reality, it’s an accessible art form that anyone can learn using simple hand tools and basic techniques. This guide will walk you through what wood carving truly involves, the essential tools you need to get started, fundamental techniques that build your skills, and critical safety practices to carve confidently at home. Whether you want to create decorative pieces for your living space or personalized gifts for loved ones, understanding these fundamentals opens the door to a rewarding creative practice.
Table of Contents
- Key takeaways
- Understanding wood carving: art, materials, and methods
- Essential tools and best practices for beginner carvers
- Mastering wood carving techniques and progression
- Applying wood carving skills to practical projects and décor
- Explore expert woodworking plans to advance your skills
- Frequently asked questions
Key Takeaways
| Point | Details |
|---|---|
| Subtractive craft | Wood carving is a subtractive craft that removes material with hand tools to reveal shapes. |
| Basswood and grain | Basswood is ideal for beginners due to its soft texture and fine grain, and carving with the grain helps prevent tearout. |
| Beginner carving styles | Beginner friendly styles include whittling, with relief carving and carving in the round offering more challenge as skills grow. |
| Workflow overview | A basic workflow guides you from sharpening tools to sketching a design, roughing out the shape, refining details, sanding, and applying a finish. |
| Safety practices | Safety includes securing the workpiece and cutting away from the body to reduce the risk of injury. |
Understanding wood carving: art, materials, and methods
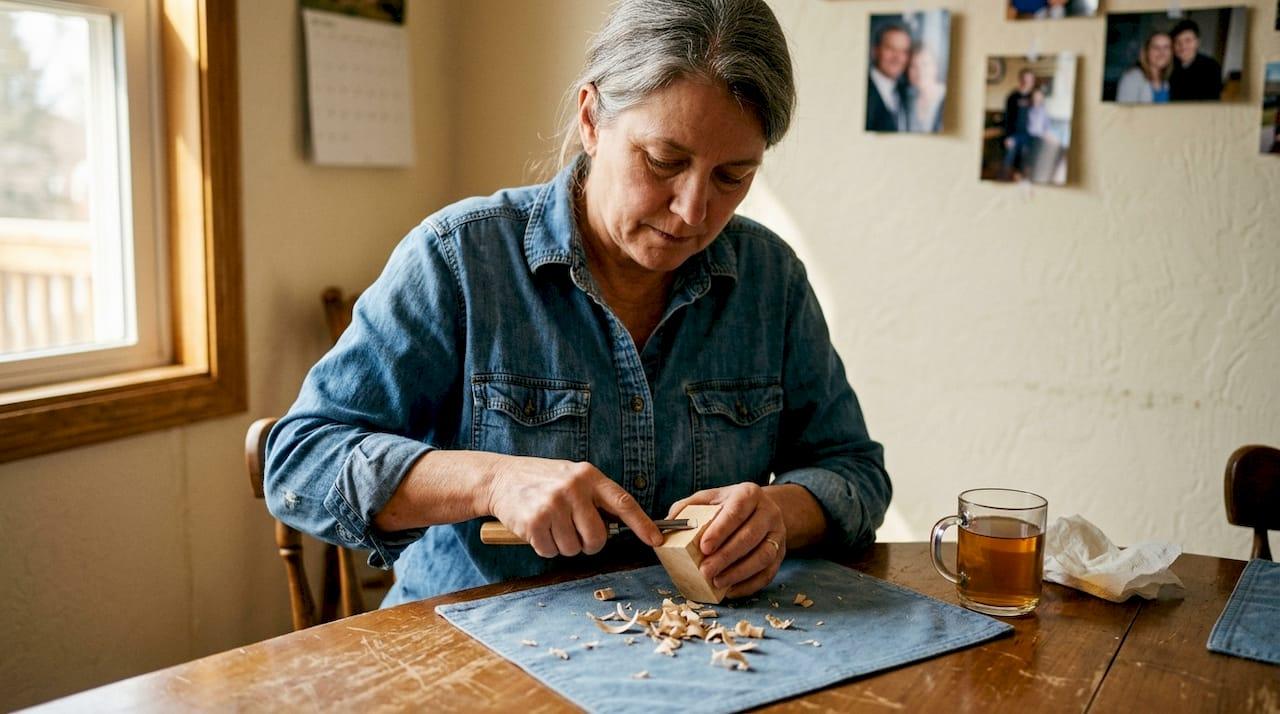
Wood carving is a subtractive art form that transforms raw wood into sculptures, decorative panels, and functional objects using hand tools like knives, chisels, and gouges. Unlike additive processes such as clay modeling, carving removes material to reveal the desired shape hidden within the wood block. This ancient craft produces everything from intricate figurines and relief panels to practical items like wooden spoons and decorative boxes.
Choosing the right wood makes a dramatic difference in your carving experience. Basswood is widely recommended for beginners because its soft texture and fine, consistent grain allow tools to move smoothly without catching or splitting. Harder woods like oak or walnut create beautiful results but require more force and sharper tools, making them better suited for intermediate carvers. The wood’s grain direction also matters significantly, as carving against the grain causes tearout and rough surfaces that ruin your work.
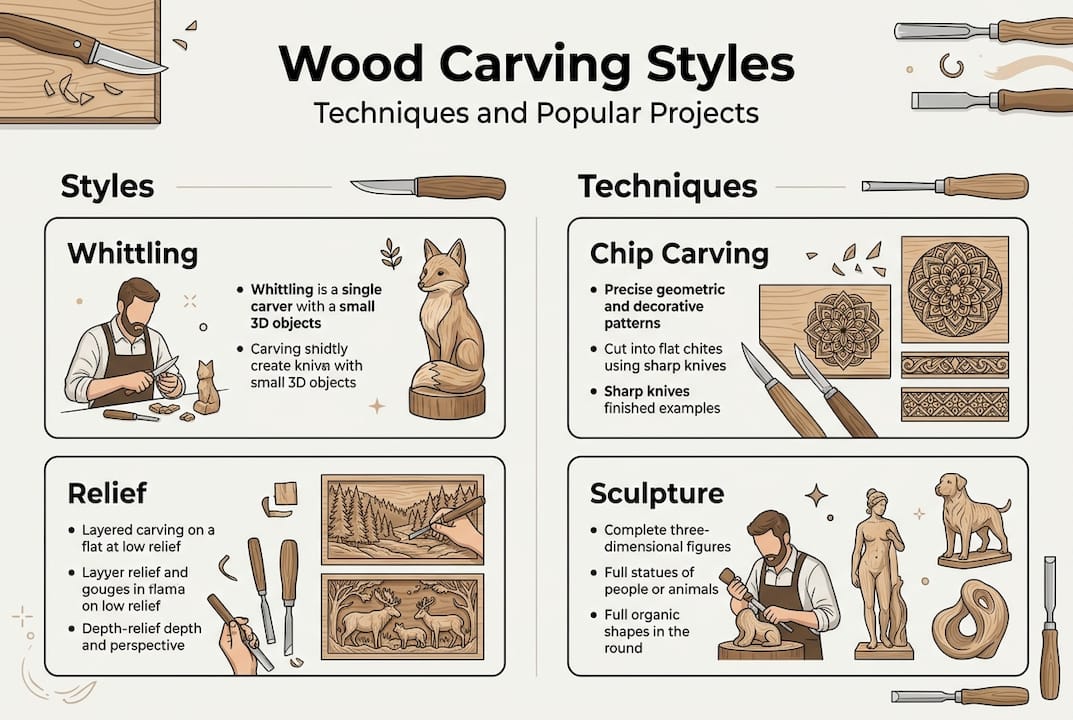
Wood carving encompasses several distinct styles, each suited to different projects and skill levels. Whittling involves using a simple knife to create small shapes and figures, making it the perfect starting point for absolute beginners. Relief carving removes wood from a flat panel to create designs that stand out from the background, ideal for decorative wall art and signs. Carving in the round produces fully three-dimensional objects like animals or human figures, requiring more advanced spatial visualization and technique.
The basic process follows clear steps from concept to finished piece. First, sharpen your tools to razor keenness for safety and precision. Select appropriate wood for your project, sketch your design directly on the wood surface, then rough out the general shape by removing large amounts of material. Refine details gradually with smaller cuts, sand the surface smooth, and apply a protective finish like oil or wax to enhance the wood’s natural beauty and protect your work.
Common beginner projects include:
- Simple geometric shapes and abstract designs
- Decorative spoons and kitchen utensils
- Small animal figurines and nature subjects
- Relief carved name signs and wall plaques
- Holiday ornaments and gift items
Understanding these fundamentals helps you approach woodworking as a beginner with realistic expectations and clear goals. The craft rewards patience and practice, with each project building skills that transfer to more ambitious work. Starting with well-designed wood projects and following proven woodworking tips for beginners accelerates your learning curve significantly.
Having defined wood carving’s essence and materials, next we’ll identify essential tools and safety practices to get started.
Essential tools and best practices for beginner carvers
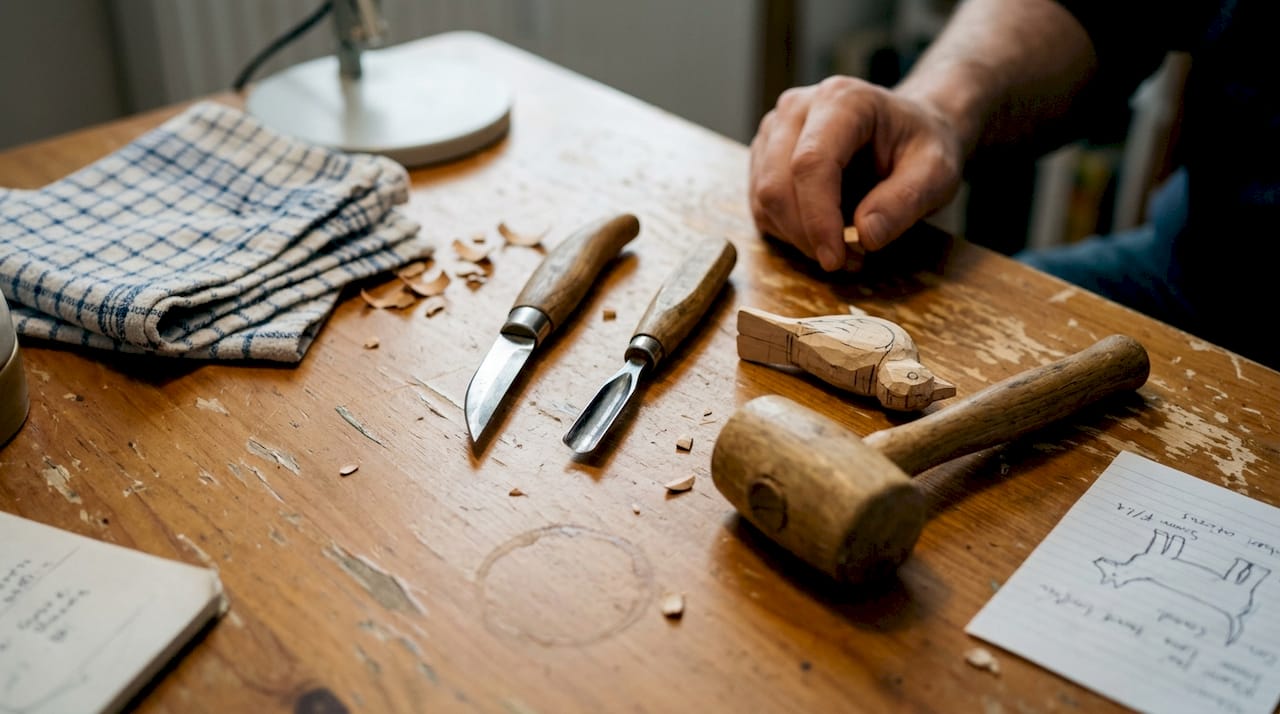
Your carving toolkit doesn’t need to be extensive or expensive to produce quality results. Essential tools include carving knives, flat chisels with minimal curve, shallow gouges for smooth hollows, V-tools for crisp lines, deep gouges for removing material quickly, and palm tools for detail work. Each tool serves a specific purpose, and understanding their functions helps you choose cuts that match your design intent. A basic starter set of five to seven tools covers most beginner projects without overwhelming you with options.
Tool sharpness directly impacts both safety and results in ways that surprise new carvers. Dull tools require excessive force that leads to slips and injuries, while sharp tools glide through wood with light pressure and precise control. Regular sharpening using leather strops and sharpening stones keeps edges keen throughout your carving session. Stropping takes just seconds and should happen every few minutes during active carving, while stones restore severely dulled edges or repair minor damage to the cutting surface.
Safety practices protect you from the most common carving injuries. Always carve with the grain to avoid tearout that can cause tools to skip unpredictably across the surface. Secure your workpiece firmly using a bench vise, clamp, or carving glove that holds the wood steady in your non-dominant hand. Cut away from your body so any slip moves the blade into empty space rather than toward your hands or legs. These simple habits become automatic with practice and dramatically reduce accident risk.
Protective gear adds another layer of safety without restricting your movement or control. Carving gloves made from cut-resistant materials protect your holding hand from accidental slips while maintaining the flexibility needed for detailed work. A leather thumb guard shields the most vulnerable digit during push cuts. Safety glasses prevent wood chips from reaching your eyes during aggressive material removal, though they’re less critical for gentle detail work on small pieces.
Maintaining your woodworking tools extends their lifespan and performance:
- Store tools in a dry location to prevent rust
- Apply a light oil coating to metal surfaces between uses
- Check handles regularly for cracks or looseness
- Replace or repair damaged tools before they fail during use
- Keep tools organized so edges don’t contact each other
Pro Tip: Test sharpness by gently slicing a piece of paper held vertically. A truly sharp tool cuts cleanly without tearing or pushing the paper away. This quick check takes seconds and prevents frustration from working with inadequate edges.
Building good habits from your first project sets the foundation for years of safe, enjoyable carving. Following proven beginner woodworking tips and developing essential woodworking skills creates confidence that lets you focus on creativity rather than worrying about technique. Understanding common wood carving chisels and their specific applications helps you select the right tool for each cut, improving both efficiency and results.
With tools and safety in mind, we can now dive into carving techniques and how to practice progressing your skills.
Mastering wood carving techniques and progression
Learning wood carving follows a natural progression that builds skills systematically. For beginners to intermediates, prioritize basswood selection, maintaining sharp tools, and developing grain awareness before attempting complex projects. Start with whittling to master basic knife control and wood behavior, then progress to relief carving that introduces chisel techniques, and finally advance to carving in the round that requires three-dimensional visualization and planning.
Follow this numbered progression for systematic skill development:
- Begin with simple whittling projects like basic geometric shapes or stylized animals that require only knife work and teach fundamental grain reading.
- Practice stop cuts and chip carving on flat panels to develop chisel control and understand how different tools interact with wood fibers.
- Attempt low relief projects like decorative plaques that introduce depth perception and background removal techniques.
- Create small three-dimensional figures that require working from multiple angles and maintaining proportions across all views.
- Tackle increasingly complex designs that combine multiple techniques and challenge your problem-solving abilities.
Common problems plague beginners who haven’t yet internalized grain direction and tool maintenance principles. Tearout occurs when you carve against the grain, causing wood fibers to rip out in ugly chunks rather than shaving away cleanly. Dull tools compound this issue by crushing fibers instead of slicing them, creating fuzzy surfaces that resist finishing. Both problems disappear when you develop the habit of reading grain direction before each cut and sharpening tools at the first sign of increased resistance.
| Carving Style | Difficulty Level | Typical Projects | Tools Required |
|---|---|---|---|
| Whittling | Beginner | Spoons, simple figures, ornaments | Carving knife, stropping supplies |
| Relief carving | Intermediate | Wall plaques, decorative panels, signs | Chisels, gouges, V-tool, mallet |
| Round carving | Advanced beginner | Figurines, sculptures, 3D animals | Full chisel set, rasps, files |
Time investment varies based on practice frequency and natural aptitude, but empirical benchmarks provide guidance. Beginners master whittling fundamentals in two to four weeks of regular practice, completing their first simple project in two to four hours of focused work. Basic techniques across all carving styles typically require three to six months to internalize. Simple round carving projects demand 10 to 20 hours from layout through finishing, though this time decreases significantly as your efficiency improves.
Pro Tip: Start every new technique with the simplest possible design that demonstrates the skill you’re learning. A basic relief carved flower teaches background removal and depth control far more effectively than an ambitious landscape scene that overwhelms you with complexity. Master the fundamental motion, then add artistic flourishes.
Tracking your progress through completed projects builds motivation and reveals improvement that feels invisible during daily practice. Photograph each finished piece from multiple angles, noting what techniques you learned and what challenges you overcame. This visual record shows dramatic growth over months and years, encouraging you to tackle projects that once seemed impossibly difficult.
Applying these techniques to beginner woodworking projects creates tangible results that reinforce your learning. Following a structured woodworking project workflow prevents common mistakes and keeps you moving forward even when challenges arise. Exploring relief carving techniques for beginners opens creative possibilities that transform flat wood into dimensional art.
After understanding techniques and progression, let’s see how wood carving fits into personal projects, especially for home décor and gifts.
Applying wood carving skills to practical projects and décor
Wood carving transforms functional objects and living spaces through personalized artistic touches that mass-produced items cannot replicate. Chip and relief carving suit panels and signs, while whittling creates spoons and ornaments, and round carving produces figurines and sculptural elements. Each style matches specific project types, letting you choose techniques that align with your current skill level and desired outcome.
Decorative wall panels carved with nature scenes, geometric patterns, or family names add character to any room while showcasing your developing skills. These projects work well as gifts because recipients appreciate the time and thought invested in creating something unique for their space. Kitchen utensils like wooden spoons, spreaders, and honey dippers combine beauty with utility, making them popular items for craft fairs and personal use. Small figurines and ornaments serve as thoughtful presents for holidays and special occasions, with each piece carrying more meaning than store-bought alternatives.
Adapting learned techniques into personalized art accelerates your creative growth beyond simply following patterns. Once you understand how tools interact with wood and how grain direction affects cuts, you can modify existing designs or create entirely original work that reflects your aesthetic preferences. This creative freedom represents the true reward of mastering fundamentals, as technical skills become invisible and artistic vision takes center stage.
Beginner-friendly project ideas to build your portfolio:
- Letter openers with carved handles featuring simple relief patterns
- Coasters with chip carved geometric designs
- Small boxes with carved lids depicting natural elements
- Decorative bookends shaped like animals or abstract forms
- Picture frames with carved corner details and border patterns
Each completed project teaches lessons that transfer to future work, building a knowledge base that makes subsequent projects easier and more enjoyable. The satisfaction of displaying handcrafted items in your home or giving them to appreciative friends creates motivation that sustains your practice through inevitable frustrations and learning plateaus. Wood carving offers a tangible connection to traditional craftsmanship while allowing complete creative expression within your personal style.
Integrating carving into broader home decor woodworking projects expands your creative possibilities significantly. Combining carving with furniture making, joinery, and finishing techniques produces sophisticated pieces that showcase multiple skills. Exploring diverse woodworking project ideas sparks inspiration and reveals how carving enhances otherwise plain wooden objects. Following sound wood project design principles ensures your carved elements integrate harmoniously with overall proportions and aesthetics.
Having explored project ideas, we’ll finish with resources that can help you advance your carving skills efficiently.
Explore expert woodworking plans to advance your skills
Building confidence in wood carving accelerates when you work from detailed plans that eliminate guesswork and prevent costly mistakes. Free woodworking plans provide step-by-step guidance for projects at every skill level, helping you focus on technique rather than design uncertainty. Structured plans show exactly which tools to use for each cut, how to approach grain direction challenges, and what finishing methods produce professional results.

Access to quality plans transforms your learning experience by compressing years of trial and error into focused practice sessions. Woodworking tips for beginners integrated throughout project instructions teach principles that apply across all your future work. Following proven wood project design guidance helps you understand why certain approaches work better than others, building intuition that eventually lets you modify plans or create original designs with confidence.
Frequently asked questions
What is the best wood for beginners to carve?
Basswood is best for beginners because its soft texture and even grain make carving easier and safer. The wood’s forgiving nature helps you practice techniques without difficult splits or tearout that discourage new carvers. Its light color also reveals details clearly, letting you see exactly how your cuts affect the final appearance.
How long does it take to learn basic wood carving?
Initial whittling skills develop in two to four weeks with regular practice, and you can complete your first simple project in two to four hours of focused work. Mastering fundamental techniques across different carving styles typically requires three to six months of consistent practice. Your learning speed depends on practice frequency, quality instruction, and willingness to learn from mistakes.
What safety precautions should I take when carving wood?
Always secure the wood firmly before making any cuts to prevent it from shifting unexpectedly. Carve with the grain to avoid tearout and reduce the risk of tools catching and slipping. Cut away from your body so any slip moves the blade into empty space rather than toward your hands. Use protective gloves designed for carving to shield your holding hand from accidental contact with sharp edges.
Can I create useful items while learning to carve?
Absolutely, many beginner projects produce functional items like wooden spoons, spreaders, and simple boxes that you can use daily. These practical projects make learning more rewarding because you create useful objects rather than just practice pieces. Kitchen utensils especially work well as early projects because their simple shapes teach fundamental techniques while producing items you’ll actually use.
Do I need expensive tools to start wood carving?
No, a basic starter set of five to seven quality tools costs far less than elaborate power tool setups while covering most beginner projects. Investing in sharp, well-made hand tools matters more than quantity, as a few excellent tools outperform dozens of mediocre ones. You can expand your collection gradually as specific projects require specialized tools, keeping initial costs manageable while you develop skills.
Recommended
- What is woodworking: a beginner’s guide to the craft
- Woodworking Tips for Beginners: Build Skills Step-by-Step
- What Is Wood Turning? Transforming Ideas Into Art
- Building Beginner Woodworking Projects: 60% Avoid Mistakes

“DIY woodworking enthusiast who started with zero experience and a YouTube tutorial.
I build simple, practical projects for my home and share free plans
so other beginners can skip the guesswork.If I can build it, you can too.”