
TL;DR:
- Modern, beginner-friendly CAD tools can improve accuracy, reduce waste, and boost creativity in woodworking.
- Integrating CAD into workflow helps catch errors early and simplifies design modifications.
- Free or affordable CAD software options suit hobbyists, enhancing project planning and visualization.
Most hobbyist woodworkers assume CAD (Computer-Aided Design) belongs in engineering firms or furniture factories, not a home workshop. That assumption costs you time, money, and perfectly good lumber. The truth is that modern CAD tools are more accessible than ever, with free options that run on a basic laptop and interfaces designed for beginners. Whether you’re building a coffee table or a custom bookshelf, CAD can help you plan smarter, cut less waste, and finish with confidence. This article walks you through the basics, the real benefits, how to pick the right tools, and how to weave CAD into your actual project workflow.
Table of Contents
- Understanding CAD and its basics for woodworking
- Benefits of using CAD in DIY woodworking projects
- Choosing the right CAD tools for home woodworking
- Integrating CAD with woodworking: practical examples and workflow
- Why most DIY woodworkers underestimate the power of CAD
- Ready to bring CAD precision to your next woodworking project?
- Frequently asked questions
Key Takeaways
| Point | Details |
|---|---|
| CAD unlocks precision | CAD tools help hobbyists achieve greater accuracy and confidence in woodworking projects. |
| Accessible for beginners | Many free and affordable CAD programs cater to DIY woodworkers and are easy to learn. |
| Reduces planning errors | Designing with CAD allows virtual testing and correction before physical construction. |
| Streamlines workflow | Integrating CAD into project planning improves efficiency from design to assembly. |
| Supports creative design | CAD empowers DIYers to experiment and visualize custom woodworking ideas easily. |
Understanding CAD and its basics for woodworking
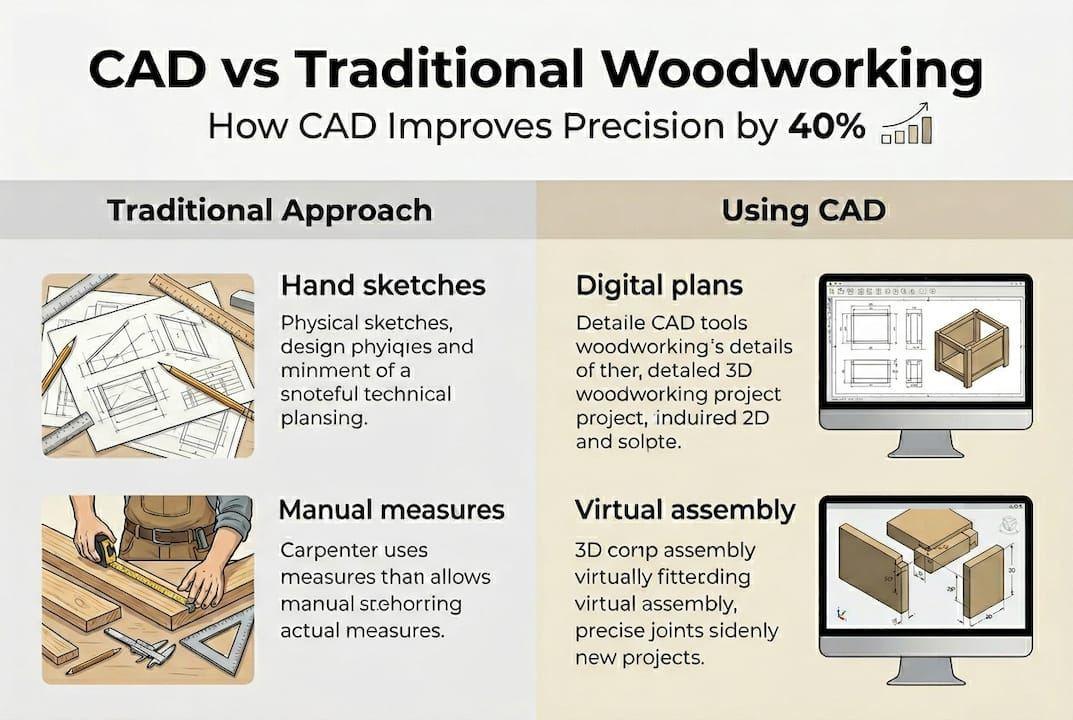
CAD stands for Computer-Aided Design. At its core, it’s software that lets you draw, model, and plan objects digitally before you ever touch a piece of wood. For woodworkers, that means you can map out every joint, board dimension, and assembly step on your screen first.
CAD software helps woodworkers visualize and plan complex projects, catching problems before they become expensive mistakes at the workbench. That’s the core value proposition for anyone building furniture or home decor at home.
Here’s what makes CAD particularly useful for woodworking:
- 2D drafting: Draw flat, scaled plans just like a traditional blueprint, but with snap-to-grid precision and easy editing.
- 3D modeling: Build a virtual version of your project and rotate it to spot issues from every angle.
- Precise measurements: Set exact dimensions down to fractions of an inch, eliminating the guesswork that leads to mismatched joints.
- Material estimation: Many programs calculate the board feet you need automatically, which saves money at the lumber yard.
- Visualization: See how wood grain, color, and finish will look before committing to a design.
For beginners, the learning curve can feel steep at first. But the payoff is significant. Once you understand how to set up a basic 2D floor plan or a simple 3D box, the logic transfers to every project you build after that. If you’re still developing your woodworking skills for beginners, adding even a basic CAD step to your planning process will accelerate your progress noticeably.
Pro Tip: Start with free programs like SketchUp Free or LibreCAD before spending money on premium software. Both have large online communities with tutorials specifically for woodworkers, so you’re never learning alone.
The biggest mental shift is treating CAD as a planning tool, not a replacement for your hands-on skills. Think of it as a digital sketchpad that never runs out of eraser. You can try ten different shelf configurations in an hour without wasting a single board.
Benefits of using CAD in DIY woodworking projects
Once you understand what CAD is, the next question is simple: why bother? Here’s a direct comparison between traditional planning and CAD-assisted planning.
| Factor | Traditional planning | CAD-assisted planning |
|---|---|---|
| Measurement accuracy | Depends on hand-drawn sketches | Exact to fractions of an inch |
| Error detection | Found during cutting | Found during virtual assembly |
| Design changes | Requires redrawing | Adjusted in seconds |
| Material estimation | Manual calculation | Auto-calculated by software |
| Visualization | 2D sketches only | Full 3D model with rotation |
The difference is not subtle. CAD minimizes costly mistakes and maximizes material use by allowing virtual prototyping, which means you test your design digitally before a single cut is made. Studies in manufacturing contexts show error rates drop significantly when virtual prototyping replaces paper-only planning.
Here are the tangible benefits you’ll notice right away:
- Fewer wasted boards: You catch dimension errors before they happen.
- Faster project planning: Modifying a digital plan takes seconds versus redrawing by hand.
- Better creative exploration: Try bold design choices without fear of wasting materials.
- Cleaner cut lists: Export a precise cut list directly from your model.
- Easier communication: Share your design with a helper or a lumber yard without confusion.
Good woodworking project planning is the single biggest factor separating successful builds from frustrating ones. CAD makes that planning stage faster and more reliable. When you combine a solid plan with a clear project workflow for woodworkers, the entire build becomes more predictable and enjoyable.
Creative freedom is another underrated benefit. Because changes cost nothing in CAD, you’re more willing to experiment. Want to add a drawer? Try it virtually. Not sure if a tapered leg looks right? Render it in 3D and decide before you make a single cut.
Choosing the right CAD tools for home woodworking
Not all CAD software is built the same, and the best choice depends on your budget, skill level, and what you’re building. Here’s a quick overview of popular options.
| Software | Price | Best for | Learning curve |
|---|---|---|---|
| SketchUp Free | Free | Beginners, 3D modeling | Low |
| LibreCAD | Free | 2D drafting | Low to medium |
| Fusion 360 | Free for hobbyists | Advanced 3D and CNC prep | Medium to high |
| AutoCAD LT | Paid (subscription) | Professional 2D drafting | High |
| Cabinet Vision | Paid | Cabinet and furniture pros | High |
Accessible CAD software options exist for hobbyists at every level, from completely free tools to affordable subscriptions with user-friendly interfaces. You don’t need to spend hundreds of dollars to get started.
On the hardware side, most entry-level CAD programs run fine on any modern laptop or desktop made in the last five years. For more advanced 3D rendering, a dedicated graphics card helps, but it’s not required to start.
Here’s how to choose the right tool for your situation:
- Define your project type. Simple furniture plans work great in 2D. Complex joinery or CNC-ready designs benefit from 3D software.
- Set a budget. Start free. Only upgrade when you’ve outgrown the free version.
- Check the learning resources. A program with an active YouTube community is worth more than a feature-rich tool with no tutorials.
- Test before committing. Most paid programs offer a free trial period.
- Consider your workflow. If you plan to use a CNC router, pick software that exports compatible file formats.
Pro Tip: Try at least two different programs before settling on one. What feels intuitive varies from person to person, and spending one weekend with two free tools can save you months of frustration later.
Once you pick your software, pair it with a woodworking step-by-step guide to understand how your digital plans translate to real workshop actions. And if you want to go deeper into the design side, resources on designing wood projects can help you think through proportions, joinery, and aesthetics before you open your CAD program.
Integrating CAD with woodworking: practical examples and workflow
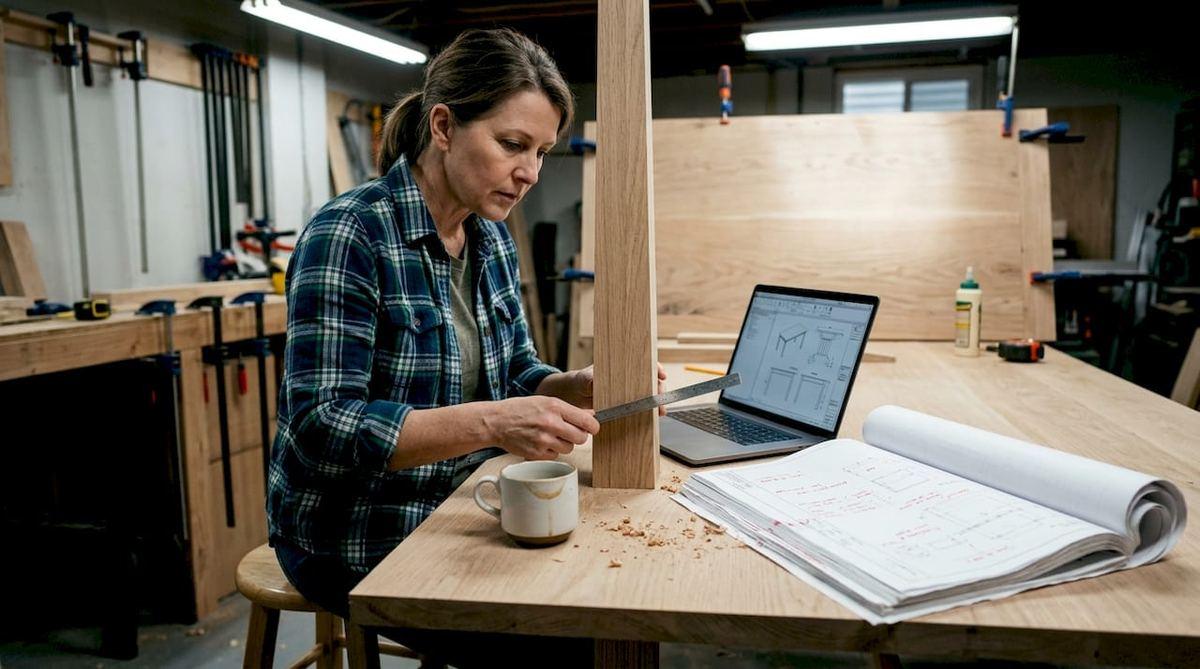
Knowing which software to use is only half the battle. The real skill is building a workflow that connects your digital design to your physical build. CAD can streamline the entire woodworking workflow, from initial design to execution, but only if you set it up correctly from the start.
Here’s a practical workflow you can follow for almost any project:
- Sketch your idea on paper first. A rough hand drawing helps you think through proportions before you open the software.
- Import or recreate the sketch in CAD. Use your measurements to build a scaled 2D plan.
- Upgrade to 3D if needed. For furniture with multiple parts, build a 3D model to check how pieces fit together.
- Run a virtual assembly. Move parts together digitally to spot gaps, misalignments, or proportion issues.
- Generate your cut list. Export a precise list of every piece you need, with exact dimensions.
- Print or export your plans. Take them to the workshop and build with confidence.
“The biggest time-saver in CAD isn’t the drawing itself. It’s the moment you catch a measurement error in the model that would have ruined a board at the saw.” This insight from experienced woodworkers captures exactly why the virtual assembly step is non-negotiable.
Here are some tips for smooth integration:
- Keep your CAD file and your physical cut list side by side during the build.
- Update your CAD model if you make changes on the fly, so your plans stay accurate.
- Use layers in your CAD program to separate different assemblies, like a tabletop layer versus a leg layer.
- Save versions of your design so you can go back if a change doesn’t work out.
Consider a real example: a hobbyist building a farmhouse dining table. Using CAD, they modeled the entire table, discovered the apron was too low for comfortable seating, adjusted the leg height by two inches in the software, and regenerated the cut list in minutes. Without CAD, that error would have appeared after cutting. The result was a cleaner woodworking workflow success story with zero wasted lumber.
CAD also opens doors to more ambitious projects. When you can visualize and plan a custom furniture guide level build digitally, you’re more likely to attempt it. And staying current with woodworking trends 2026 means knowing that CAD integration is increasingly standard even for serious hobbyists.
Why most DIY woodworkers underestimate the power of CAD
Here’s the uncomfortable truth: most hobbyists skip CAD not because it’s too hard, but because they assume they’re not the type of person who uses it. That’s a story we tell ourselves, and it costs us real time and real money.
CAD isn’t about being technical. It’s about being intentional. Every time you measure twice and cut once, you’re already thinking like a CAD user. The software just makes that habit faster and more reliable.
The woodworkers who adopt CAD early don’t become less creative. They become more creative, because they stop being afraid to try bold ideas. When a design change costs you nothing but a few mouse clicks, you experiment more. You discover proportions and details you’d never attempt if every change meant recutting a board.
One hobbyist we’ve seen go through this shift started with a simple CAD shelf plan. Within three projects, they were designing built-in cabinetry they never thought possible. The tool didn’t change their skill level overnight, but it changed what they were willing to try. That’s the real power. Boosting DIY project success often comes down to removing the fear of failure, and CAD does exactly that.
Ready to bring CAD precision to your next woodworking project?
If this article has you thinking about your next build differently, that’s exactly the point. CAD is a tool that rewards the curious, and the best way to learn it is to start with a real project you actually care about.
At realwoodworkplans.com, you’ll find free and premium woodworking plans that pair perfectly with CAD-based design workflows. Whether you’re building your first shelf or tackling a full dining set, our plans give you the dimensions and structure you need to model confidently in your CAD software. Explore our DIY project success resources and woodworking skills for beginners guides to build your knowledge alongside your projects.
Frequently asked questions
Do I need expensive software to start using CAD for woodworking?
No. Free CAD options like SketchUp Free and LibreCAD are fully capable for most hobbyist woodworking projects and require no financial commitment to get started.
Can CAD help me design custom furniture for my home?
Absolutely. CAD enables digital design for furniture and home decor, letting you adjust dimensions, test proportions, and visualize finishes before cutting a single board.
What hardware do I need to run basic CAD tools for woodworking?
Most CAD programs run on any modern computer made in the last five years; only advanced 3D rendering or CNC-prep software requires higher-end specs like a dedicated graphics card.
How does CAD reduce errors in woodworking?
CAD minimizes costly mistakes by letting you run a virtual assembly before any cutting begins, so measurement errors and fit problems are caught on screen, not at the workbench.
Can CAD be used for both small and large woodworking projects?
Yes. CAD supports projects ranging from small decorative boxes to large, multi-component furniture builds, making it a flexible tool regardless of project scale.
Recommended
- Woodworking tools checklist for DIY projects in 2026
- 5 Essential Woodworking Measuring Tools for DIY Success
- Role of Jigs in Woodworking: Precision Guide 2026
- Master Your Woodworking Project Workflow for DIY Success

“DIY woodworking enthusiast who started with zero experience and a YouTube tutorial.
I build simple, practical projects for my home and share free plans
so other beginners can skip the guesswork.If I can build it, you can too.”