
Creating beautiful custom furniture for your home feels rewarding, but many DIY enthusiasts struggle with planning and executing woodworking projects that match their vision. Without clear guidance, you risk wasting materials, time, and confidence on pieces that don’t meet your expectations. This comprehensive guide walks you through detailed woodworking plans, essential preparation steps, execution techniques, and finishing methods that transform raw lumber into stunning home decor. You’ll discover practical advice tailored to hobbyist woodworkers ready to elevate their craft and build furniture that reflects personal style while developing skills that last a lifetime.
Table of Contents
- Key takeaways
- Essential preparations for home decor woodworking projects
- Step-by-step guide to crafting custom home decor pieces
- Common mistakes and troubleshooting in home decor woodworking
- Finishing techniques and verifying your custom furniture quality
- Explore detailed woodworking plans to boost your home decor skill
- FAQ
Key Takeaways
| Point | Details |
|---|---|
| Plan before starting | A thorough plan helps you anticipate materials, tools, costs, and potential challenges before you cut. |
| Choose the right materials | Selecting appropriate materials ensures durability and visual appeal in the finished piece. |
| Follow a stepwise plan | Following a stepwise plan keeps you organized and reduces mistakes during assembly. |
| Finish and verify results | Finishing and testing the piece confirms quality and protects the work for years. |
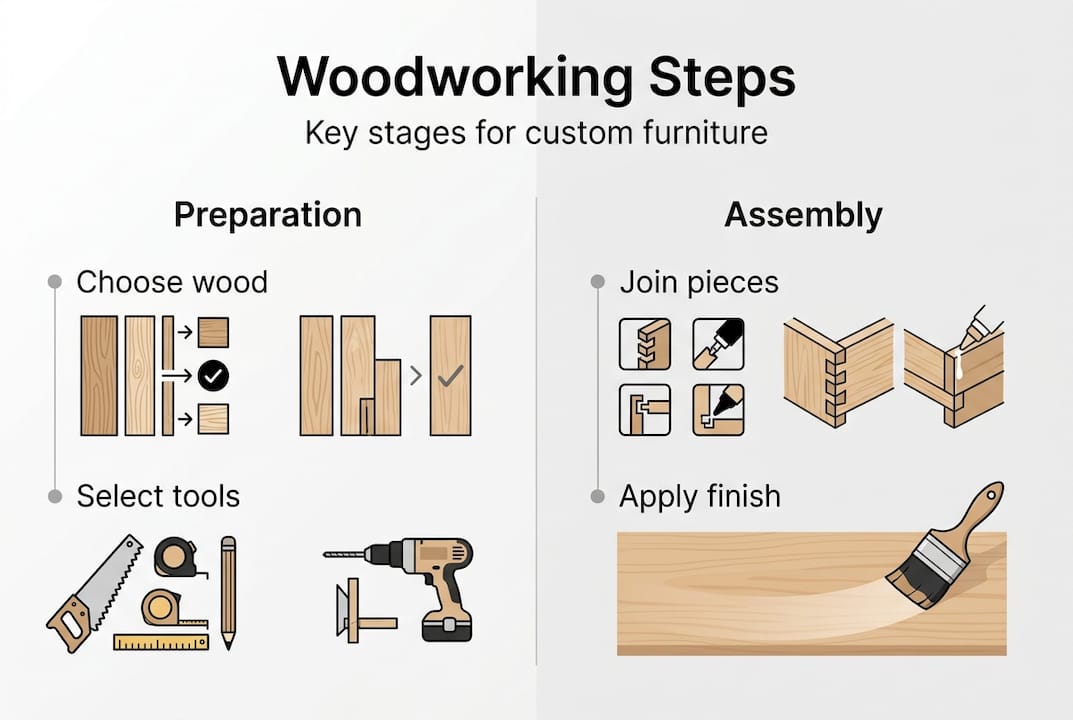
Essential preparations for home decor woodworking projects
Successful woodworking starts long before you make the first cut. Proper preparation ensures your project stays on track, within budget, and produces results you’ll proudly display in your home.
Selecting the right wood makes all the difference in how your furniture looks and performs over time. Furniture-grade hardwoods like oak, maple, walnut, and cherry offer superior durability and take finishes beautifully, making them ideal for pieces you’ll use daily. Pine and poplar work well for painted projects or practice pieces where cost matters more than grain appearance. Understanding wood types and their characteristics helps you match material properties to project requirements.
Your tool collection doesn’t need to be extensive, but certain essentials make every project easier. A quality table saw or circular saw handles most cutting tasks, while a drill and driver set manages joinery and assembly. Sanders, clamps, measuring tools, and safety equipment round out the basics. Following a comprehensive woodworking tools checklist ensures you have what you need without overbuying specialty items you’ll rarely use.
Pro Tip: Invest in versatile tools that serve multiple purposes rather than single-task gadgets. A quality router with various bits handles edge profiles, joinery, and decorative details across dozens of projects.
Wood finishes protect your work while enhancing natural beauty. Each finish type serves specific purposes:
| Finish type | Best for | Durability | Application ease |
|---|---|---|---|
| Oil-based polyurethane | High-traffic surfaces | Excellent | Moderate |
| Water-based polyurethane | Indoor furniture | Very good | Easy |
| Tung oil | Natural look pieces | Good | Very easy |
| Danish oil | Walnut and exotic woods | Good | Very easy |
| Paste wax | Low-use decorative items | Fair | Easy |
| Lacquer | Professional finish | Excellent | Difficult |
Choosing plans that match your skill level prevents frustration and builds competence progressively. Beginner plans feature straightforward joinery, minimal tool requirements, and forgiving designs. Intermediate projects introduce techniques like mortise and tenon joints or curved components. Advanced plans challenge you with complex assemblies and precision requirements. Browse home decor woodworking projects organized by difficulty to find options that stretch your abilities without overwhelming you.
Your workspace setup impacts safety and efficiency dramatically. Clear a dedicated area with adequate lighting, ventilation, and room to maneuver materials safely. Organize tools within easy reach and establish consistent locations for measuring, cutting, and assembly zones. Keep safety equipment like eye protection, hearing protection, and dust masks accessible at all times.
Step-by-step guide to crafting custom home decor pieces
With preparation complete, you’re ready to transform plans and materials into finished furniture. Following a systematic approach keeps projects organized and produces professional results.
-
Review your plans thoroughly before starting. Identify all required materials, understand each construction step, and visualize how components fit together. Mark critical measurements and note any special techniques you’ll need to practice first.
-
Mill your lumber to rough dimensions, adding extra length for safety and adjustment. Joint one face flat, then plane the opposite face parallel. Joint one edge straight, then rip the final edge parallel on your table saw. This four-step milling process creates square, flat stock that assembles accurately.
-
Cut all components to final dimensions using your cut list. Measure twice and cut once remains excellent advice. Group similar cuts together to maintain consistent saw settings and improve efficiency. Label each piece as you cut it to prevent confusion during assembly.
-
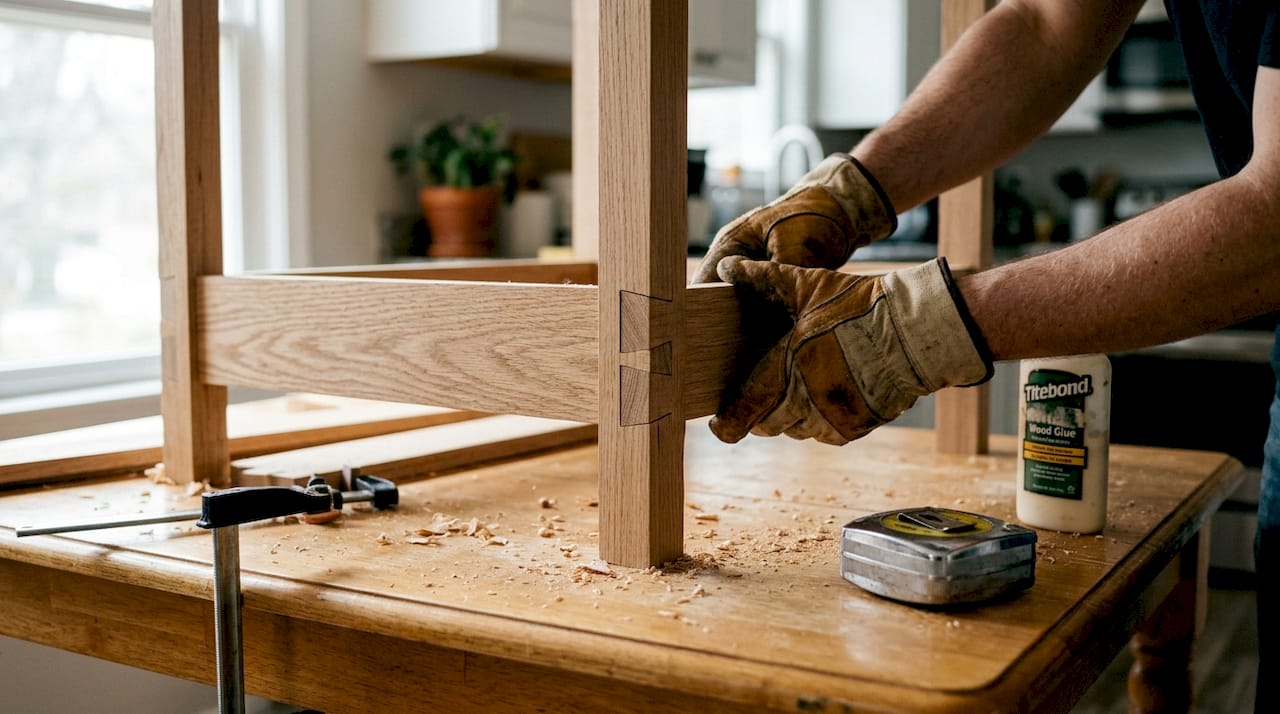
Execute joinery before assembly. Whether you’re cutting dados, drilling pocket holes, or cutting mortises and tenons, complete all joinery work while pieces remain easy to handle. Building custom furniture with proper techniques ensures structural integrity that lasts decades.
-
Perform a dry fit assembly without glue to verify everything aligns properly. This crucial step reveals fit issues while you can still make corrections easily. Check for square using diagonal measurements and adjust as needed.
-
Sand all interior surfaces and edges before final assembly. Once glued together, many areas become impossible to reach with sanders. Progress through grits from 120 to 220 for smooth results.
-
Apply glue and assemble your project, working methodically to prevent glue from setting before you achieve proper alignment. Use adequate clamps but avoid overtightening, which can distort joints or squeeze out too much glue.
-
Allow glue to cure fully before removing clamps or stressing joints. Most wood glues need 24 hours for full strength, though some formulations cure faster.
Pro Tip: Before applying glue, do a complete dry assembly with all clamps in place. This rehearsal identifies missing clamps, awkward clamping angles, and assembly sequence issues while you can still adjust your approach.
Developing essential woodworking skills through practice makes each project easier than the last. Start with simpler constructions and gradually tackle more complex techniques as your confidence grows.
Understanding joinery techniques and their applications elevates your furniture from basic to heirloom quality. Butt joints work for simple projects, pocket screws offer speed and strength for face frames, and traditional mortise and tenon joints provide maximum durability for chairs and tables.
Common mistakes and troubleshooting in home decor woodworking
Even experienced woodworkers encounter problems, but recognizing common issues early prevents minor setbacks from becoming project-ending disasters.
Measurement errors cause more failed projects than any other mistake. Always use the same measuring tool throughout a project to maintain consistency. Mark cut lines clearly with a sharp pencil or marking knife. When measuring for multiple identical pieces, use a stop block rather than measuring each piece individually. Small measurement discrepancies compound quickly, resulting in assemblies that don’t fit square or components that end up different sizes.
Poor joinery technique weakens furniture and leads to premature failure. Loose joints lack holding power, while overly tight joints can split wood during assembly. Practice new joinery methods on scrap wood before cutting your project pieces. Understanding why detailed woodworking plans prevent mistakes helps you follow proven techniques rather than guessing.
Finishing problems often ruin otherwise excellent work:
- Skipping surface preparation leaves scratches and mill marks visible under finish
- Applying finish too thickly causes runs, sags, and extended drying times
- Working in dusty environments embeds particles in wet finish
- Rushing between coats prevents proper adhesion and builds sticky layers
- Using incompatible products causes finish to wrinkle, bubble, or peel
When mistakes happen, assess whether you can salvage the project or need to remake components. Minor gaps often hide with wood filler matched to your stain color. Misaligned joints sometimes respond to careful planing or sanding. Serious structural issues usually require remaking the affected parts.
Patience and attention to detail separate adequate woodworking from exceptional craftsmanship. Take time to set up cuts properly, verify measurements, and allow finishes to cure fully between steps.
Maintaining proper woodworking project workflow keeps you organized and reduces errors caused by rushing or skipping steps. Work methodically through each phase rather than jumping ahead to more exciting tasks.
Learn from every mistake rather than getting discouraged. Each problem you solve builds knowledge that prevents similar issues in future projects. Keep notes about what worked well and what you’d change next time. This reflective practice accelerates skill development more than simply completing projects.
Finishing techniques and verifying your custom furniture quality
Applying finish properly protects your woodworking investment and enhances the natural beauty you’ve worked hard to create. Understanding why finishing wood matters motivates you to invest time in this crucial final phase.
Different finishes offer distinct advantages depending on your project’s intended use and desired appearance:
| Finish characteristic | Oil finishes | Polyurethane | Lacquer | Wax |
|---|---|---|---|---|
| Protection level | Moderate | High | High | Low |
| Ease of application | Very easy | Moderate | Difficult | Easy |
| Repair ease | Excellent | Poor | Moderate | Excellent |
| Build thickness | Thin | Medium to thick | Thin to medium | Very thin |
| Drying time | 8-24 hours | 2-4 hours | 30-60 minutes | Immediate |
Follow these steps for professional finishing results:
-
Sand progressively through grits, removing all scratches from the previous grit before moving finer. Stop at 220 grit for most projects, as finer grits can burnish wood and prevent finish absorption.
-
Remove all sanding dust with a vacuum, followed by a tack cloth. Dust contamination ruins finish appearance and adhesion.
-
Apply stain if desired, following grain direction and wiping off excess before it dries. Test stain color on scrap wood from your project to verify the final appearance.
-
Allow stain to dry completely, typically 8-24 hours depending on temperature and humidity.
-
Apply your chosen topcoat in thin, even layers. Multiple thin coats outperform single thick applications every time.
-
Sand lightly between coats with 320 grit sandpaper to remove dust nibs and improve adhesion. Wipe clean before applying the next coat.
-
Allow final coat to cure fully before using your furniture. Cure times vary by product but typically range from several days to two weeks.
Verify your finished project meets quality standards before considering it complete:
- Check all joints for tightness and strength by applying gentle pressure
- Verify surfaces are smooth with no rough patches or finish defects
- Confirm dimensions match your plans within acceptable tolerances
- Test drawers and doors for smooth operation and proper fit
- Inspect finish coverage for missed spots or thin areas
- Ensure all hardware is properly installed and functions correctly
Maintaining wooden furniture preserves its beauty for generations. Dust regularly with a soft cloth. Clean spills immediately to prevent staining. Avoid placing hot items directly on wood surfaces. Reapply paste wax annually on waxed finishes. Keep furniture away from direct sunlight and heat sources that cause fading and cracking. Selecting durable wood types at the project start reduces long-term maintenance needs.
Understanding how joinery affects furniture strength helps you evaluate whether your completed project will hold up to intended use. Quality joinery combined with proper finishing creates furniture that becomes more beautiful with age.
Explore detailed woodworking plans to boost your home decor skill
Taking your woodworking to the next level becomes much easier when you work from professionally designed plans that eliminate guesswork and provide clear guidance. Rather than struggling through projects by trial and error, detailed plans give you confidence with accurate measurements, proven techniques, and realistic material lists.

Access to quality woodworking plans dramatically improves project success by providing step-by-step instructions, detailed diagrams, and expert tips that help you avoid common mistakes. Whether you’re building your first bookshelf or tackling an ambitious dining table, having a reliable plan saves time, reduces material waste, and produces furniture you’ll be proud to display. Explore both free starter plans and premium options designed for various skill levels. Understanding why professional plans matter transforms how you approach every project.
Browse inspiring home decor woodworking projects to discover your next build and continue developing skills that bring your creative vision to life.
Pro Tip: Combine plan guidance with your own creative touches. Use provided dimensions and joinery techniques as a foundation, then customize details like wood species, finish color, or decorative elements to create truly unique pieces.
FAQ
What type of wood is best for home decor woodworking?
Furniture-grade hardwoods like oak, maple, and cherry deliver excellent durability and beautiful grain patterns that enhance any home. These woods accept stains evenly and develop rich patinas over time. Choosing appropriate wood types based on your project’s requirements and your finishing preferences ensures results that last for decades.
How can I avoid common mistakes when building furniture?
Measure twice and cut once remains the golden rule for accurate woodworking. Follow detailed plans carefully rather than improvising techniques you haven’t mastered yet. Using proven woodworking plans provides tested methods that prevent costly errors. Take your time with each step, verify measurements before cutting, and perform dry assemblies before applying glue.
What finishing technique is best for protecting wooden decor?
Varnish and oil finishes offer excellent protection while enhancing natural wood grain. Polyurethane varnishes provide maximum durability for high-use surfaces like tabletops, while oil finishes create beautiful natural appearances on decorative pieces. Understanding why proper finishing protects wood helps you select appropriate products for each project’s specific needs and use environment.
DIY projects:
DIY Wooden Coffee Table
DIY Shoe Rack
Recommended
- Home Decor Woodworking: 4 Best Projects + 10-Hour Guide
- What is woodworking: a beginner’s guide to the craft
- What is furniture grade wood? A DIY guide for quality
- Woodworking Tips for Beginners: Build Skills Step-by-Step
- Step by step home decorating guide for stylish spaces – Homable
- Bespoke decorative shutters: expert guide for UK homes

“DIY woodworking enthusiast who started with zero experience and a YouTube tutorial.
I build simple, practical projects for my home and share free plans
so other beginners can skip the guesswork.If I can build it, you can too.”